
Jenkins is a popular open-source automation server that can help you build, test, and deploy your software projects. One of the features of Jenkins is that it can execute commands on remote machines via SSH. This can be useful for tasks such as copying files, running scripts, or restarting services.
In this blog post, I will show you how to add or set up an SSH server in Jenkins using the Publish Over SSH plugin. This plugin allows you to configure SSH servers and credentials in Jenkins, and then use them in your build steps or post-build actions.
Prerequisites
Before you begin, you will need the following:
- A Jenkins server with admin access
- A remote machine that you want to connect to via SSH
- The Publish Over SSH plugin installed on your Jenkins server
Step 1: Configure SSH Server and Credentials in Jenkins
The first step is to configure the SSH server and credentials in Jenkins. To do this, follow these steps:
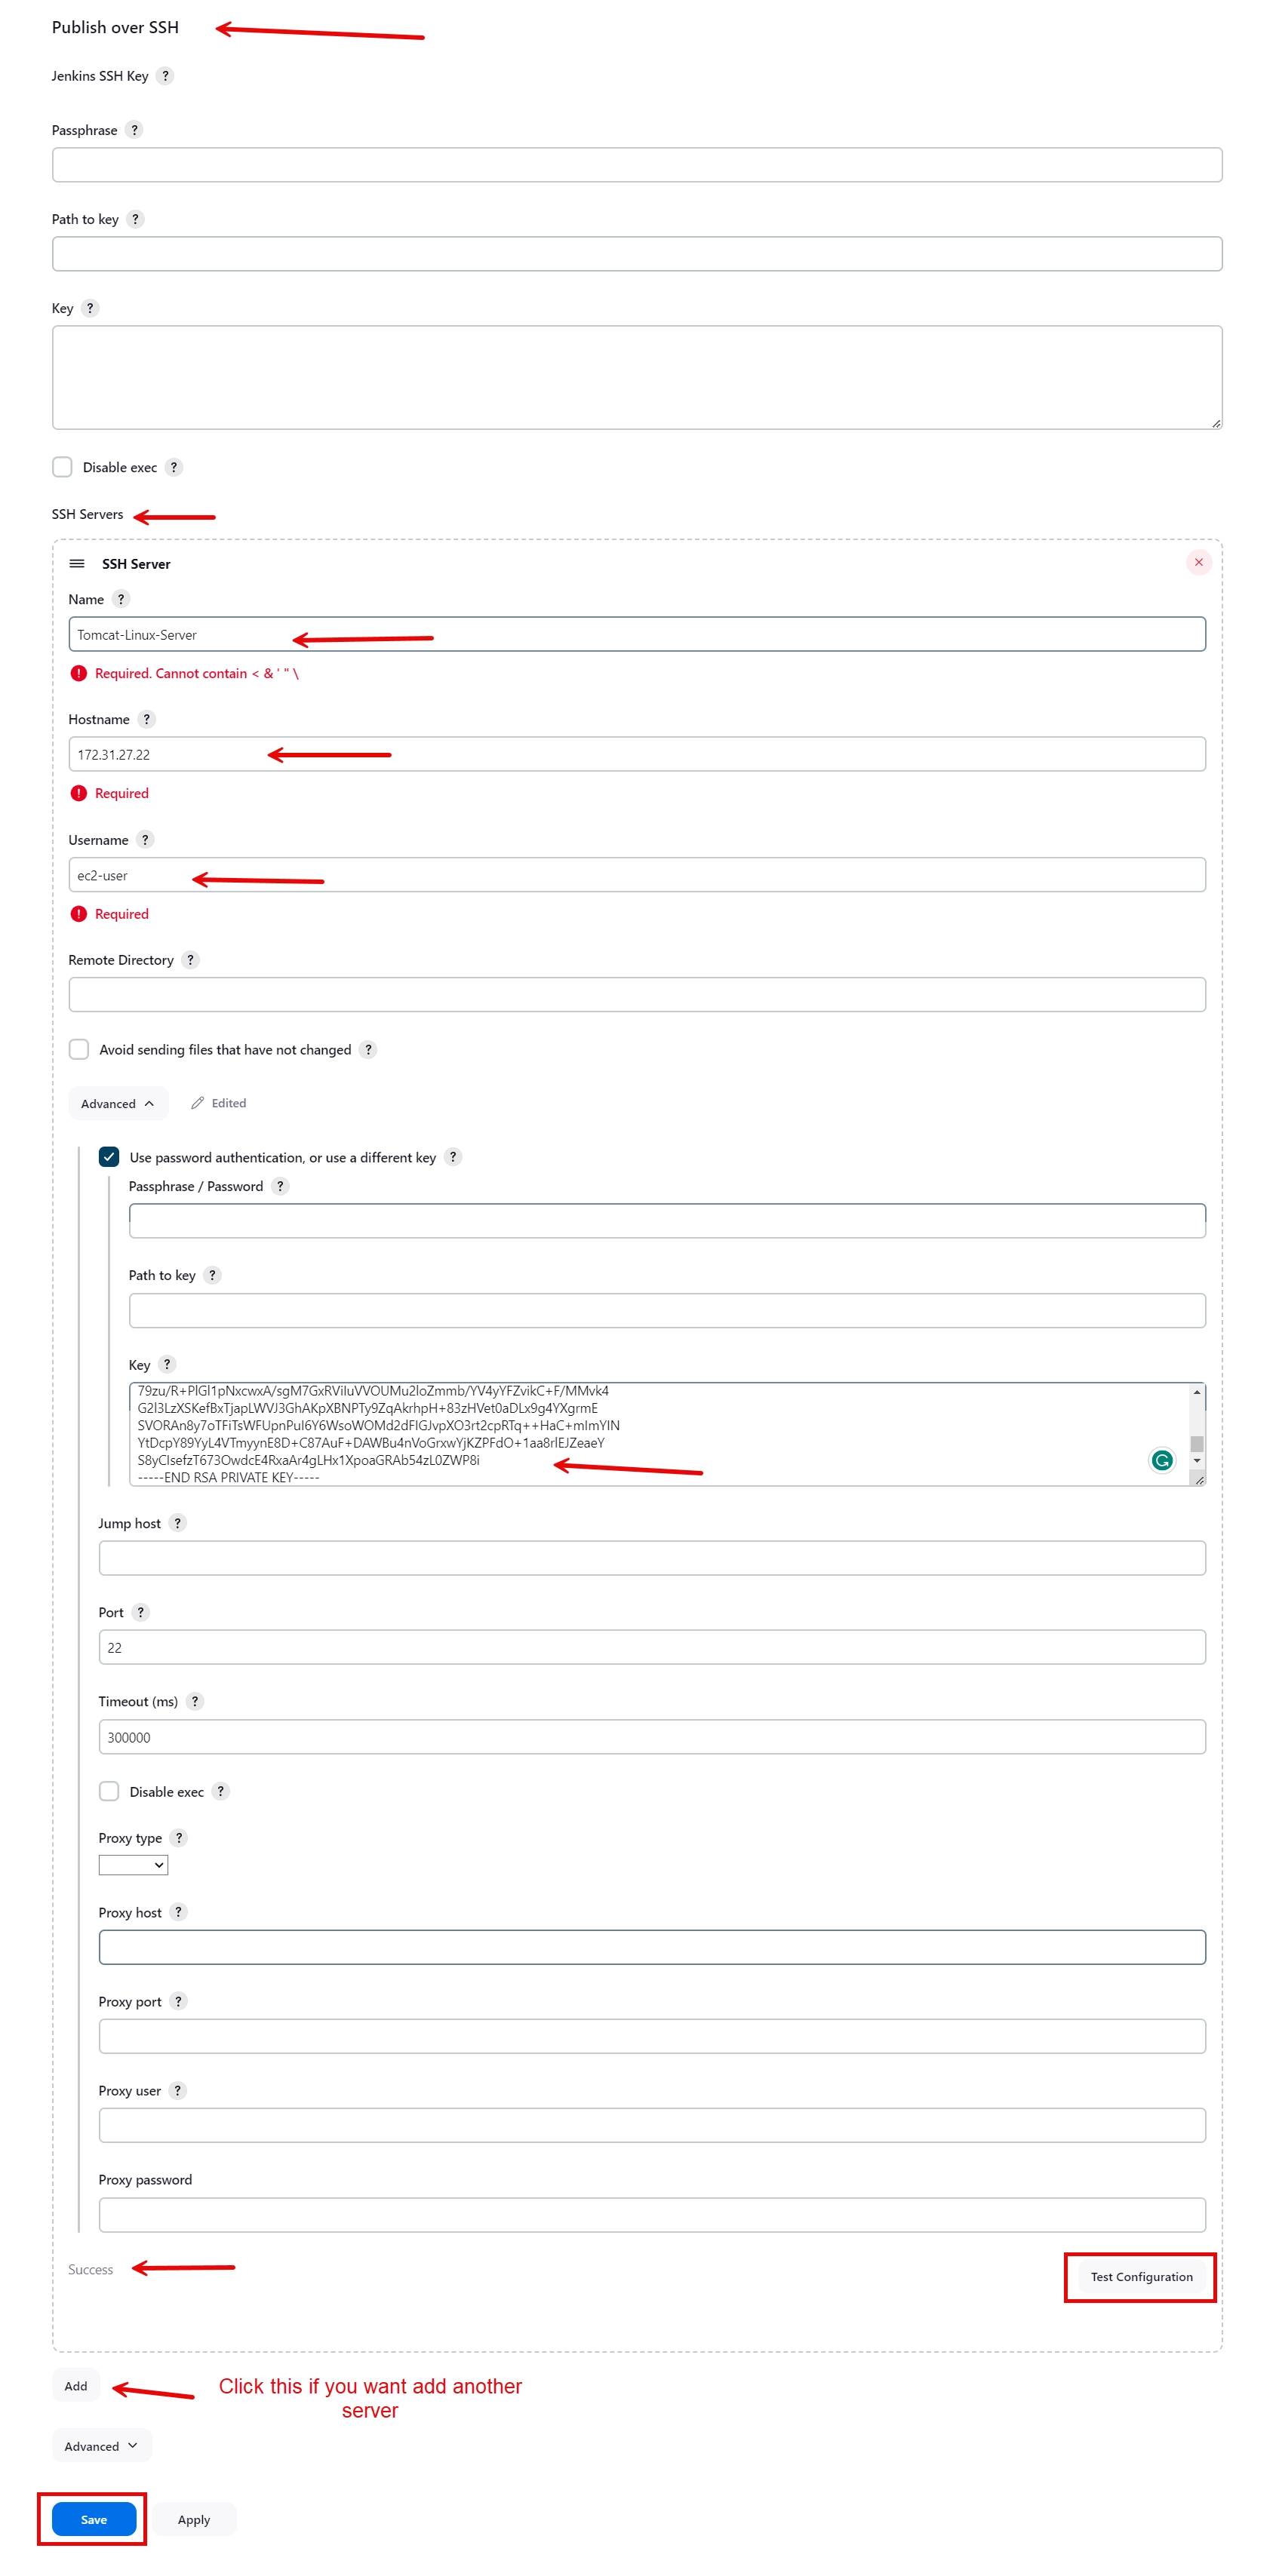
- Go to Manage Jenkins > Configure System and scroll down to the Publish over SSH section.
- Click on the Add button next to SSH Servers to add a new SSH server configuration.
- Enter the following details for your SSH server:
- Name: A unique name for your SSH server
- Hostname: The hostname or IP address of your remote machine
- Username: The username that you use to log in to your remote machine via SSH
- Remote Directory: The default directory where you want to copy files or execute commands on your remote machine
- Use password authentication, or use a different key: Check this option if you want to use password authentication or a custom SSH key for your SSH server
- Password / Passphrase: The password or passphrase for your SSH server
- Key: The private SSH key for your SSH server (optional)
- Disable exec: Check this option if you want to disable the execution of commands on your SSH server
- Click on the Test Configuration button to test your SSH server connection. You should see a message saying Success if everything is configured correctly.
- Click on the Save button to save your SSH server configuration.
Step 2: Use SSH Server in Build Steps or Post-Build Actions
The second step is to use your SSH server in your build steps or post-build actions. To do this, follow these steps:
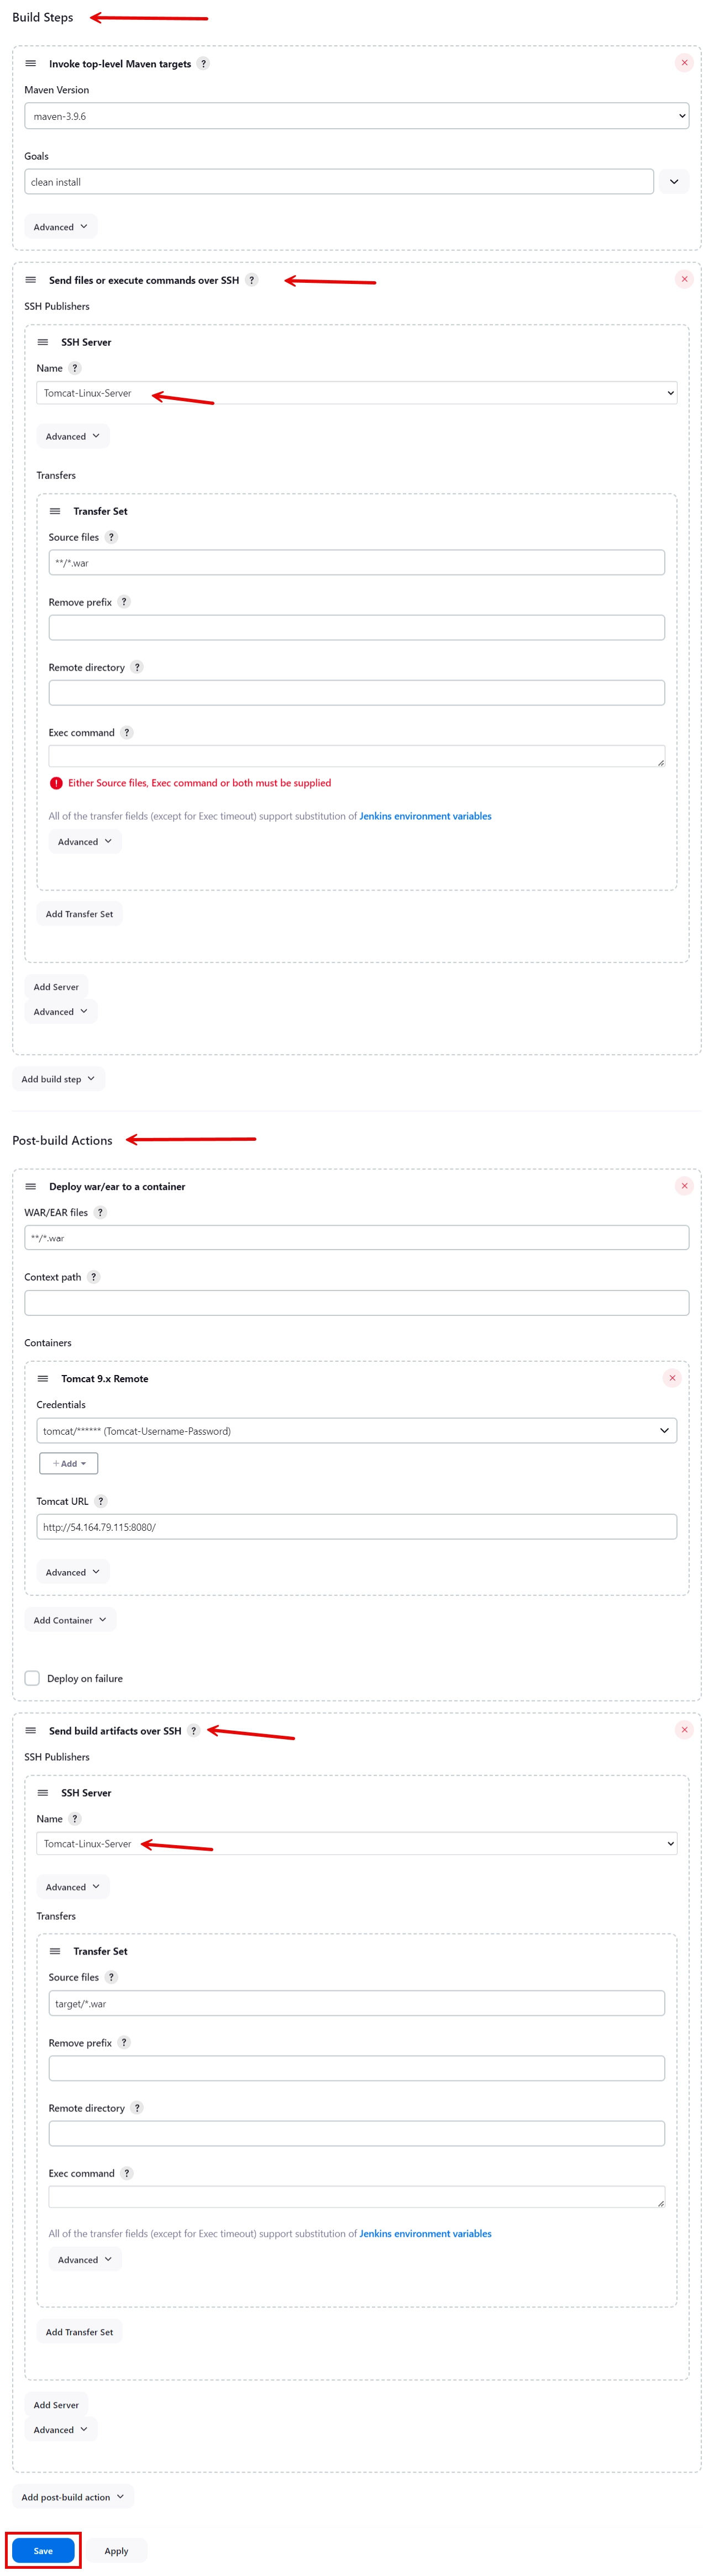
- Go to your Jenkins job and click on the Configure button.
- In the Build section, click on the Add build step button and select Send files or execute commands over SSH.
- Select your SSH server from the SSH Server dropdown menu.
- Enter the following details for your build step:
- Source files: The files that you want to copy from your Jenkins workspace to your remote machine
- Remove prefix: The prefix that you want to remove from the source files before copying them to your remote machine
- Remote directory: The directory where you want to copy the files on your remote machine (optional)
- Exec command: The command that you want to execute on your remote machine after copying the files (optional)
- In the Post-build Actions section, click on the Add post-build action button and select Send build artifacts over SSH.
- Select your SSH server from the SSH Server dropdown menu.
- Enter the following details for your post-build action:
- Source files: The files that you want to copy from your Jenkins workspace to your remote machine
- Remove prefix: The prefix that you want to remove from the source files before copying them to your remote machine
- Remote directory: The directory where you want to copy the files on your remote machine (optional)
- Exec command: The command that you want to execute on your remote machine after copying the files (optional)
- Click on the Save button to save your Jenkins job configuration.
Step 3: Run Your Jenkins Job and Verify the Results
The final step is to run your Jenkins job and verify the results. To do this, follow these steps:
- Go to your Jenkins job and click on the Build Now button to trigger a build.
- Wait for the build to finish and click on the Console Output link to view the build log.
- You should see the messages from the Publish Over SSH plugin showing the files that were copied and the commands that were executed on your remote machine.
- Log in to your remote machine via SSH and verify that the files were copied and the commands were executed as expected.
Conclusion
In this blog post, I showed you how to add or setup an SSH server in Jenkins using the Publish Over SSH plugin. This plugin can help you automate tasks that require SSH access to remote machines.
I hope you found this tutorial useful and learned something new. If you have any questions or feedback, please leave a comment below. Thank you for reading!