
Jenkins is a popular open-source automation server that can help you build, test, and deploy your applications. One of the common tasks that Jenkins can perform is deploying your web applications to a Tomcat server.
However, before you can do that, you need to add your Tomcat credentials to Jenkins, so that Jenkins can access your Tomcat server and deploy your web applications.
There are two methods to add your Tomcat credentials to Jenkins: using the Credentials plugin or using the Deploy to Container plugin.
In this blog post, I will show you how to use both methods and explain the pros and cons of each method.
Method 1: Using the Credentials Plugin
The Credentials plugin is a Jenkins plugin that allows you to store and manage your credentials in a secure way.
You can use this plugin to add your Tomcat credentials to Jenkins and use them in your Jenkins jobs. Here are the steps to use this method:
- Install the Credentials plugin from the Jenkins plugin manager. You can find it under the “Credentials” category.
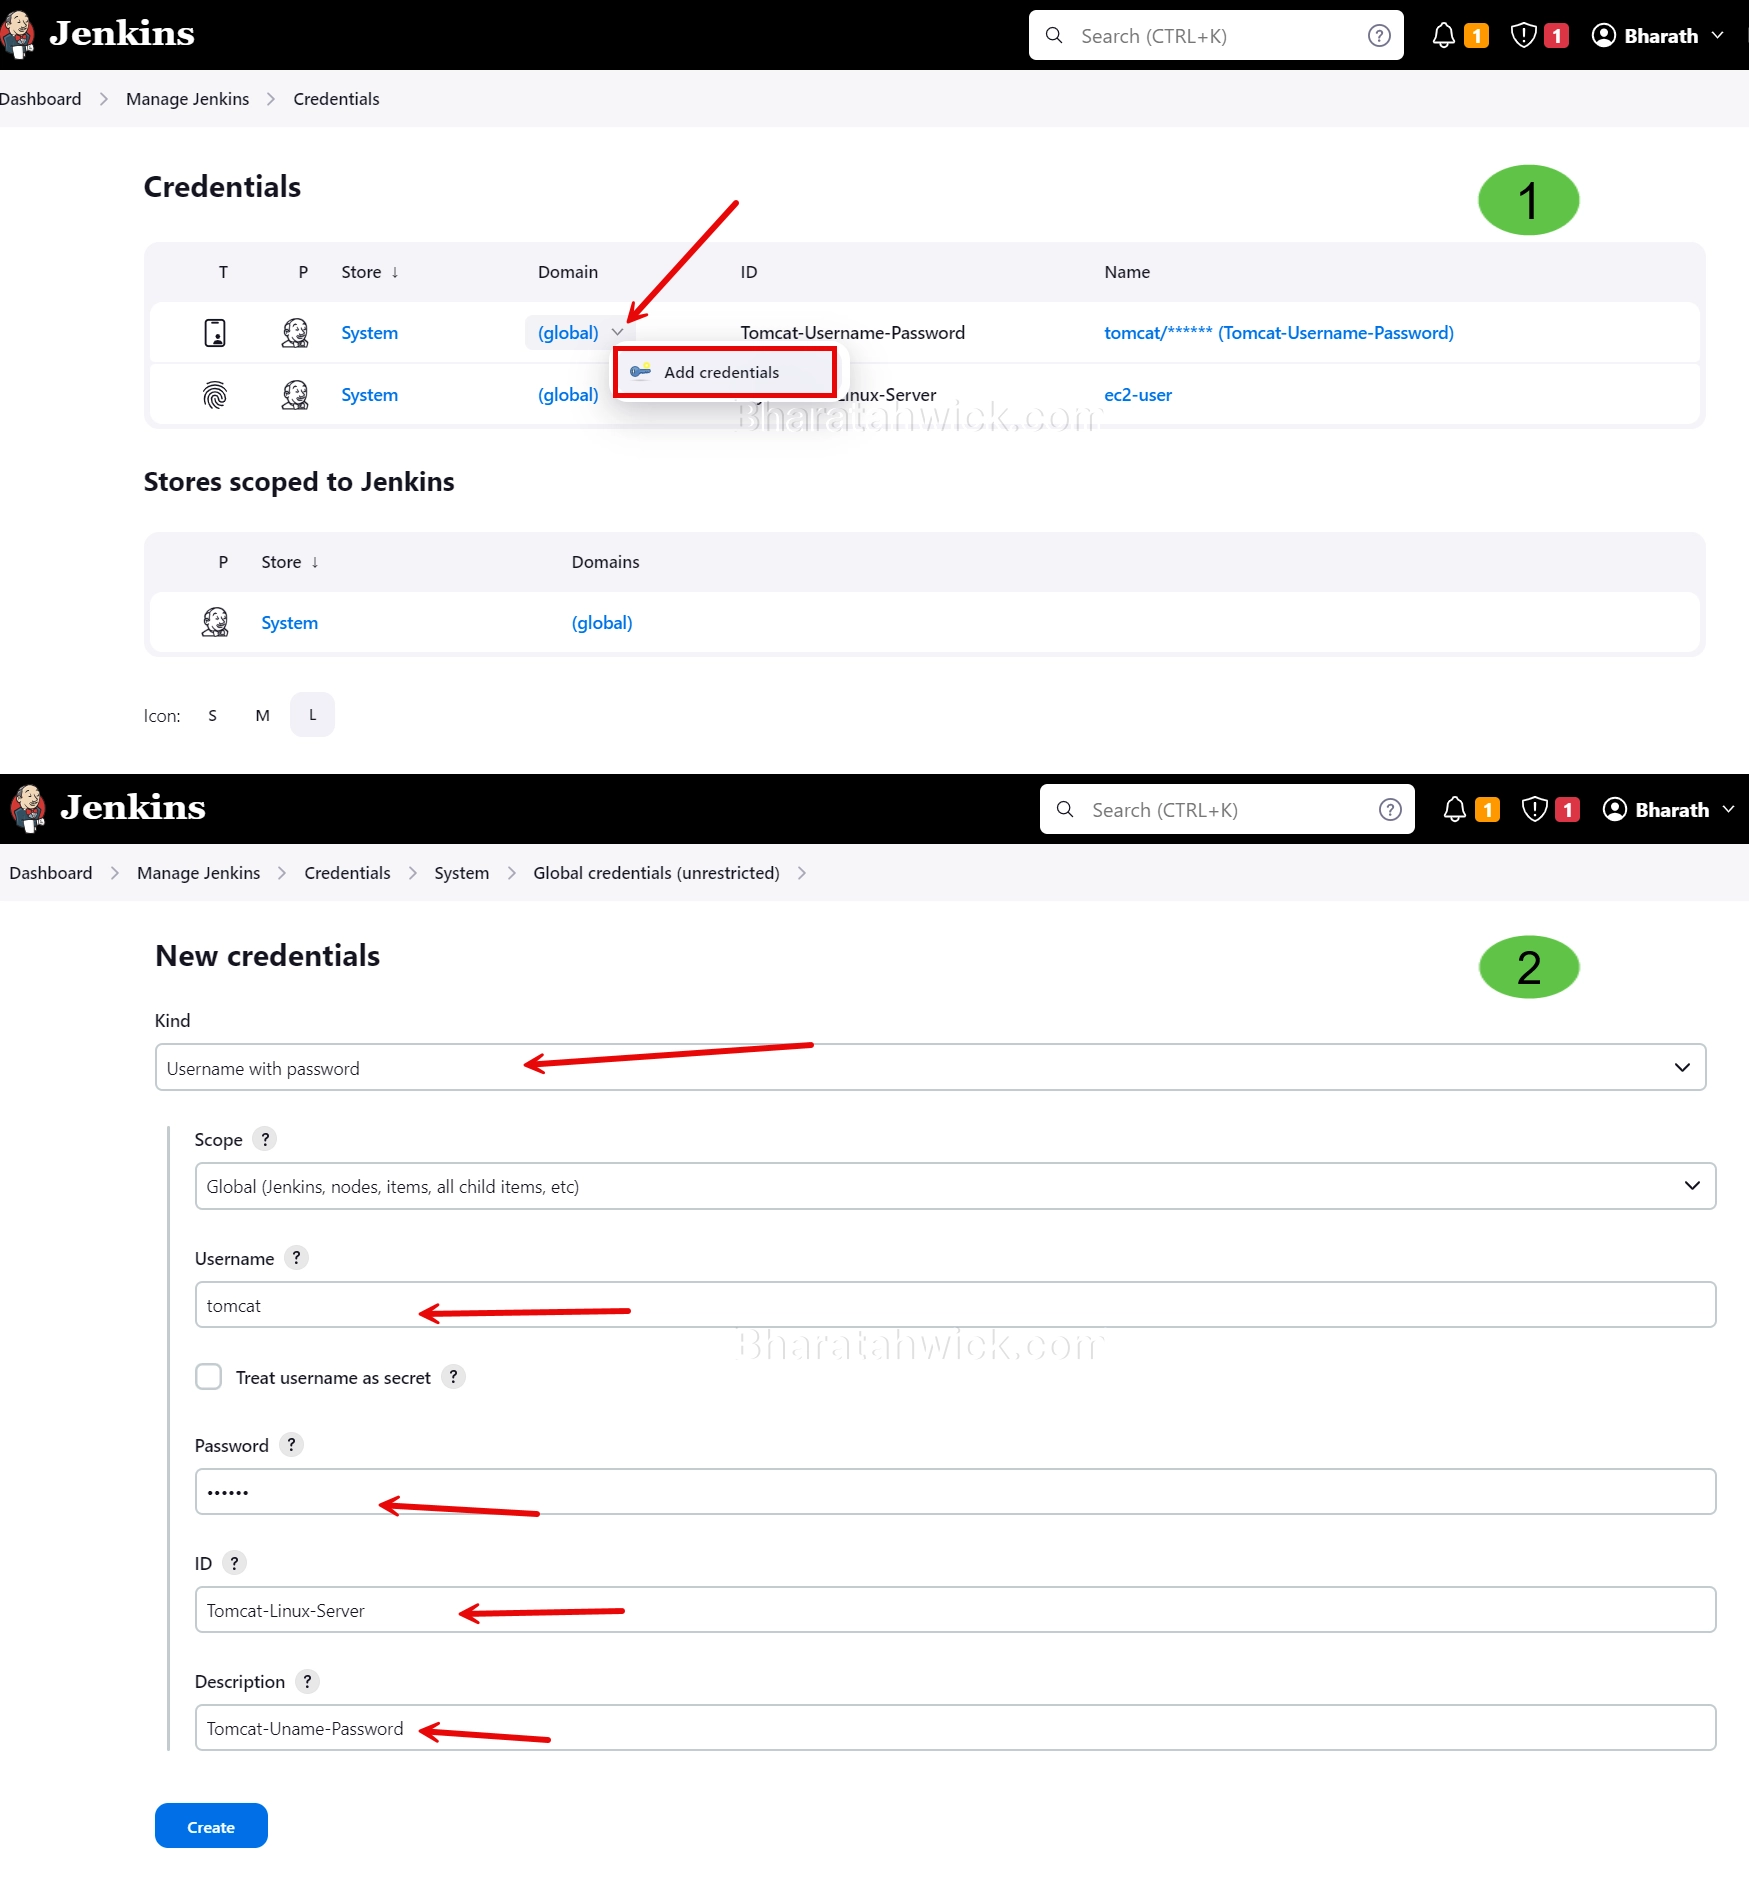
- Go to Jenkins > Manage Jenkins > Manage Credentials. You will see a list of credential stores, such as “Jenkins”, “System”, and “Global”.
- Click on the “Global” credential store and then click on the “Add Credentials” button on the left side.
- In the “Add Credentials” form, select “Username with password” as the “Kind” of credential. Enter your Tomcat username and password in the corresponding fields.
- Optionally, you can also enter an “ID” and a “Description” for your credential. Click on the “OK” button to save your credentials.
- Now, you can use your Tomcat credential in your Jenkins jobs. For example, if you are using the Maven plugin to deploy your web applications, you can specify your Tomcat credential ID in the “tomcat:deploy” goal, as shown below:
<plugin>
    <groupId>org.apache.tomcat.maven</groupId>
    <artifactId>tomcat7-maven-plugin</artifactId>
    <version>2.2</version>
    <configuration>
        <url>http://your-tomcat-server:8080/manager/text</url>
        <server>your-tomcat-credential-id</server>
        <path>/your-webapp-context</path>
    </configuration>
</plugin>
The advantages of using this method are:
- You can store and manage your credentials in a centralized and secure way.
- You can reuse your credentials across multiple Jenkins jobs and projects.
- You can easily update or delete your credentials without affecting your Jenkins jobs.
The disadvantages of using this method are:
- You need to install and configure an additional plugin.
- You need to remember or look up your credential ID when using it in your Jenkins jobs.
Method 2: Using the Deploy to container Plugin
The Deploy to container plugin is another Jenkins plugin that allows you to deploy your web applications to a Tomcat server.
Unlike the Credentials plugin, this plugin does not require you to store your Tomcat credentials in Jenkins. Instead, you can enter your Tomcat credentials directly in your Jenkins job configuration. Here are the steps to use this method:
- Install the Deploy to container plugin from the Jenkins plugin manager. You can find it under the “Deploy” category.
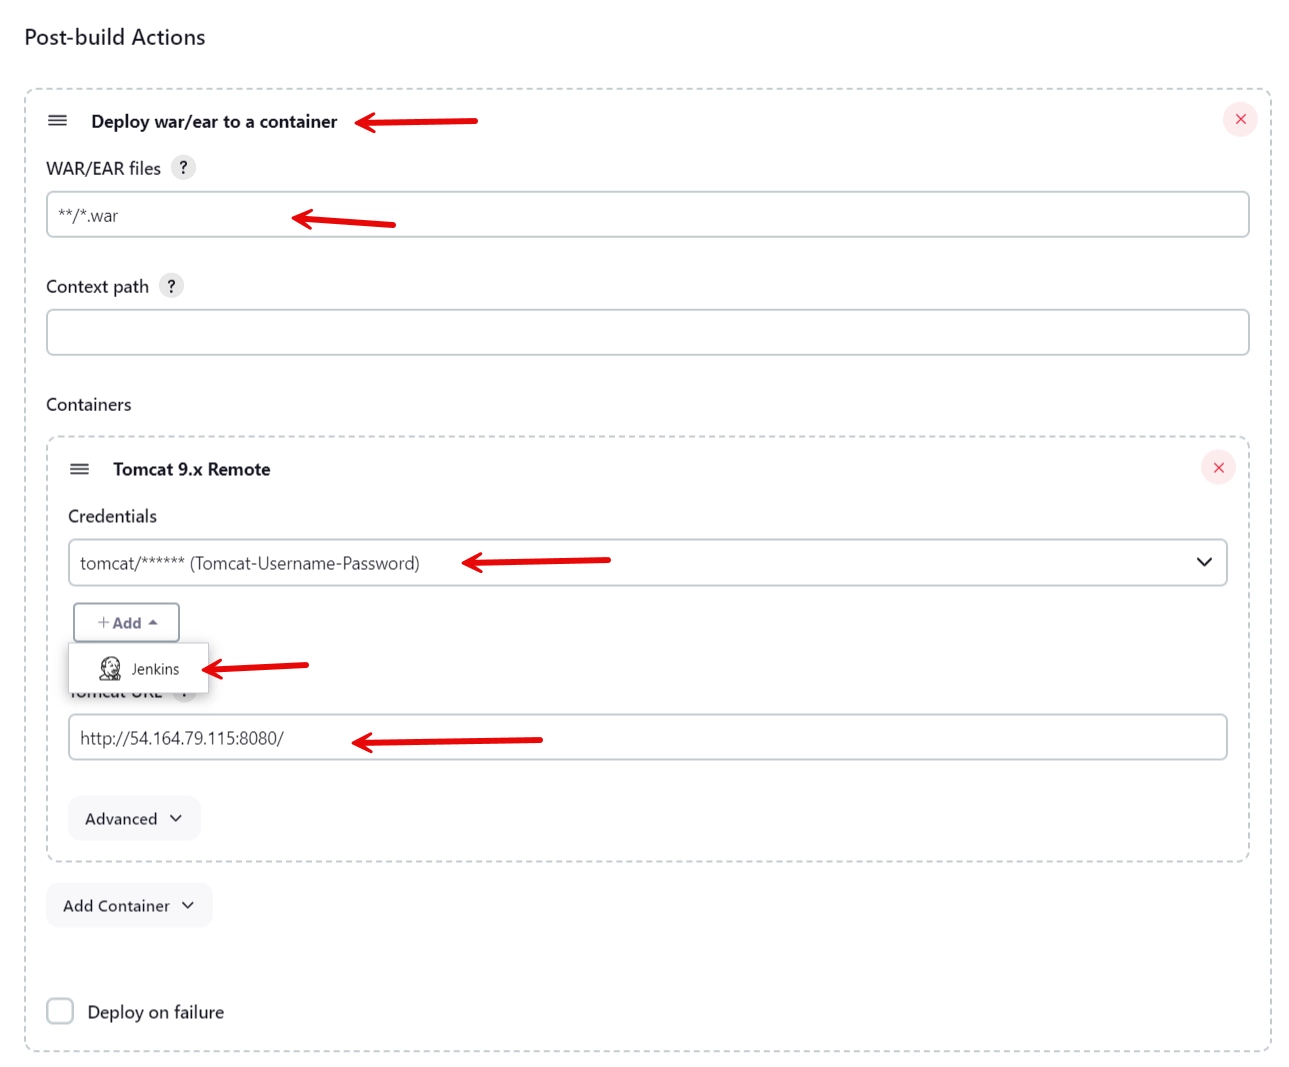
- Go to your Jenkins job and click on the “Configure” button. Scroll down to the “Post-build Actions” section and click on the “Add post-build action” button. Select “Deploy war/ear to a container” from the drop-down menu.
- In the “Deploy war/ear to a container” section, enter the path to your web application war file in the “WAR/EAR files” field. For example, if you are using the Maven plugin to build your web application, you can enter “
**/target/*.war” as the path. - In the “Containers” section, click on the “Add container” button and select “Tomcat 7.x” from the drop-down menu. Enter your Tomcat URL, username, and password in the corresponding fields. Optionally, you can also enter a “Context path” for your web application. Click on the “Save” button to save your job configuration.
- Now, when you run your Jenkins job, it will automatically deploy your web application to your Tomcat server using the credentials that you entered.
The advantages of using this method are:
- You do not need to store or manage your credentials in Jenkins.
- You do not need to remember or look up your credential ID when using it in your Jenkins jobs.
- You can easily change or remove your credentials without affecting your Jenkins jobs.
The disadvantages of using this method are:
- You need to enter your credentials in each Jenkins job that deploys to your Tomcat server.
- Your credentials are exposed in your Jenkins job configuration and logs, which may pose a security risk.
Conclusion
In this blog post, I showed you how to add your Tomcat credentials to Jenkins using two methods: using the Credentials plugin or using the Deploy to container plugin. Both methods have their pros and cons, and you can choose the one that suits your needs and preferences.
I hope you found this blog post helpful and learned something new. If you have any questions or feedback, please feel free to leave a comment below. Thank you for reading!