Are you interested in learning how to create a shell script file that sets the environment variables for Java and Maven. This is a useful skill for developers who work with these tools frequently.
In this blog post, I will show you how to create and execute such a script in a few easy steps. Let’s get started!
Step 1: Create the shell script file
The first step is to create a shell script file that contains the commands to set the environment variables for Java and Maven. A shell script file is a text file that can be executed by a shell interpreter, such as bash or sh.
You can use any text editor of your choice to create the file, such as vim, nano, or gedit. The file should have a .sh extension, which indicates that it is a shell script file. For example, you can name your file java_maven.sh.
To set the environment variables, you need to use the export command and specify the paths to the respective home directories of Java and Maven.
The home directory is the location where the tool is installed and contains its files and folders.
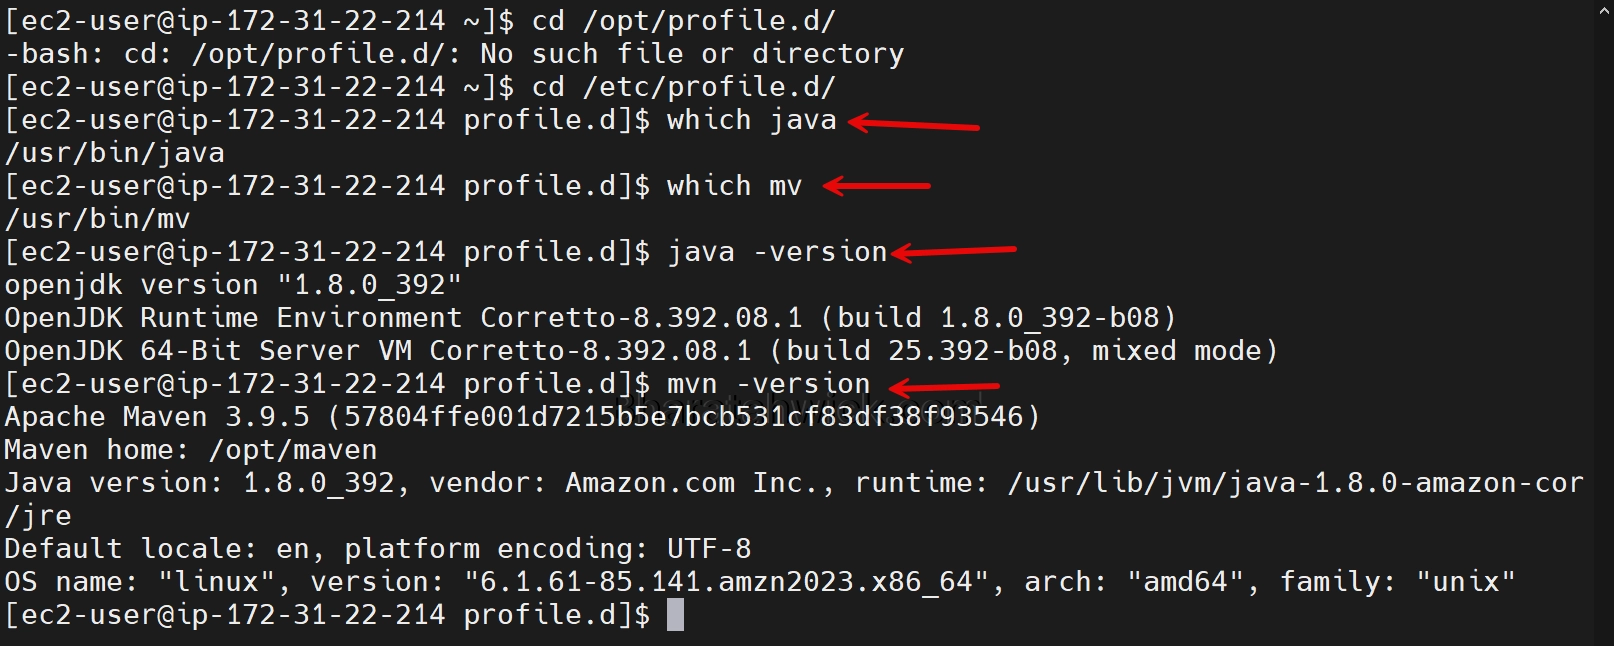
You can find out the home directory of your Java and Maven installations by using the which command. For example, you can type:
which java
which mvn
This will print the paths to the executable files of Java and Maven. The home directory is usually the parent directory of the bin folder that contains the executable file. For example, if the output of the which command is:

Step 2: Creating the shell script file
You can use these paths to set the environment variables for Java and Maven. The environment variables are named JAVA_HOME and M2_HOME, respectively.
You also need to update the system path variable, which is a list of directories where the system looks for executable files. You can append the bin directories of Java and Maven to the system path by using the PATH variable. The syntax of the export command is:
export VARIABLE=VALUE
A common location for shell script files is the /etc/profile.d/ directory, which contains scripts that are executed when a user logs in.
To save the file in this directory, you need to have root or sudo privileges, which means that you can run commands as a superuser.
You can use the sudo command to run the text editor as a superuser and save the file in the desired location. For example, if you are using nano, you can type:
sudo nano /etc/profile.d/java_maven.shWhere VARIABLE is the name of the environment variable and VALUE is the path to the home directory. You can write the following commands in your shell script file to set the environment variables for Java and Maven:
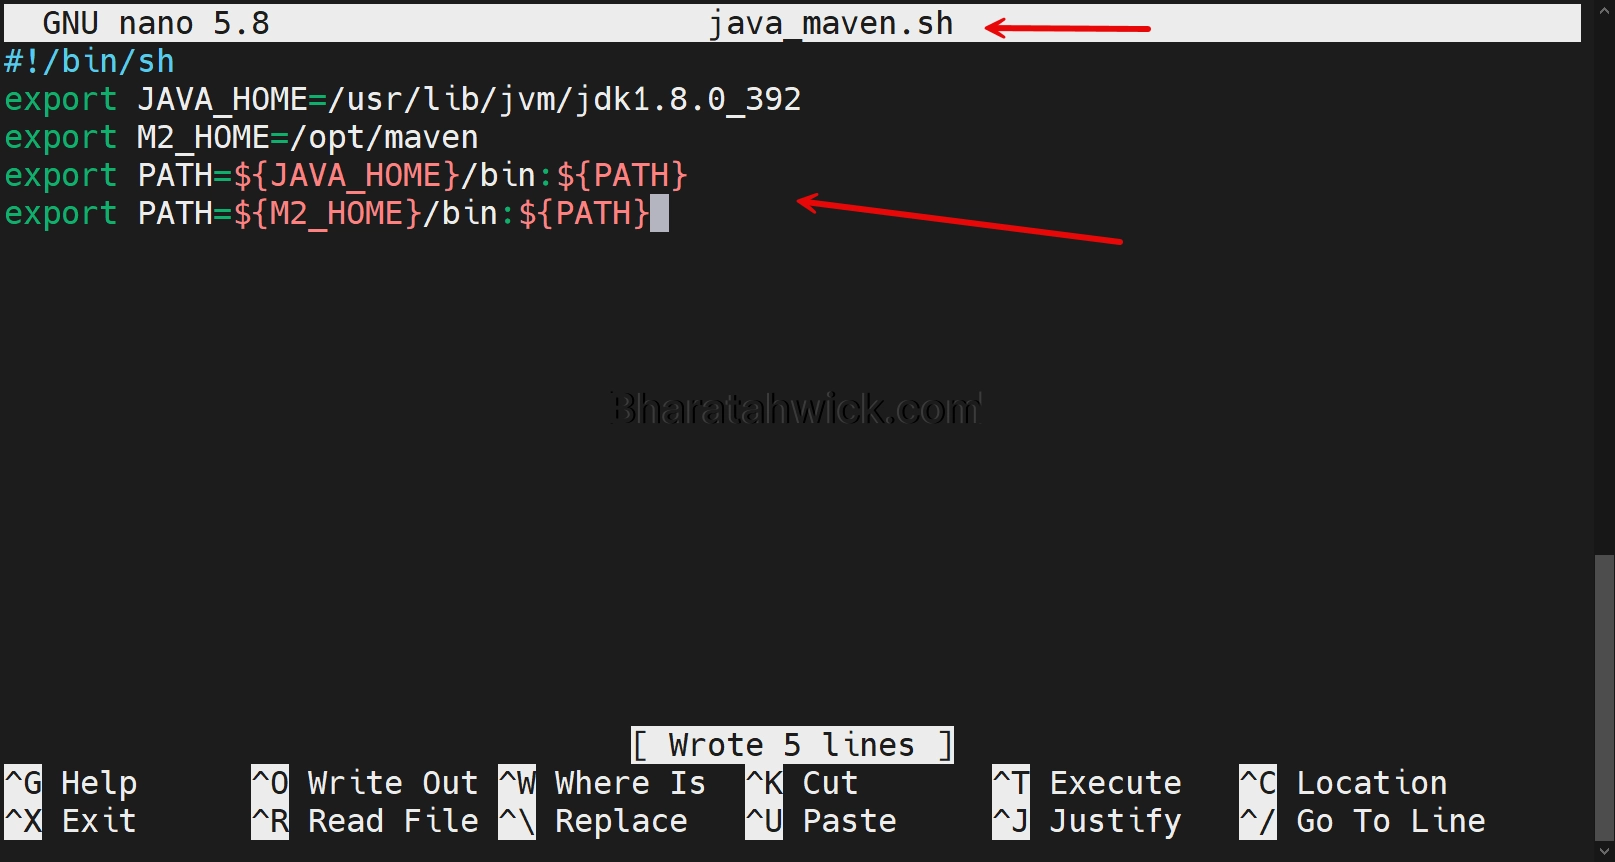
#!/bin/sh
export JAVA_HOME=/usr/lib/jvm/jdk1.8.0_392
export M2_HOME=/opt/maven
export PATH=${JAVA_HOME}/bin:${PATH}
export PATH=${M2_HOME}/bin:${PATH}
The first line, #!/bin/sh, is called a “shebang” and tells the system which interpreter to use to execute the script.
The next four lines use the export command to set the environment variables for Java, Maven, and the system path. You can modify four lines according to your actual paths.
Once you added the code to your java_maven.sh file press Ctrl + O to save the file and Ctrl + X to exit the editor.
Step 3: Make the shell script file executable
The final step is to make the shell script file executable, which means that it can be run as a program by the system.
To do this, you need to use the chmod command, which changes the permissions of files and folders.
You can use the sudo command to run the chmod command as a superuser and give the execute permission to the file. The syntax of the chmod command is:
chmod MODE FILE
Where MODE is the permission mode and FILE is the name of the file. You can use the +x mode to add the execute permission to the file. For example, you can type:
sudo chmod +x /etc/profile.d/java_maven.shThis will make the file executable and allow it to run as a script.
Step 4: Run the shell script file
To run the shell script file, you can either log out and log in again, reboot your system, or use the source command to apply the changes immediately in your current shell.
The source command executes the commands in a file in the current shell, without creating a new one. The syntax of the source command is:
source FILE
Where FILE is the name of the file. For example, you can type:
source /etc/profile.d/java_maven.shThis will run the script and set the environment variables for Java and Maven. You can verify that the variables are set correctly by using the echo command, which prints the value of a variable. The syntax of the echo command is:
echo $VARIABLE
Where VARIABLE is the name of the environment variable. For example, you can type:
echo $JAVA_HOME
echo $M2_HOME
echo $PATH
This will print the values of the environment variables and show you the paths to the Java and Maven home directories and the system path.
Conclusion
In this blog post, I have shown you how to create and execute a shell script file that sets the environment variables for Java and Maven.
This is a handy way to configure your development environment and avoid typing the same commands every time you use these tools.
I hope you found this tutorial useful and easy to follow. If you have any questions or feedback, please leave a comment below. Thank you for reading!
