
Have you ever wanted to create your own virtual machine in Microsoft Azure? Well, you’re in luck because it’s a breeze! By creating a VM in Azure, you can access a versatile and robust computing environment that suits your unique needs.
If you’re looking to develop, test, or run specific applications, this is the perfect solution for you. To get started, we’ll take you through the simple steps of creating a virtual machine that runs on Ubuntu in Azure. Let’s dive in!
Step-by-Step Guide to Creating a Ubuntu VM in Azure
If you’re looking to create an Ubuntu virtual machine (VM) in Microsoft Azure, we’ve got you covered with this step-by-step guide! Just make sure you have an Azure account before diving in. If you don’t have one yet, don’t worry – you can easily sign up for one.
Step 1: Sign in to Azure Portal
- Head over to the Azure Portal.
- To get started, log in using your Azure account details.
Step 2: Create a Resource Group
If you’re new to Azure resources, creating a resource group might seem like a daunting task. But don’t worry – it’s easy once you know how! Check out this guide for step-by-step instructions on how to create your own logical container for all your Azure resources.
Step 3: Create a Virtual Machine
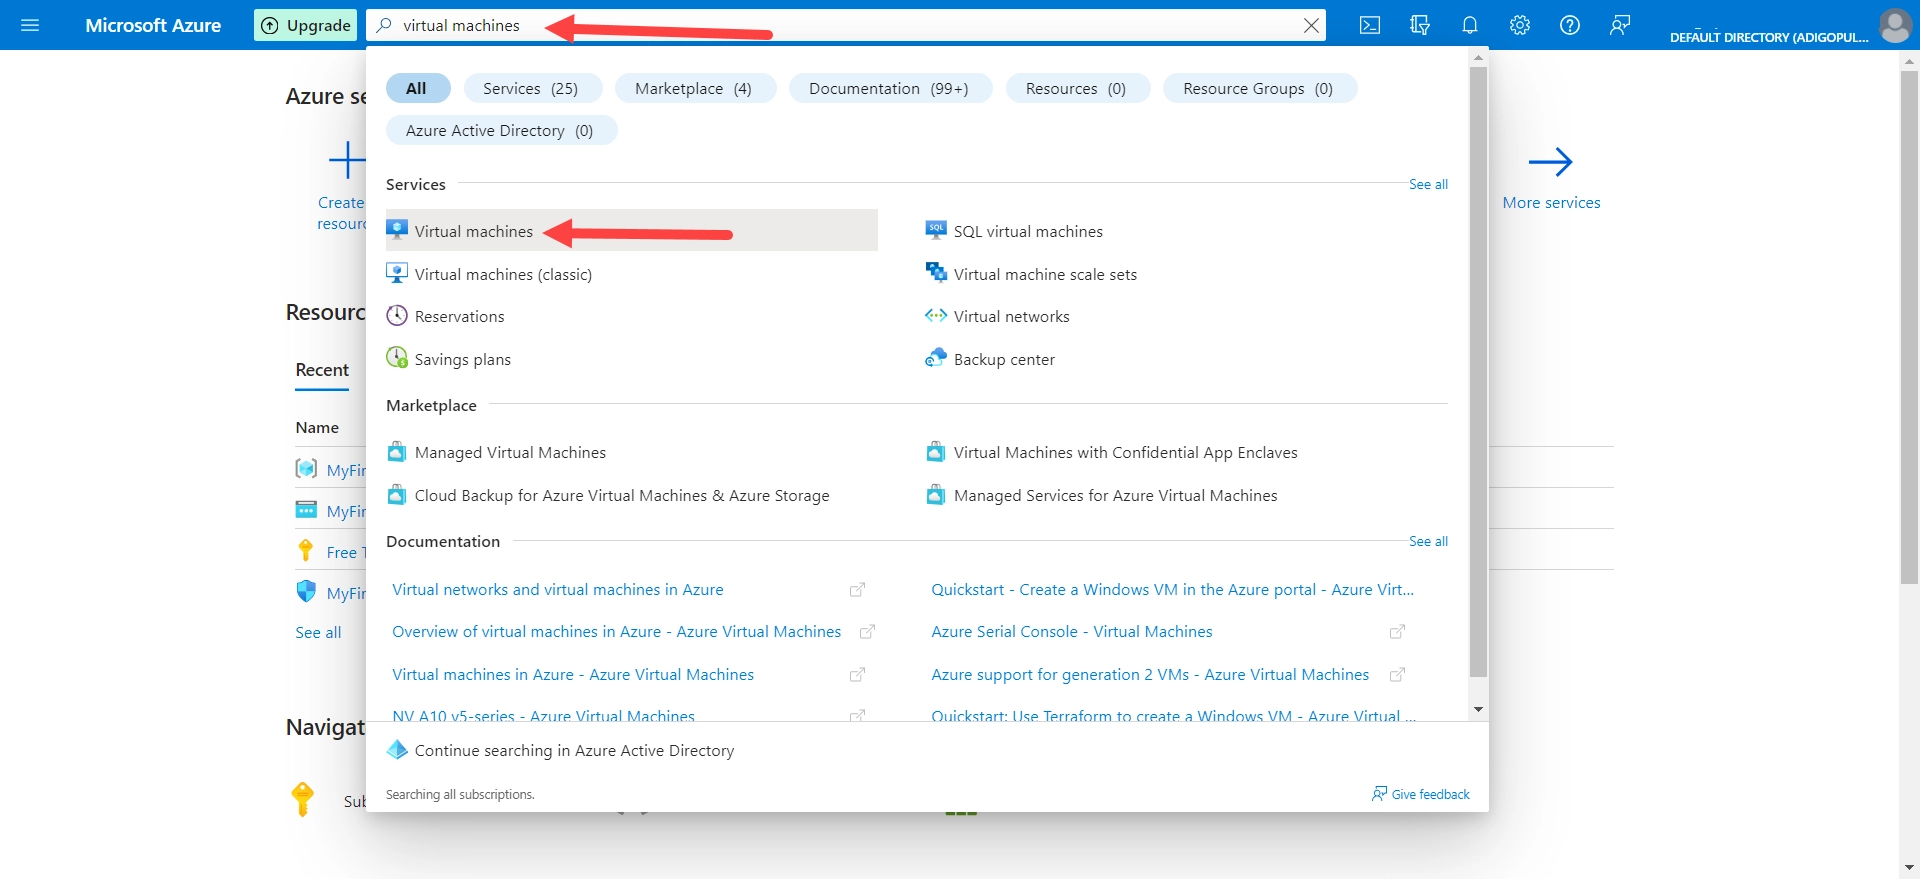
To access Virtual Machines in the Azure Portal, simply search for it and select the option. You can also find it in the left-side panel menu.
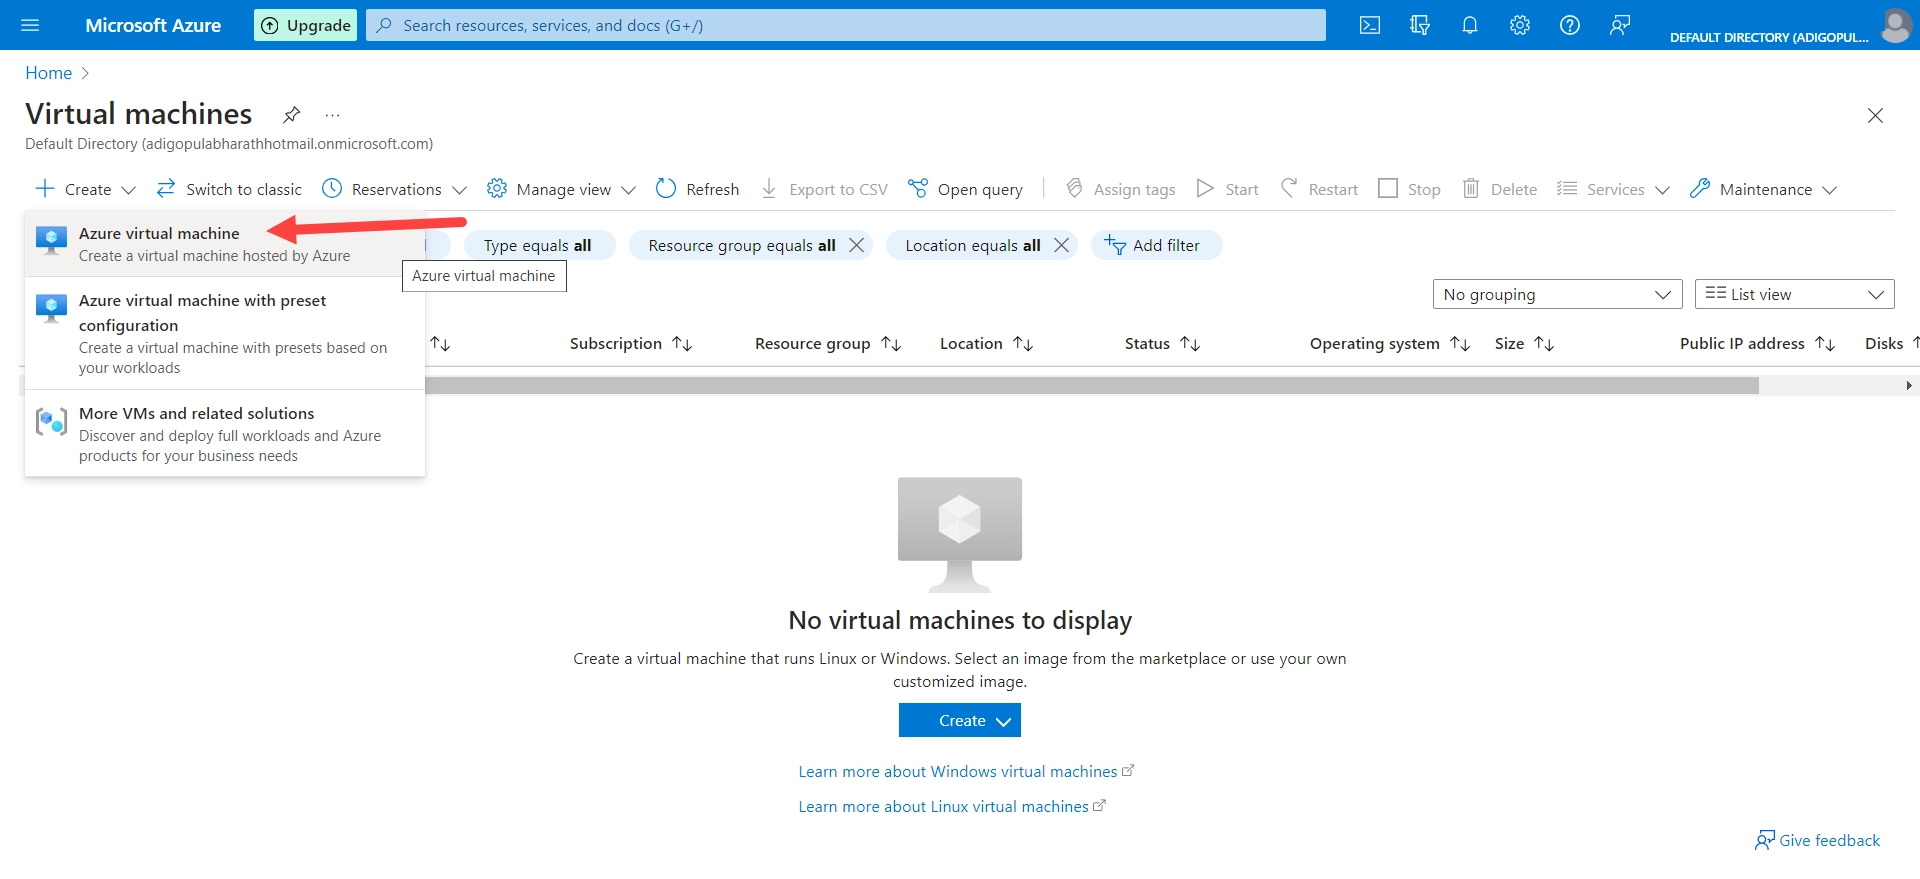
When you’re ready to create your virtual machine, click the “Create” button to start the setup process. It’s super easy and straightforward!
Step 4: Configure the Basics
Let’s dive into the “Basics” tab of the “Create a virtual machine” window, shall we? This is where you’ll input some key information to get started. Keep in mind that every detail counts, so make sure to double-check before moving on to the next step.
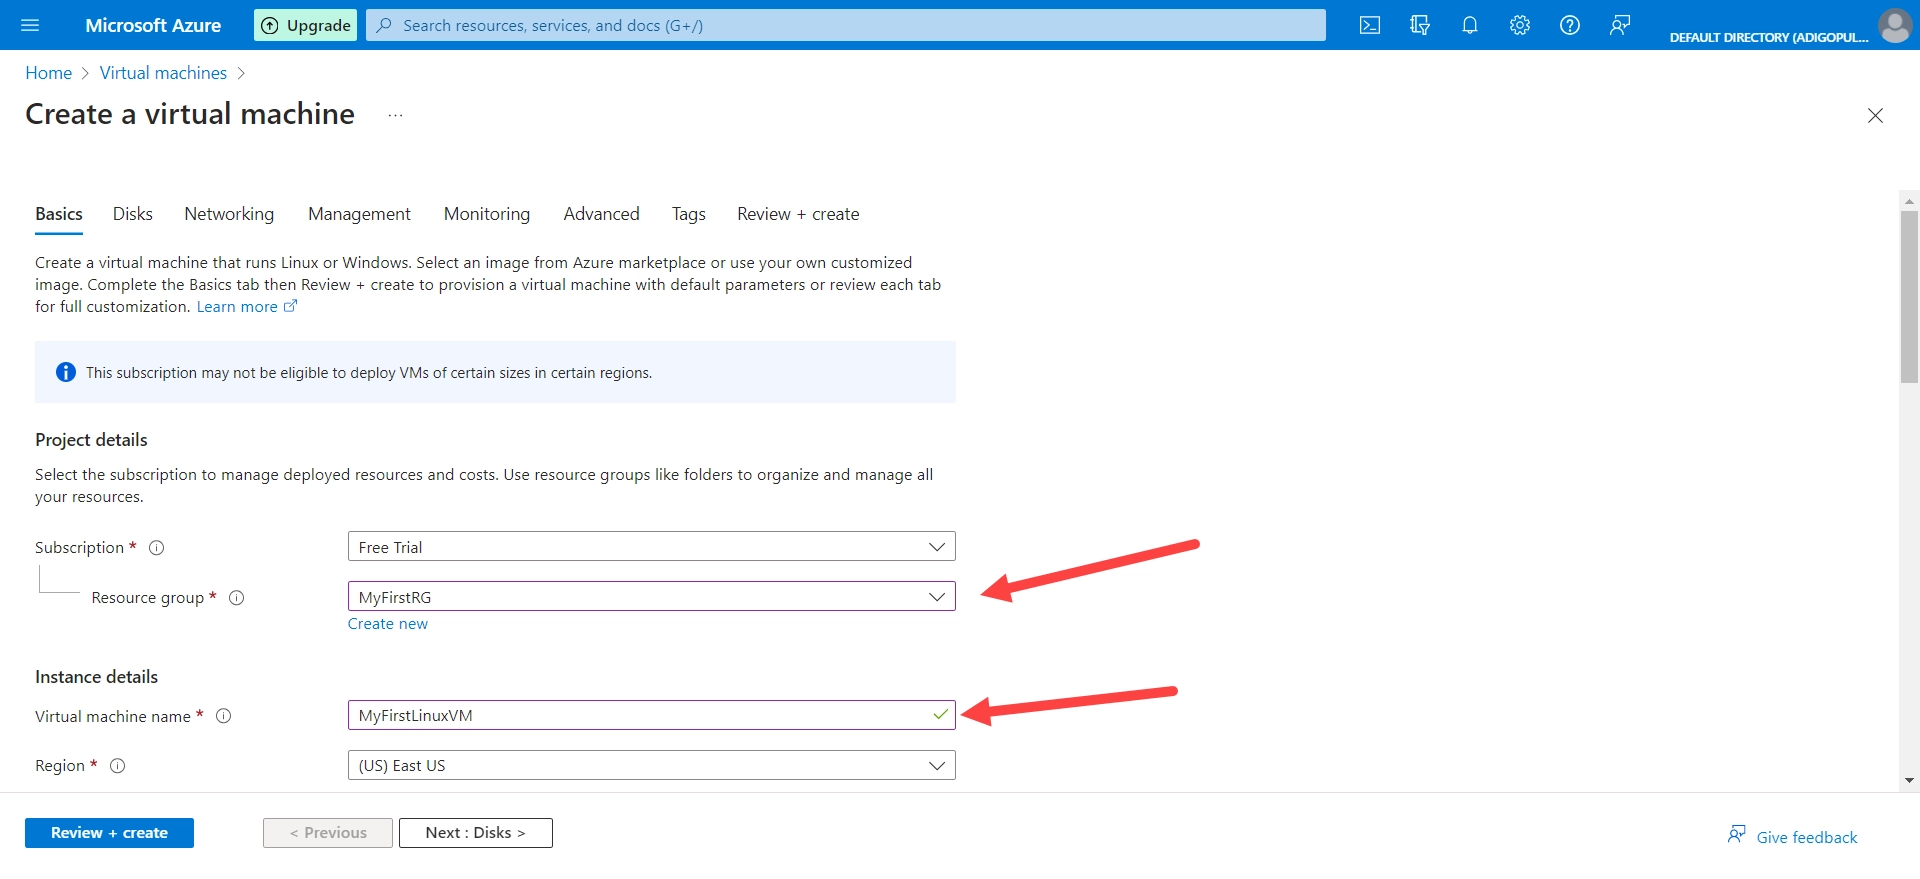
- Subscription: Select your Azure subscription.
- Resource group: Choose the resource group you created in Step 2.
- Virtual machine name: Enter a unique name for your VM.
- Region: Choose the Azure region for your VM.
- Availability options: If you’re good with it, we can go ahead and leave it as “No infrastructure redundancy required.” But if you want to take an extra step to ensure availability, you can always select an availability zone. It’s all up to you!
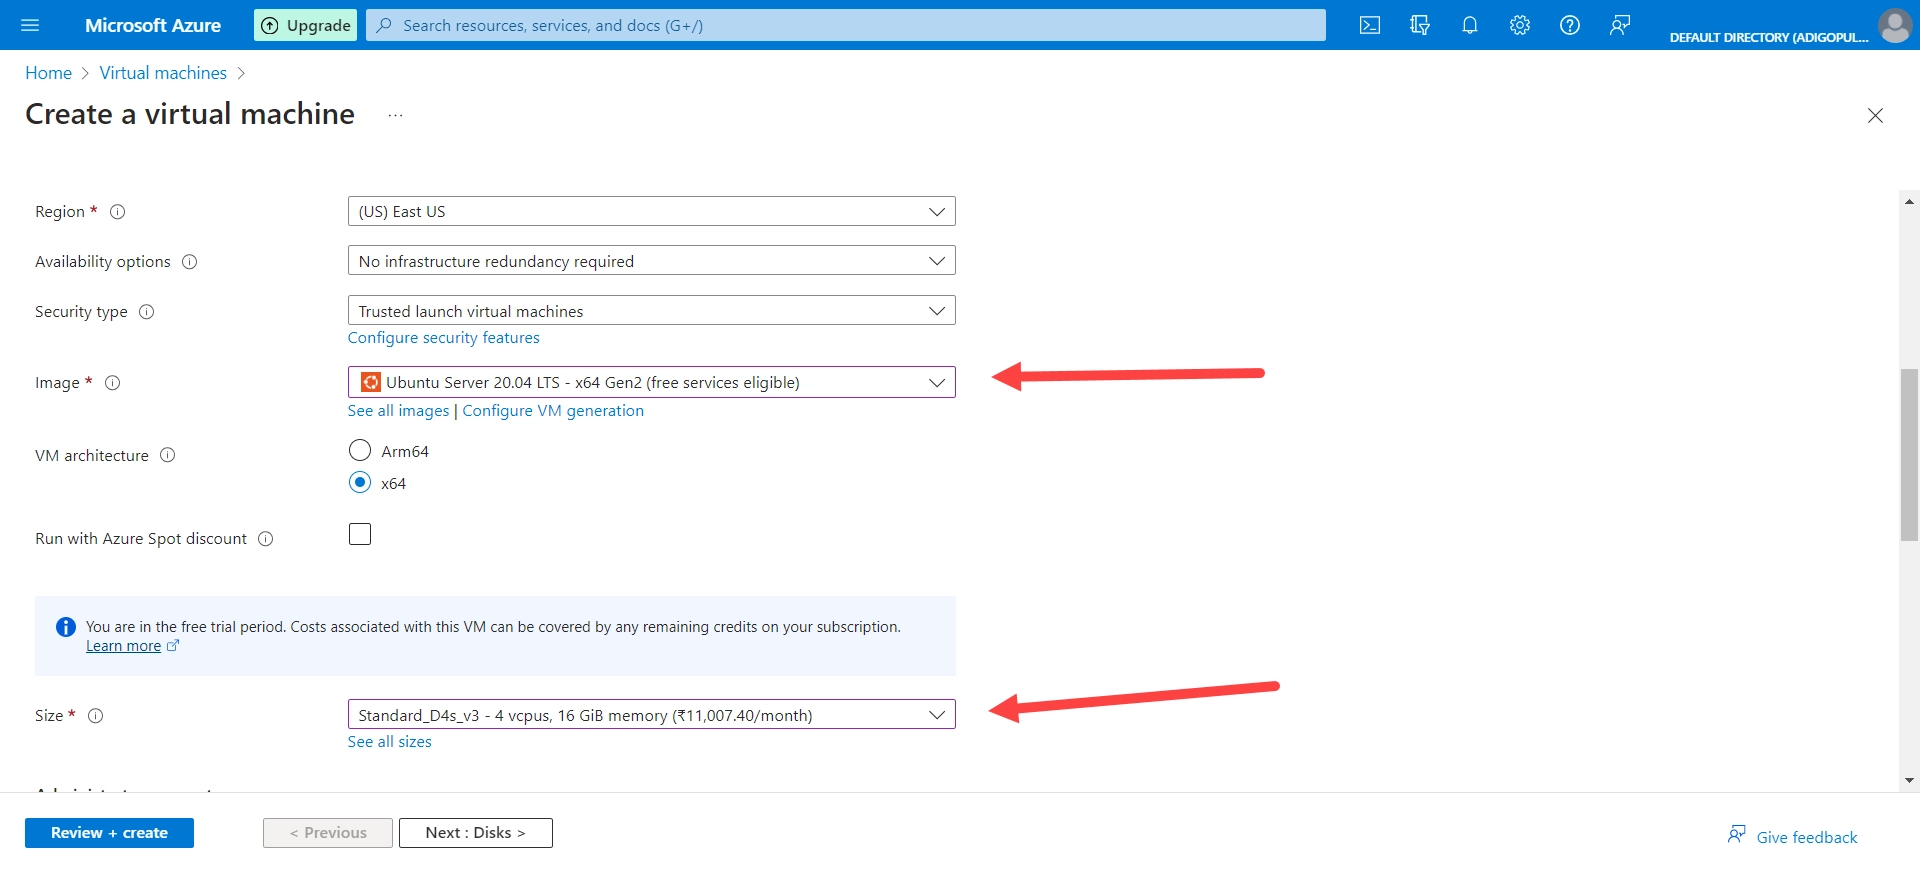
- Image: Select “Ubuntu Server 20.04 LTS” or the desired version.
- Size: When it comes to selecting the perfect VM size for your needs, there are many options to choose from. In my case, I decided to go with the D4s_v3 because it’s the perfect fit for running my high-end applications.

- Authentication type: When it comes to authentication, you have two options: “Password” or “SSH public key”. I personally prefer the SSH public key because it allows me to effortlessly connect to my virtual machine from any computer using a PEM key.
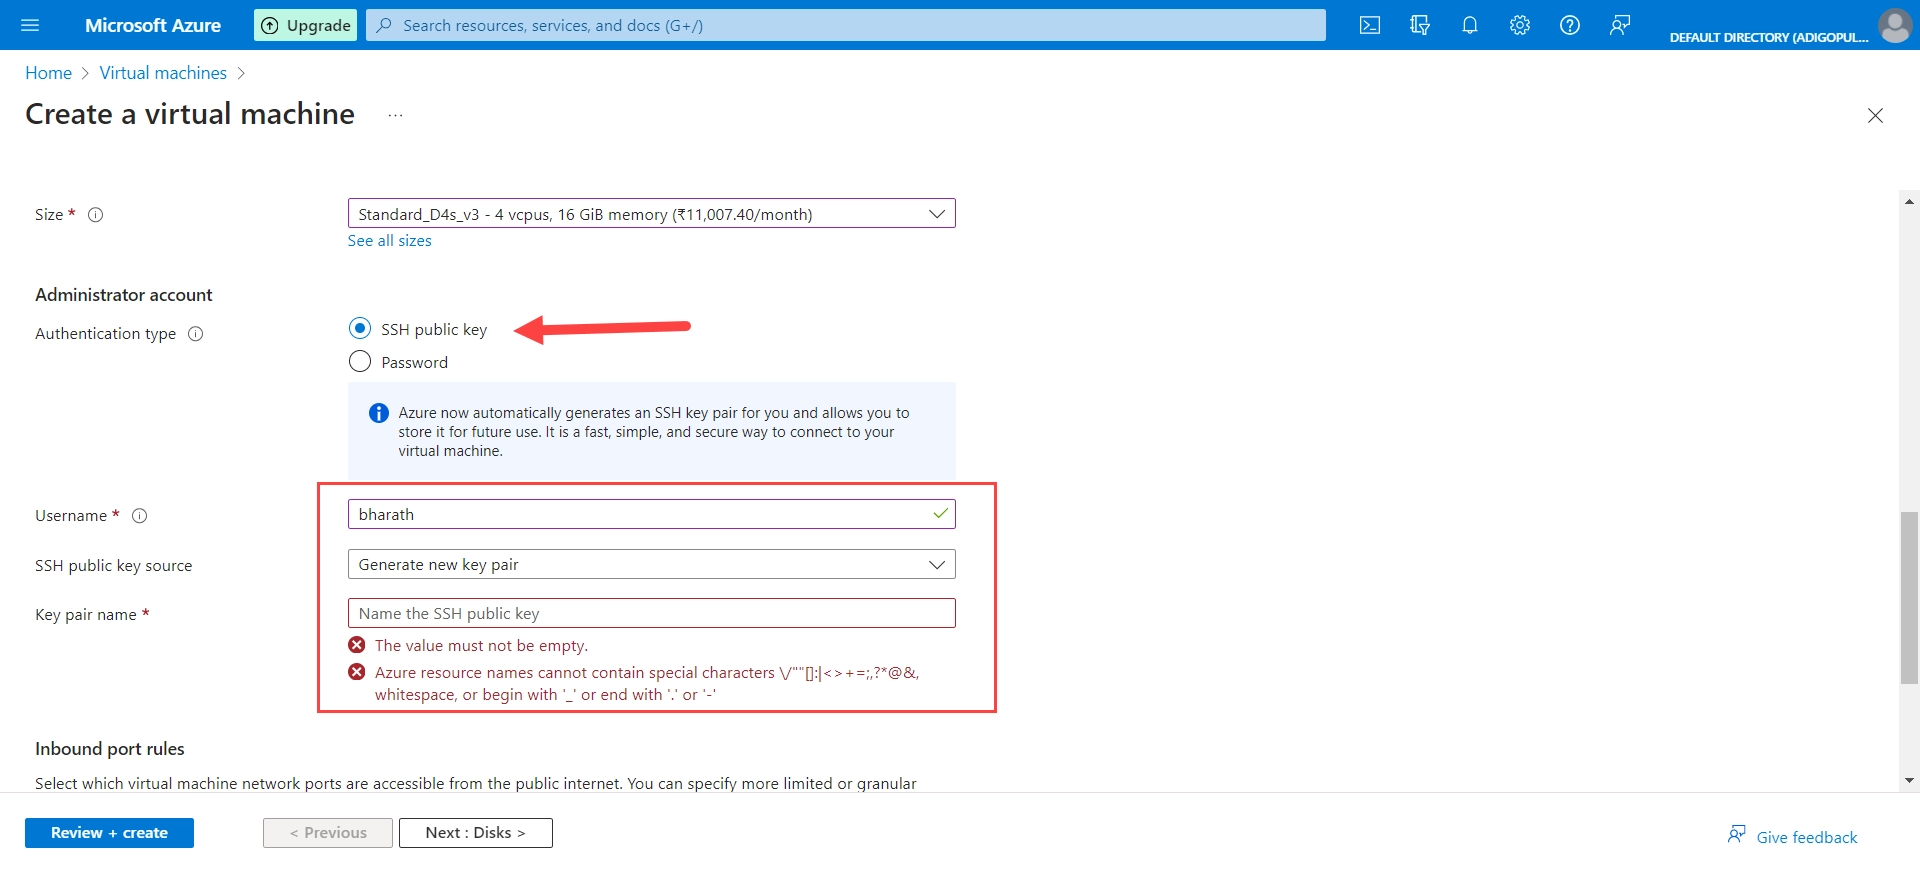
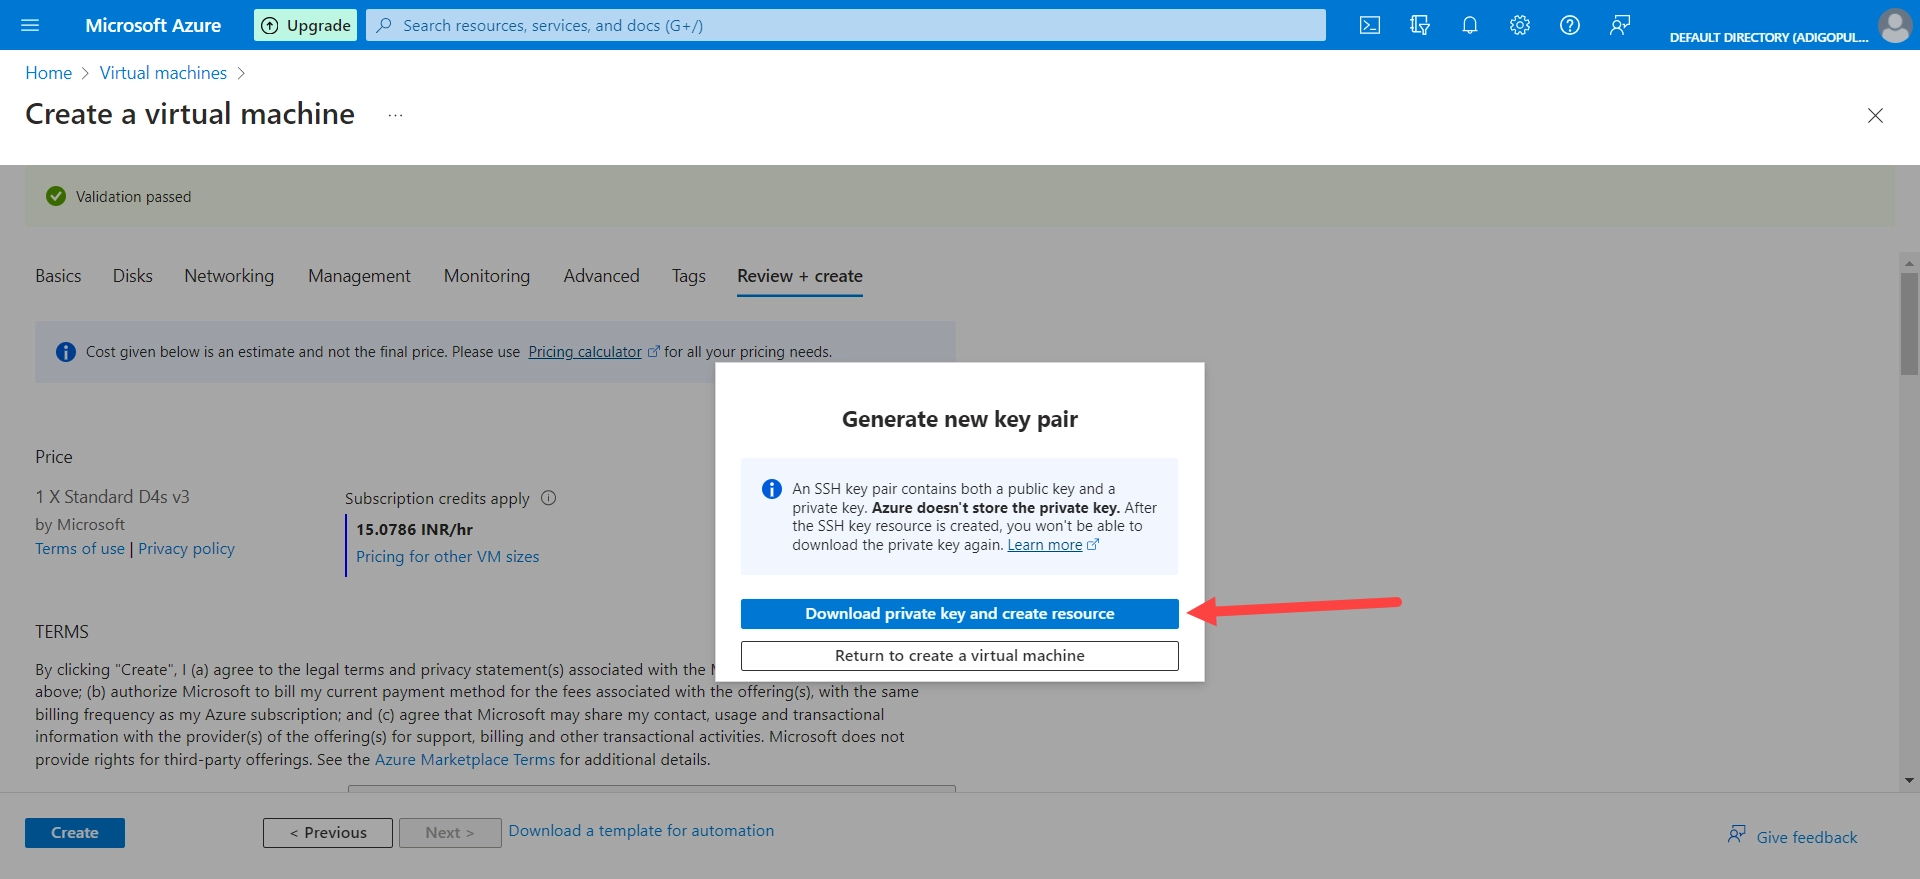
- If you choose “Password,” simply provide a username and password. However, if you opt for “SSH public key,” you’ll need to provide your public SSH key. If you’re like me and don’t have an existing public SSH key, don’t worry! You can easily create a new key pair.
- Make sure to grab hold of the Private Key (PEM) and save it on your personal computer.
- Inbound Port Rules: Select the inbound ports that you require for your system: HTTP (TCP Port 80), HTTPS (TCP Port 443), and SSH (TCP Port 22). These ports will ensure that your system runs smoothly and securely.

Step 5: Review + Create
- Take a moment to double-check the configuration to make sure everything is set up correctly.
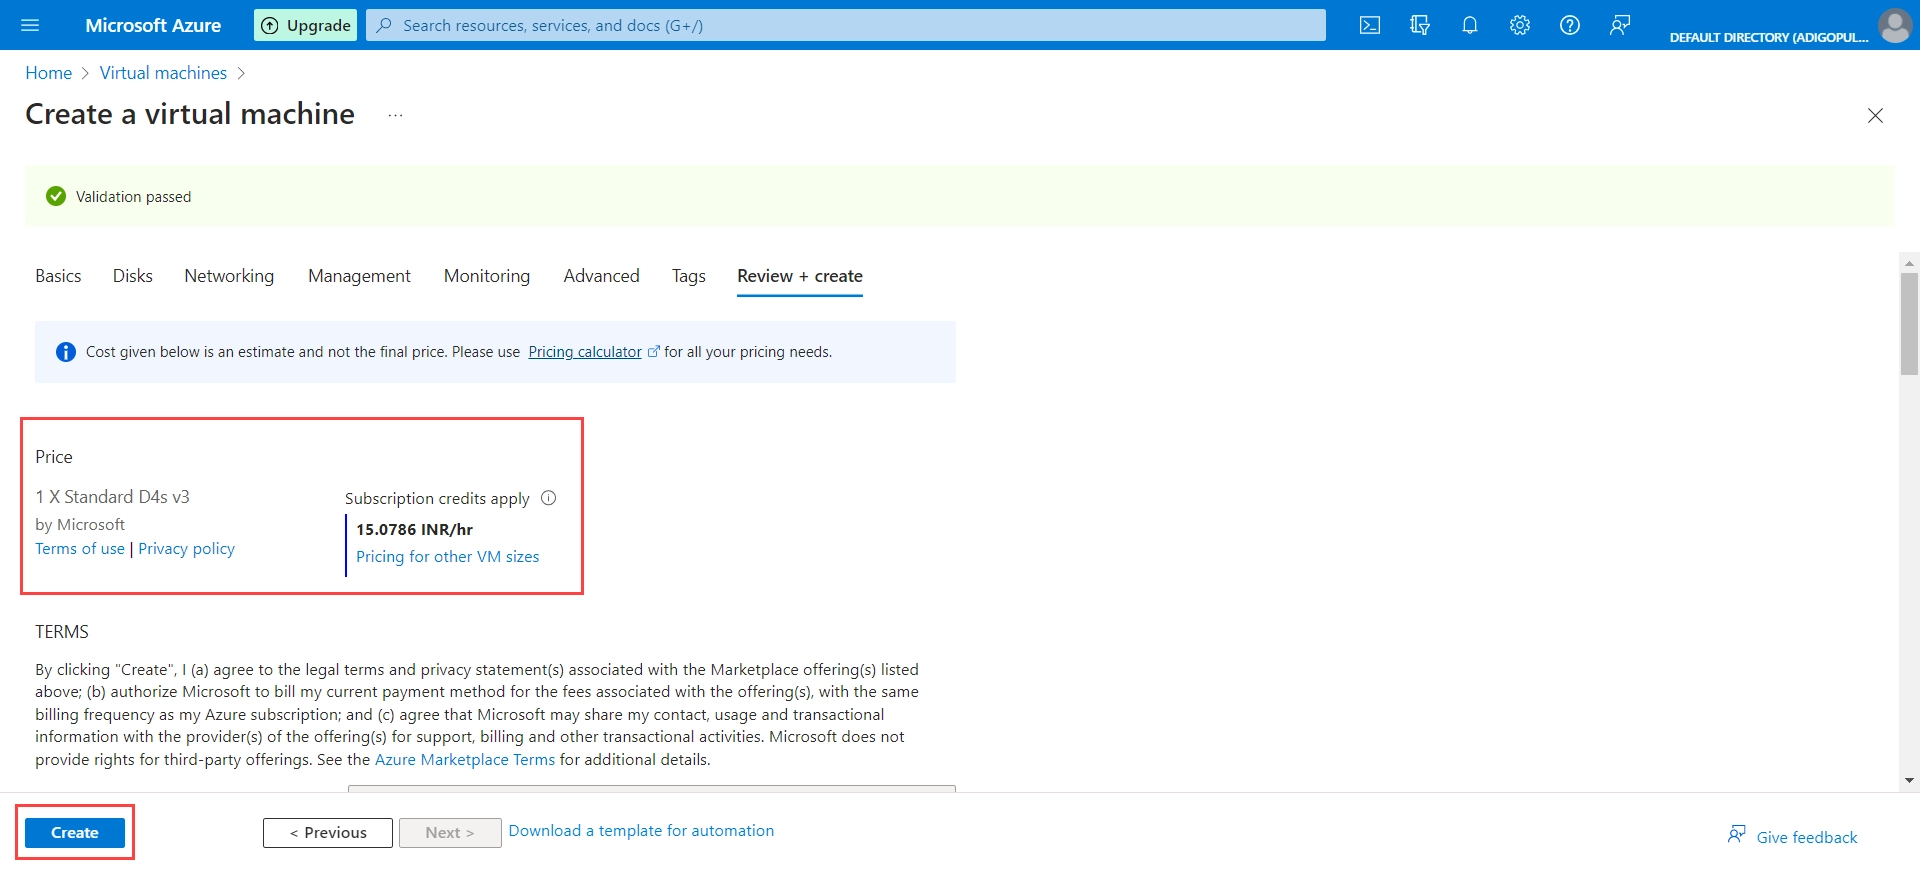
- Ready to get started? Just hit “Create” to begin the process of provisioning your new VM.

Step 7: Access Your Ubuntu VM
- After the successful deployment, head over to your VM’s resource page and get ready to connect! Look for the “Settings” section and click on “Connect.”
- To successfully connect to your Ubuntu VM, simply follow these instructions. If you opted for SSH, make use of an SSH client to get connected. However, if you selected a password, then you’ll need to utilize the Remote Desktop Protocol (RDP). It’s that simple!
Step 8: Additional Configuration
After successfully connecting to your VM, you’ll be able to customize it to your liking, add new software, and complete any other necessary tasks with ease.
Final Thoughts
Creating an Ubuntu virtual machine in Azure is the perfect starting point! Azure’s flexibility and scalability make it a top choice for hosting your VMs.
With our easy-to-follow, step-by-step guide, you’ll have a Ubuntu-based VM up and running in no time. Whether you’re a developer, system administrator, or just someone looking to tap into the power of the cloud, Azure VMs are an incredibly useful tool to have in your arsenal.