
Are you one of those tech enthusiasts who are always keen on exploring new features? If yes, then you must be excited to try out the latest version of Windows, Windows 11. And what if we tell you that you can create a virtual machine for Windows 11 using Microsoft’s cloud computing platform, Azure? Yes, you read that right!
In this step-by-step guide, we’ll show you how to set up and run a Windows 11 virtual machine in Azure. Whether it’s for development, testing, or production environments, creating and managing virtual machines is an essential skill in today’s tech-savvy world. So, let’s get started!
Prerequisites
Let’s get started, but before we do, it’s important to make sure you have everything you need. Check that you have the following prerequisites in place:
- Azure Account: In order to get started, an active Azure subscription is required. If you don’t already have one, no worries! Sign up for a free trial, and you’ll be good to go.
- Azure Portal Access: Head over to the Azure Portal by logging in at portal.azure.com.
- Resource Group: Let’s create an Azure Resource Group! Don’t worry if you don’t have one yet; we can easily set it up in the Azure Portal.
Alright, let’s dive right into creating our very own Windows 11 virtual machine!
Step 1: Launch the Azure Portal
Access the Azure Portal by logging in to your Azure account.
Step 2: Create a Virtual Machine
To get started on your next project in Azure, go ahead and hit that “Create a resource” button located on the left-hand side of your screen in the portal.
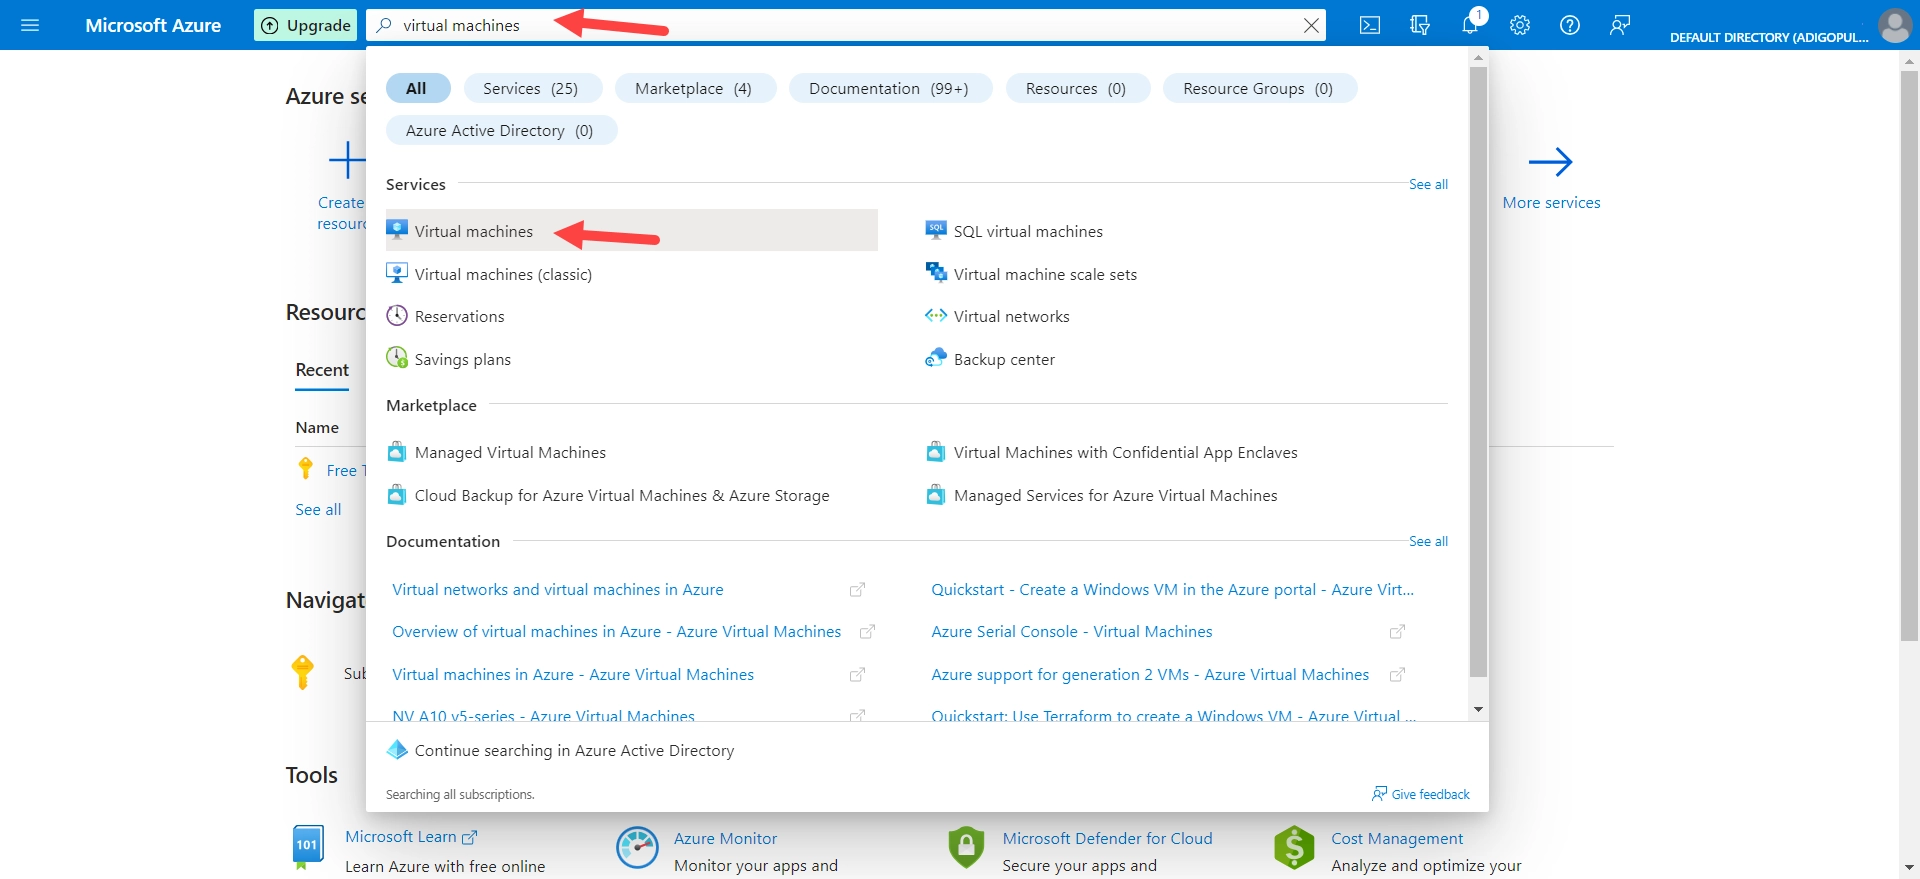
Can you look up “Virtual Machine” in the marketplace? Once you see the results, go ahead and click on “Virtual Machine.”
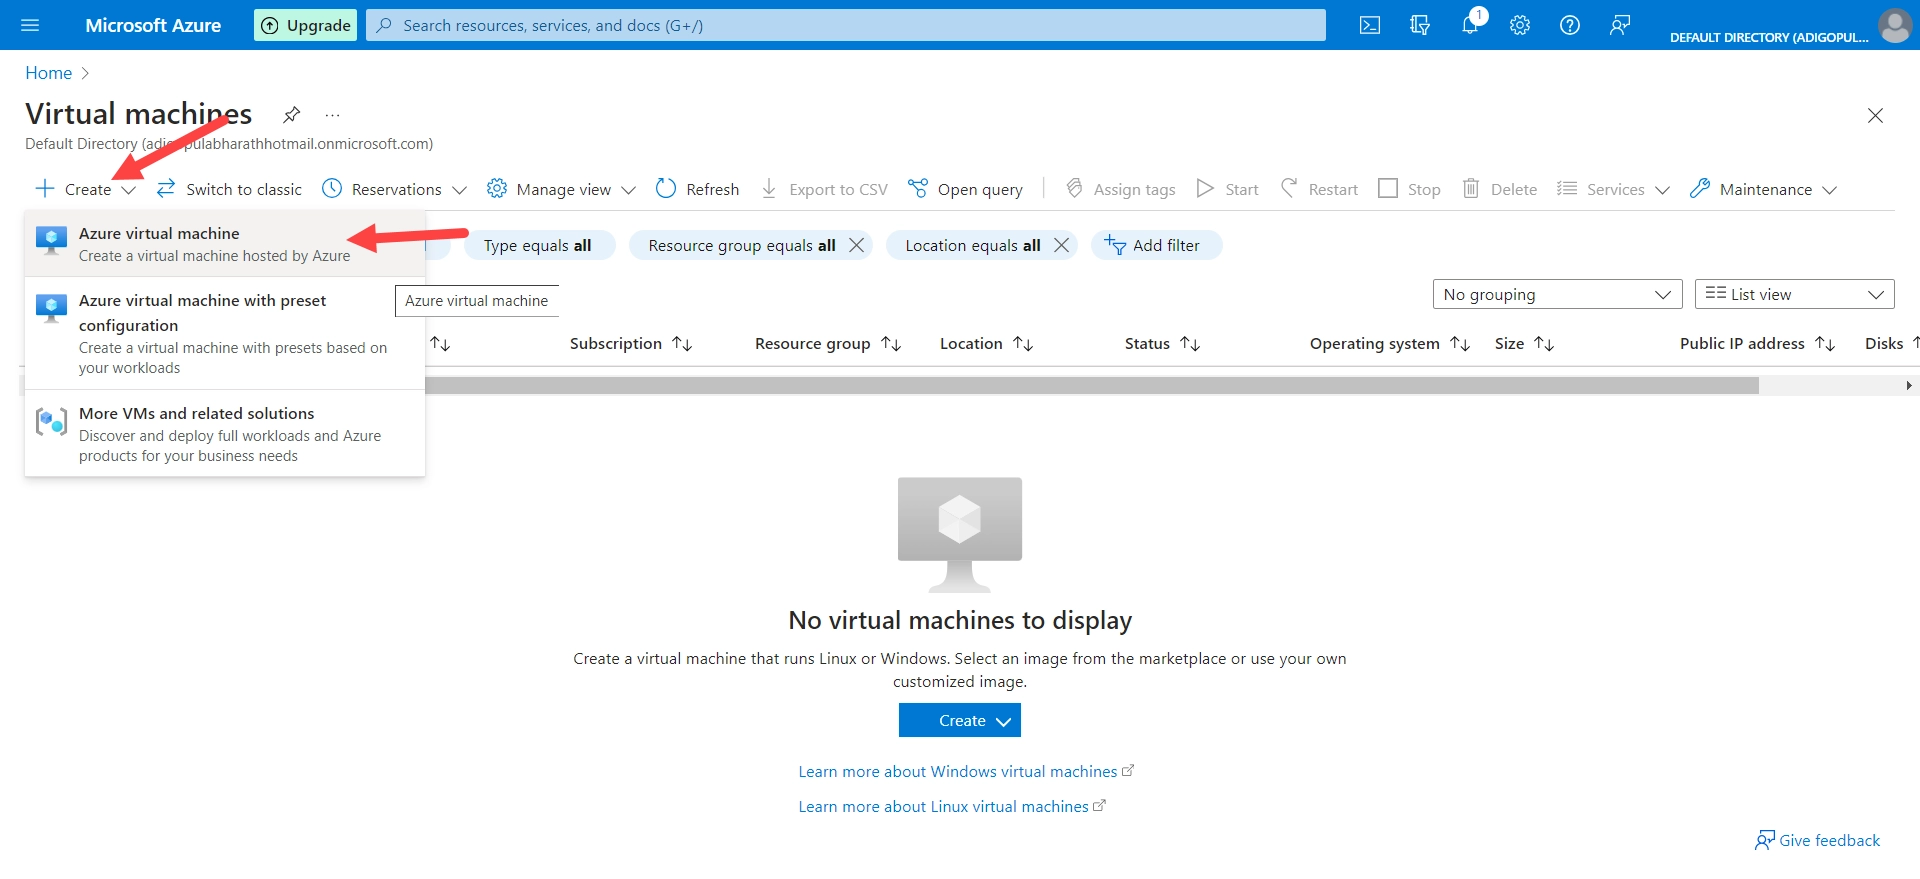
To get things rolling on your new virtual machine, simply hit that “Create” button!
Step 3: Basic Settings
Let’s head over to the “Basics” tab and get things set up just right. Here’s what we need to configure:
Subscription: Select your Azure subscription.
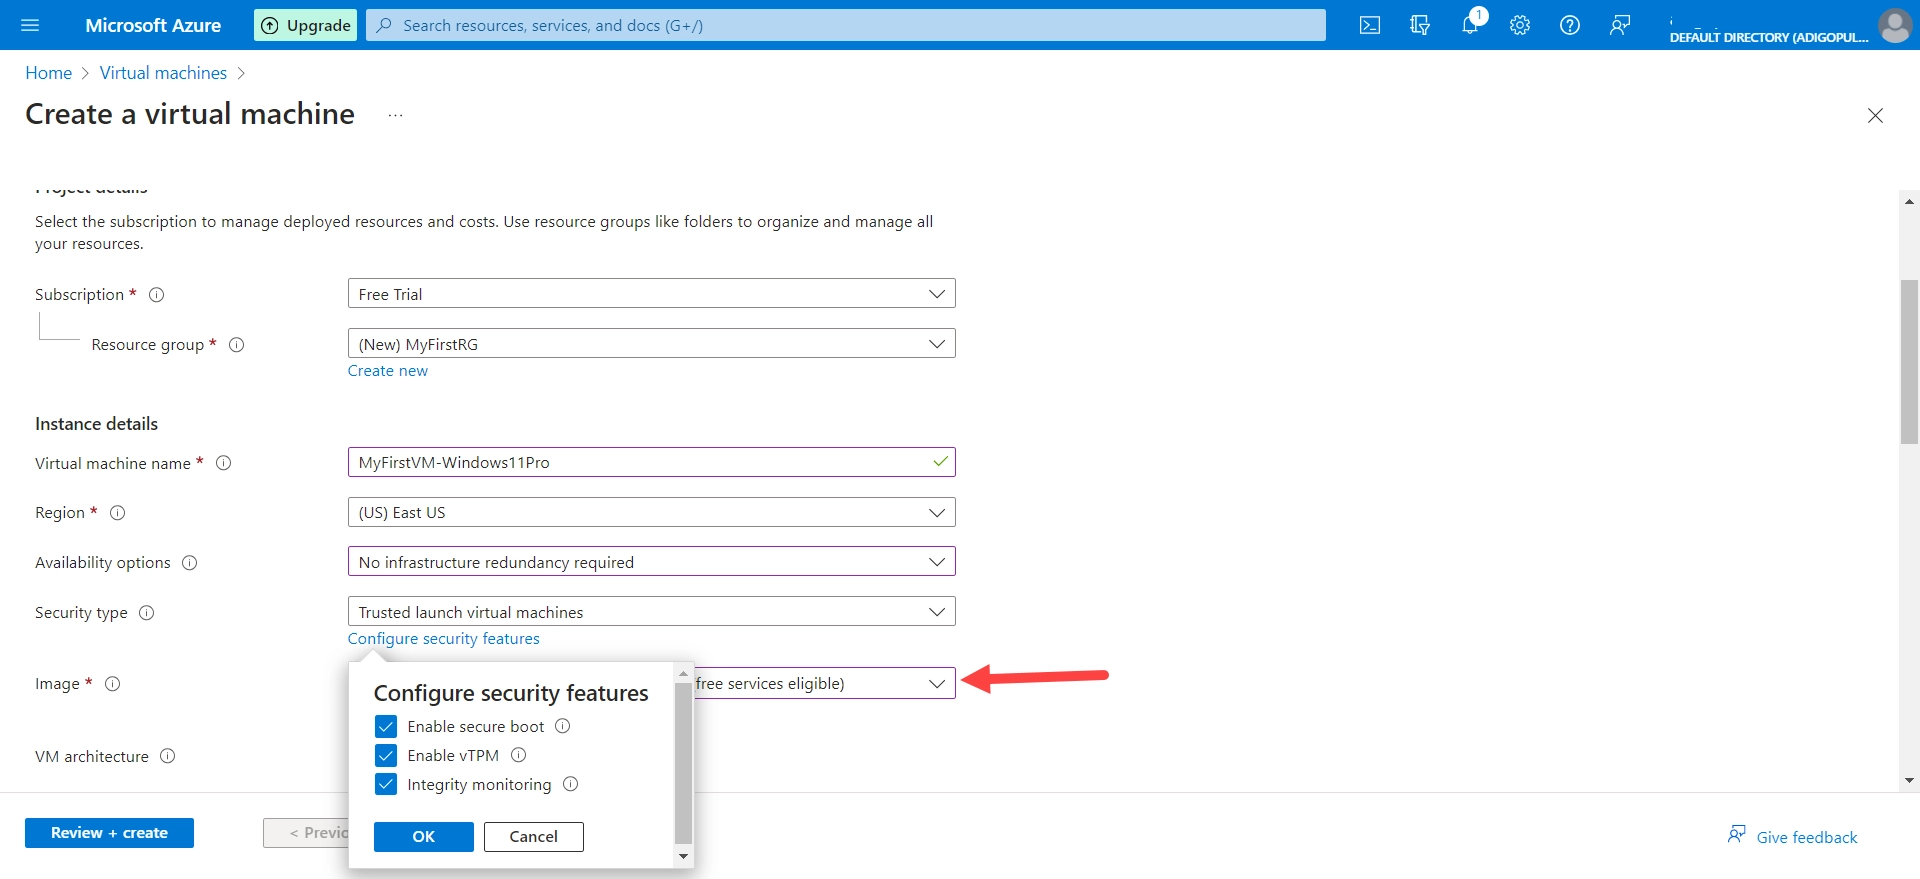
Resource Group: Choose an existing resource group or create a new one.
Region: Choose the Azure region for your VM.
Availability options: If you’re good with it, we can go ahead and leave it as “No infrastructure redundancy required.” But if you want to take an extra step to ensure availability, you can always select an availability zone. It’s all up to you!
Virtual machine name: Give your VM a unique name.
Region: Choose the Azure data center region for your VM.
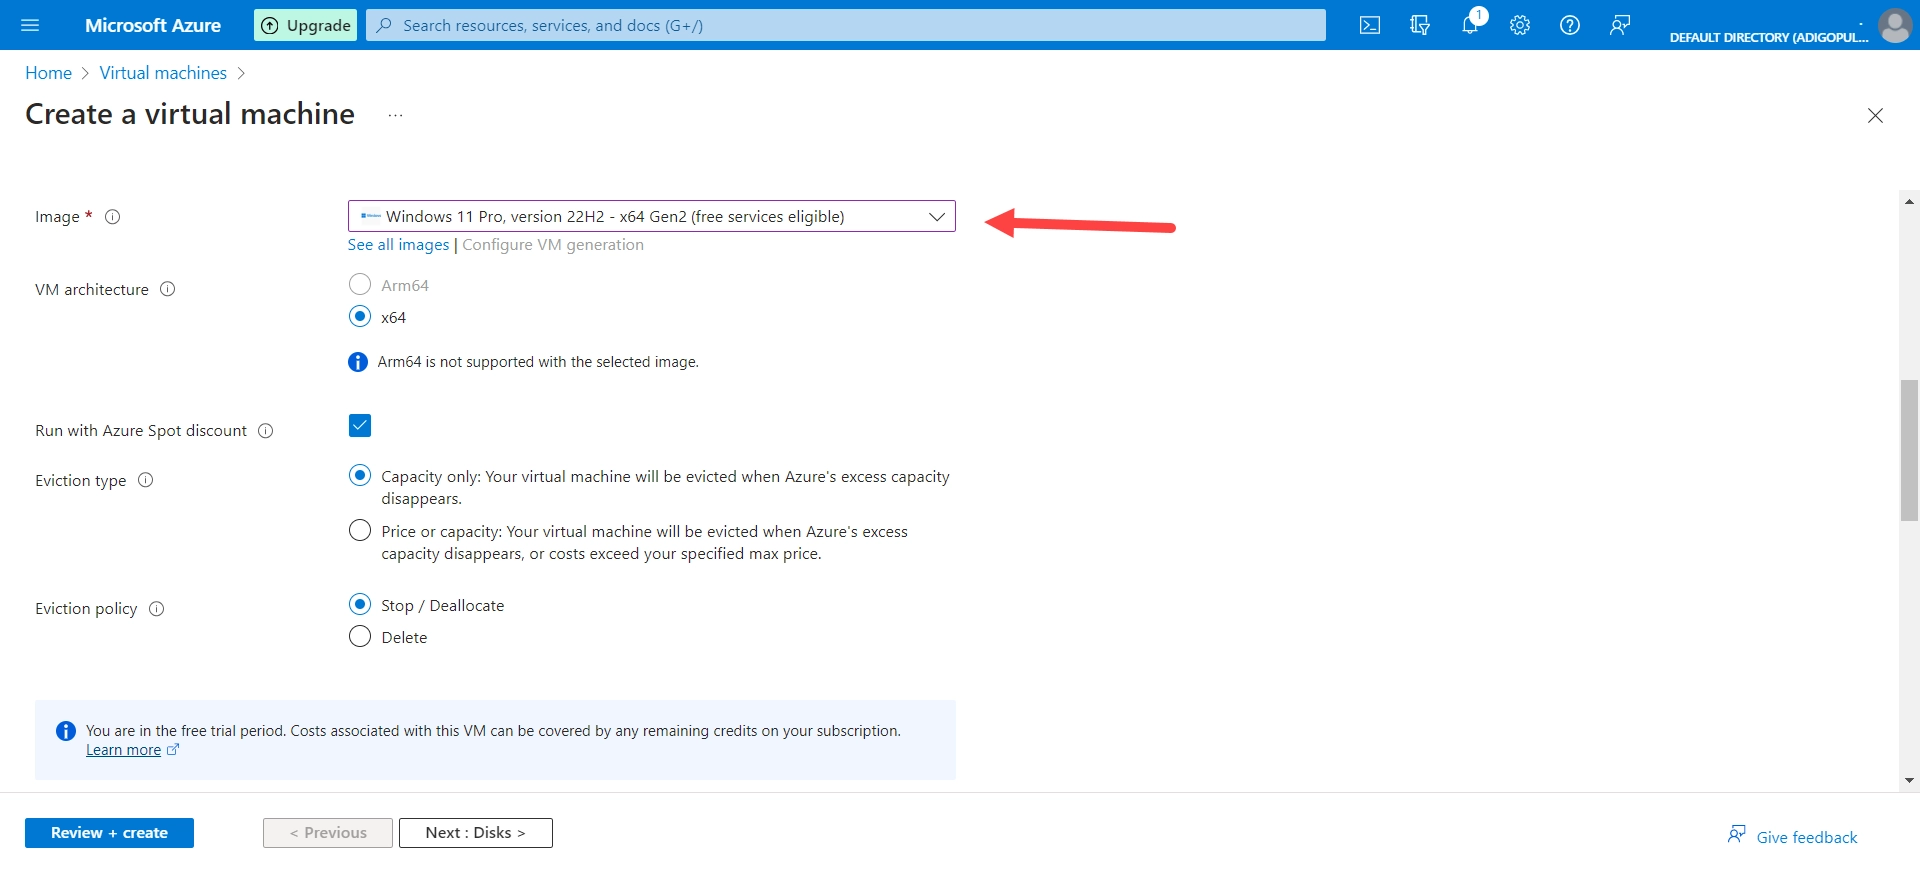
Image: It’s time to pick your preferred Windows image! You’ve got some great options to choose from, including different versions of Windows Server or the newest edition, Windows 11. For me, I’m feeling excited to explore Windows 11!
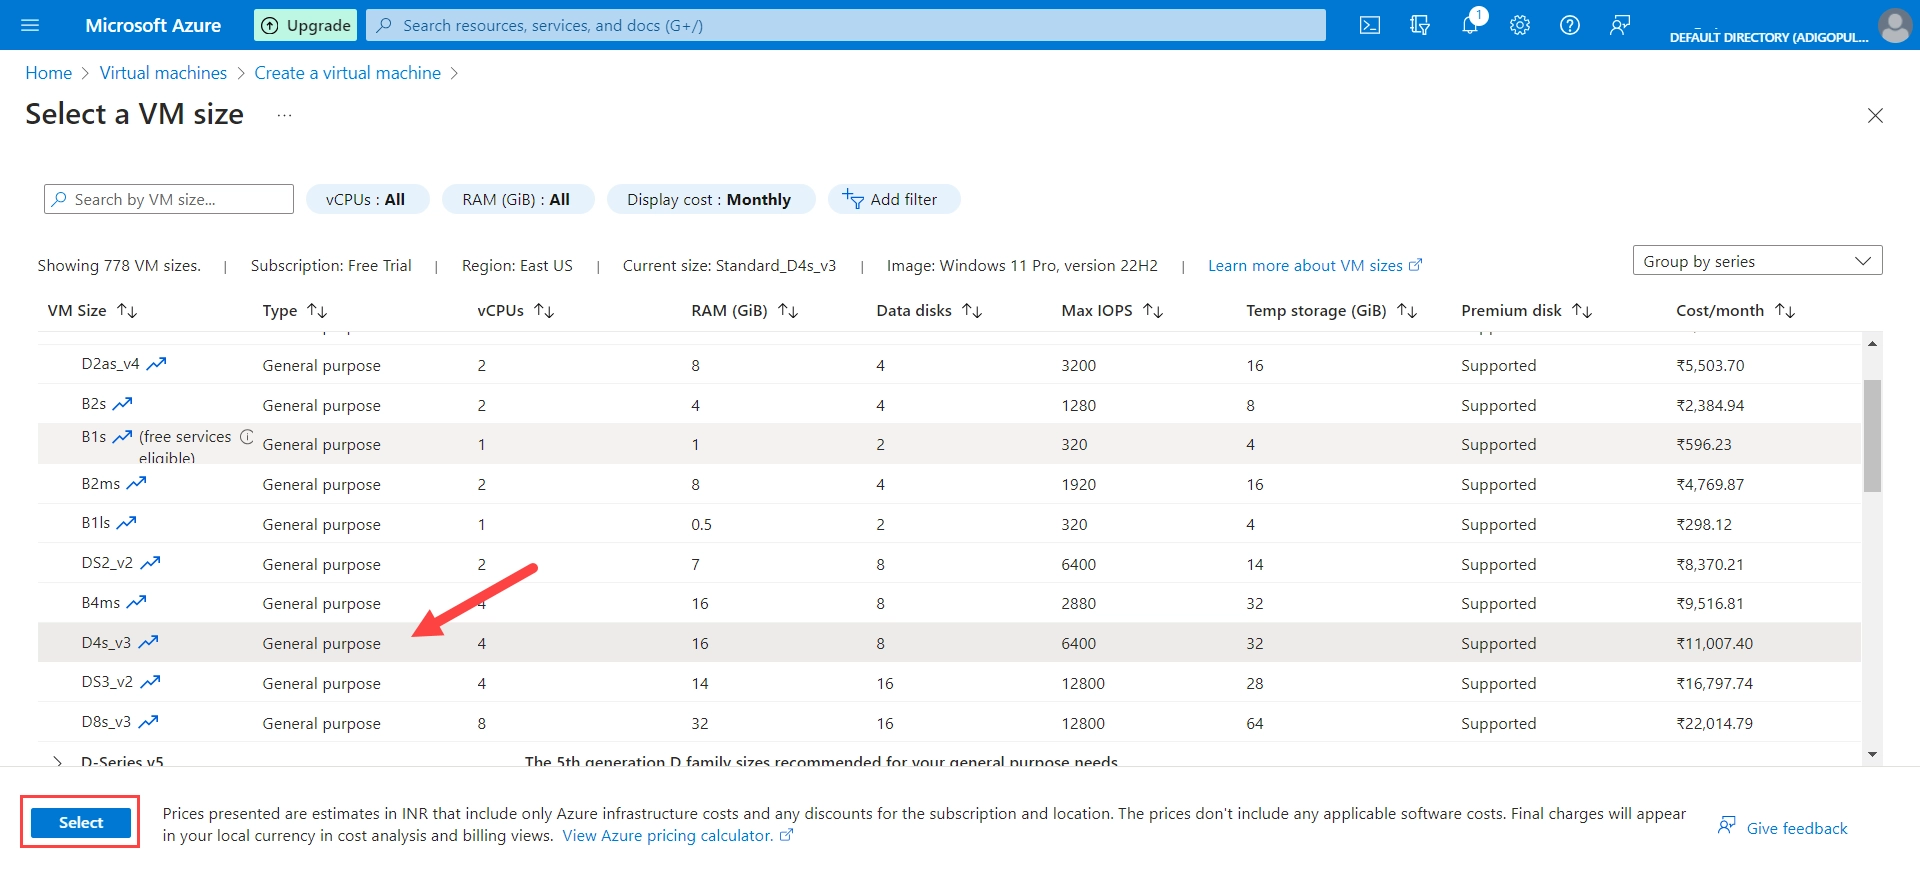
Size: When it comes to selecting the perfect VM size for your needs, there are many options to choose from. In my case, I decided to go with the D4s_v3 because it’s the perfect fit for running my high-end applications.
Administrator account: In order to access your VM with RDP, you’ll need to create a username and password. This will ensure that your virtual machine is secure and protected. Let’s get started with setting up your credentials!
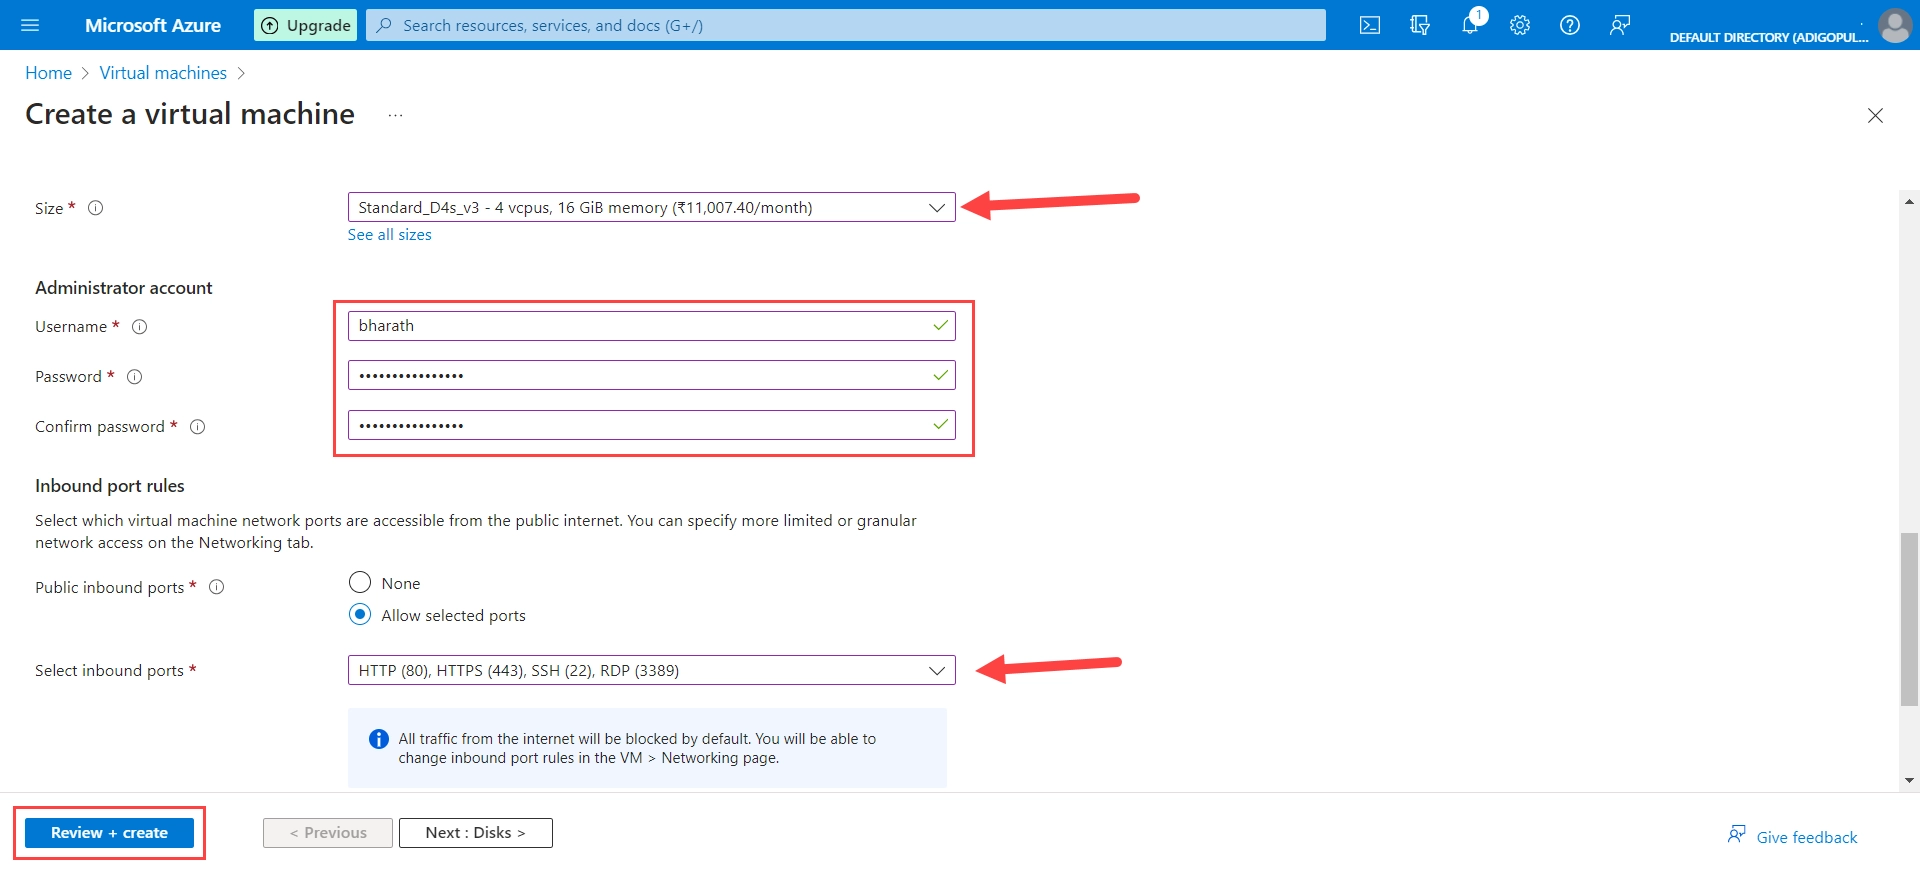
Inbound port rules: I’ve gone ahead and chosen all the rules, so we’re all set! You’re good to go with HTTP (Port 80), HTTPS (Port 443), SSH (Port 22), and RDP (Port 3389). Those are the only ports that are allowed, so we can be sure everything is secure.
Licensing: Review and accept the license terms in order to create a Windows VM.
Step 5: Review + Create
Take a moment to double-check the configuration to make sure everything is set up correctly.
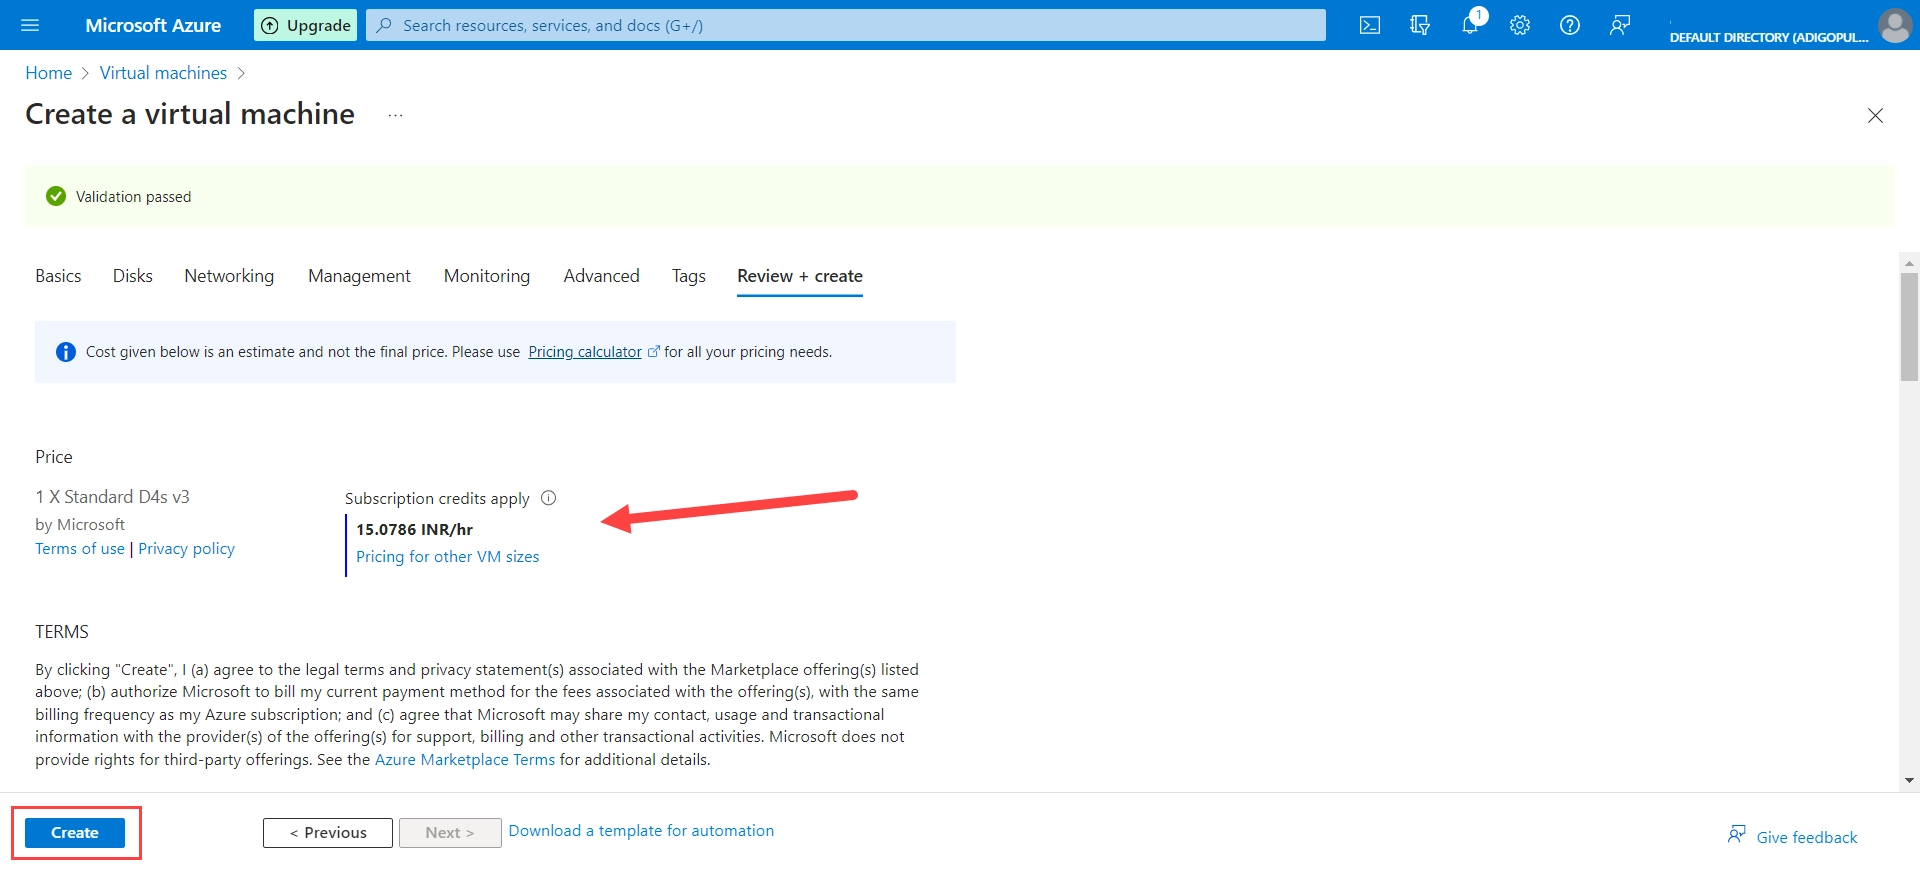
Ready to get started? Just hit “Create” to begin the process of provisioning your new VM.
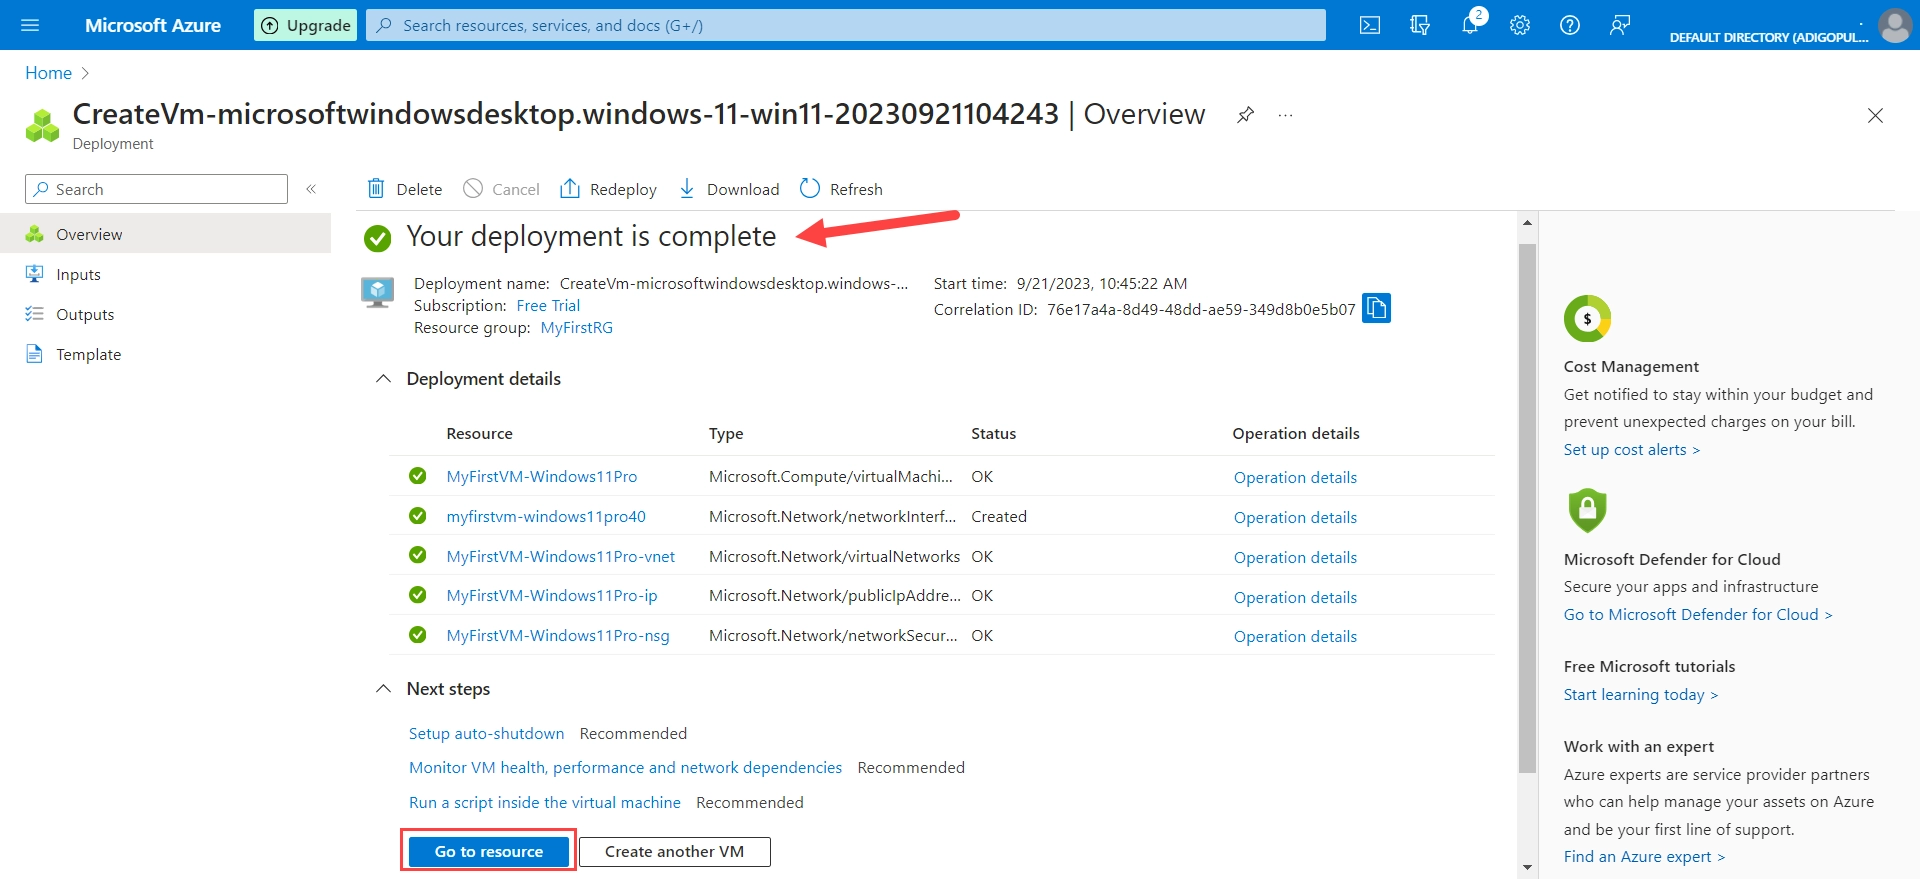
Step 6: Connect to Your Windows VM
Once your Windows VM deployment is finished, you’ll be able to hop on over to it using Remote Desktop Protocol (RDP) for Windows VMs. To gain access, simply use the same administrator username and password you created when you initialized the VM.
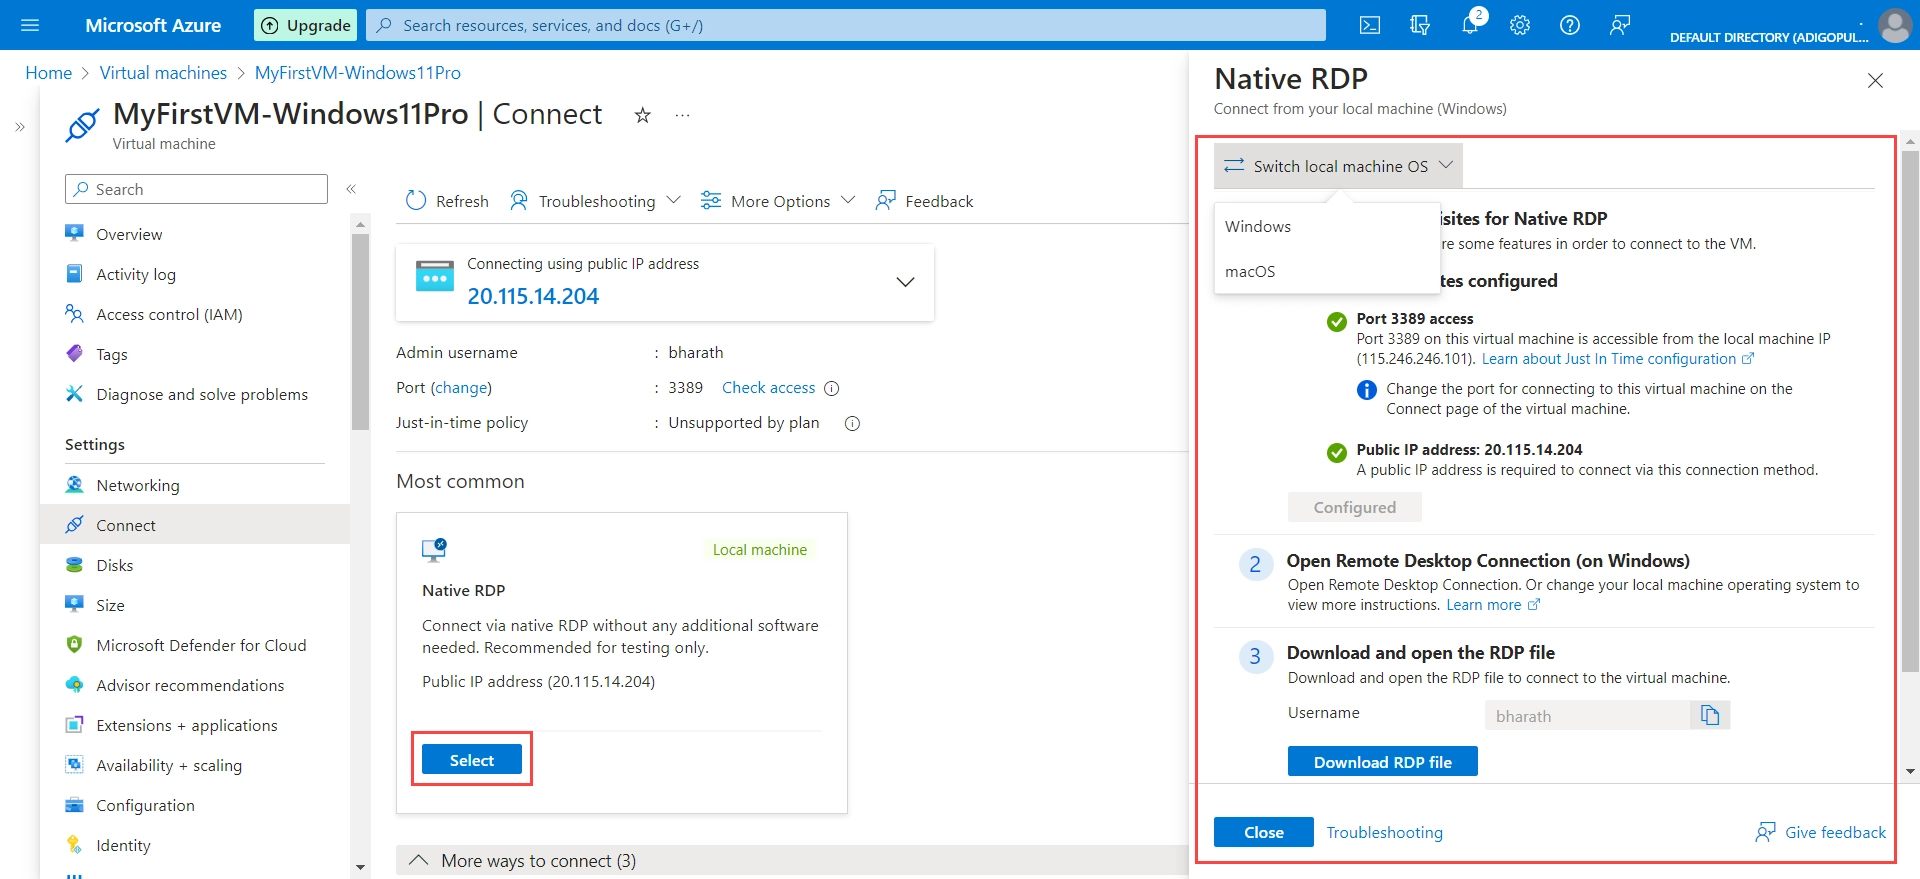
To access your VM, simply click on “Native RDP” and save the RDP file to your local computer.
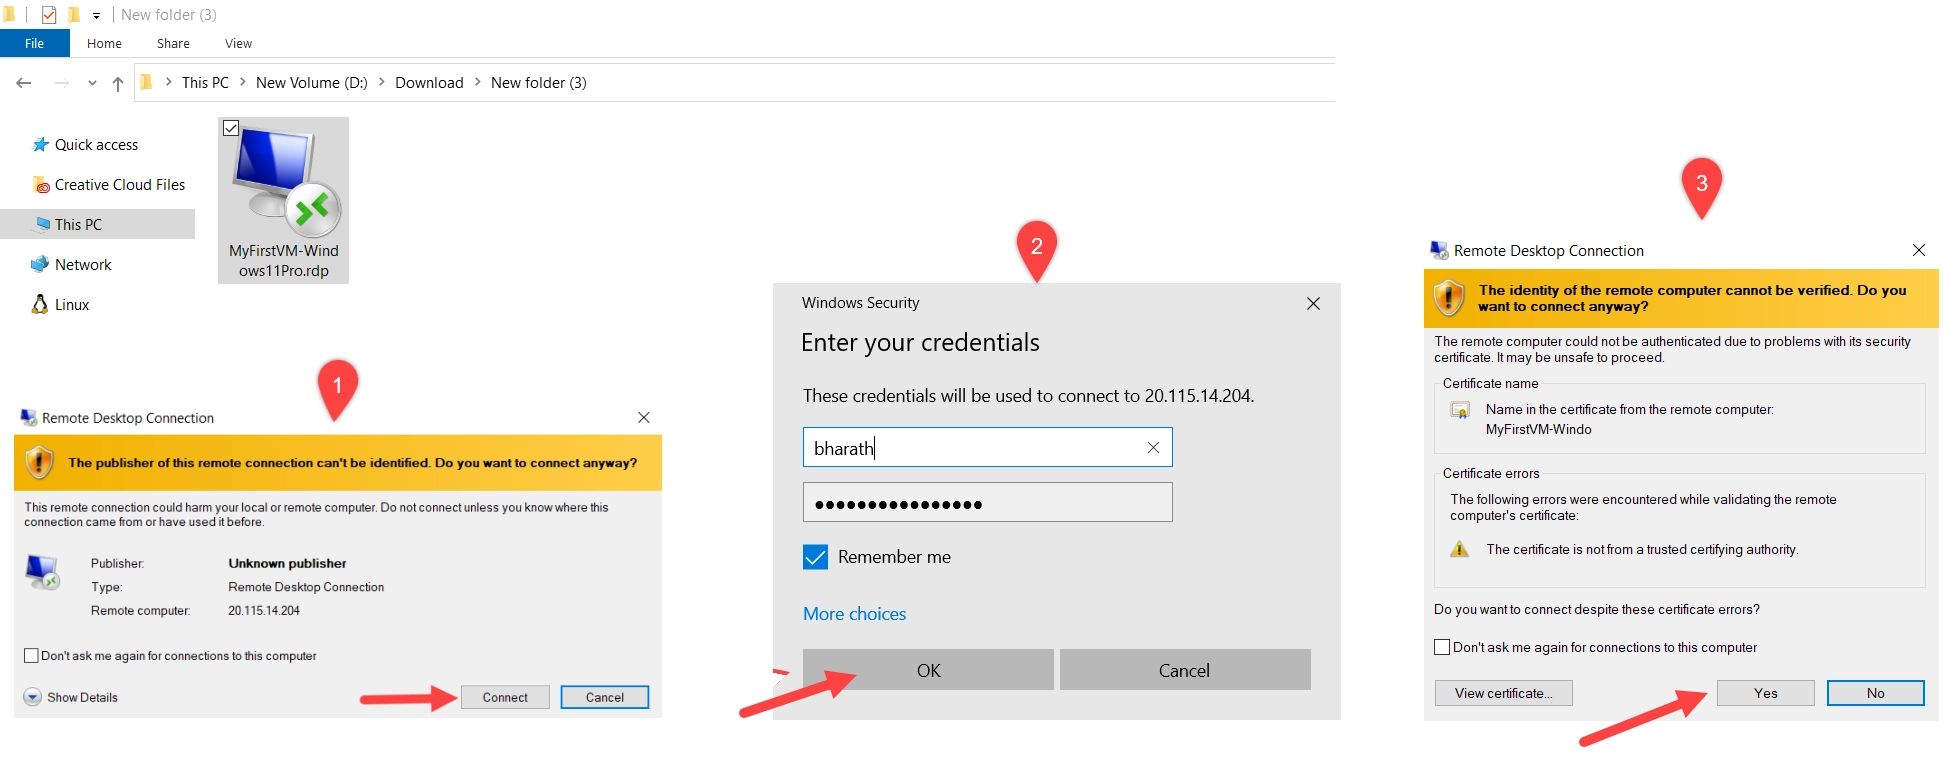
When you’ve got the RDP file downloaded, give it a double-click! If you’re prompted for admin privileges, just hit that Yes button and type in your administrator username and password.
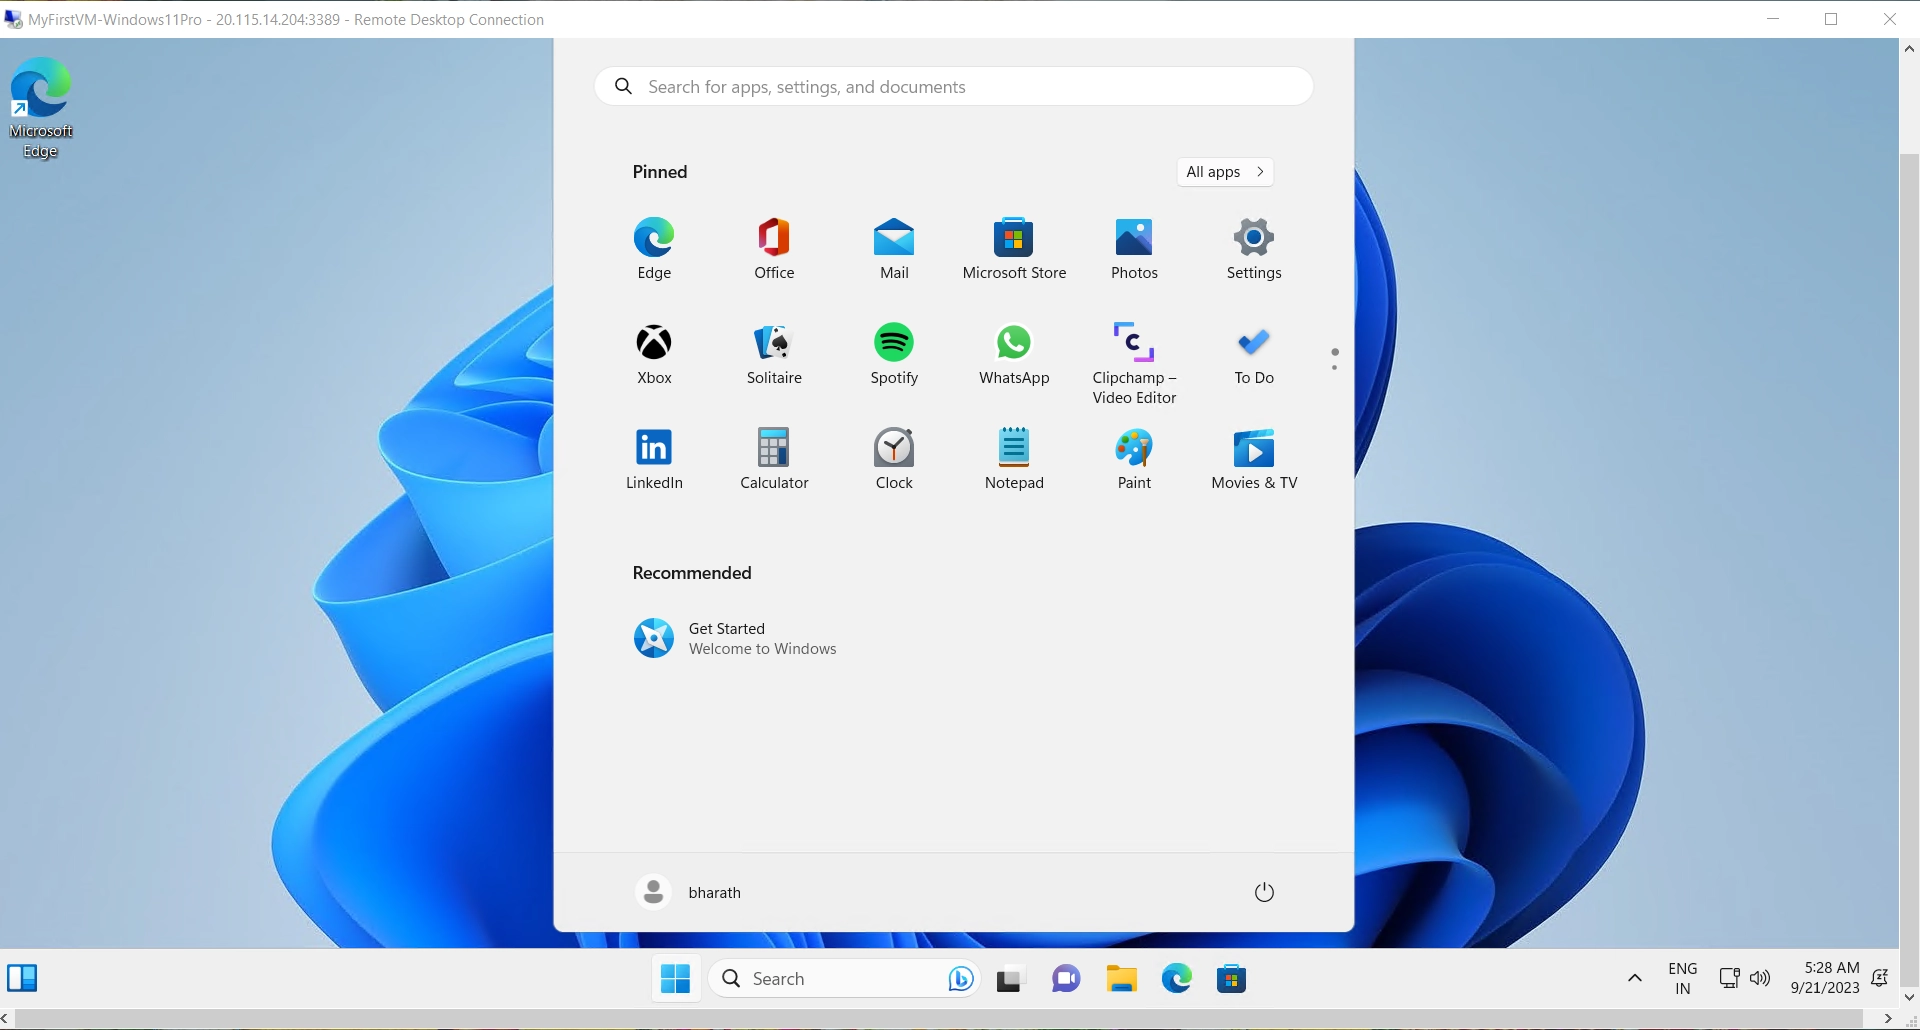
Great news! Your Windows 11 virtual machine is ready to go! Once it prompts you for privacy settings, simply click “Accept,” and you’ll be on your way to exploring your new desktop.
Final Thoughts
Your Windows 11 virtual machine is up and running in Azure! You can now dive into all the exciting new features Windows 11 has to offer, whether you’re using it for software development, testing, or running Windows-specific applications in the cloud. Just remember to keep an eye on your Azure resources and manage them wisely to keep your virtual machine running smoothly.