
Java remains a popular choice for developing and running applications on various platforms, including AWS Linux.
In this blog post, we’ll walk you through the process of installing Java on AWS Linux, providing step-by-step instructions and explanations for each command, including the use of ‘sudo’ and alternatives for configuring Java.
Prerequisites
Before we begin, ensure that you have:
- An AWS account
- Access to an AWS Linux AMI instance
- Sudo privileges on the instance
Step 1: Update Your System
First, connect to your AWS Linux instance using SSH. Once logged in, it’s a good practice to update your system to the latest packages. Use the following command:
sudo dnf updateThis command will fetch the latest available updates and rebuild the DNF package index cache.
Step 2: Install Corretto (Amazon’s Distribution of OpenJDK)
Amazon Linux 2023 comes with Corretto, Amazon’s production-ready distribution of the Open Java Development Kit (OpenJDK), available through the default system repository. To install Java without adding any extra repository, use the following commands:
For Java 8
To install the Java Runtime Environment (JRE):
sudo dnf install java-1.8.0-amazon-corretto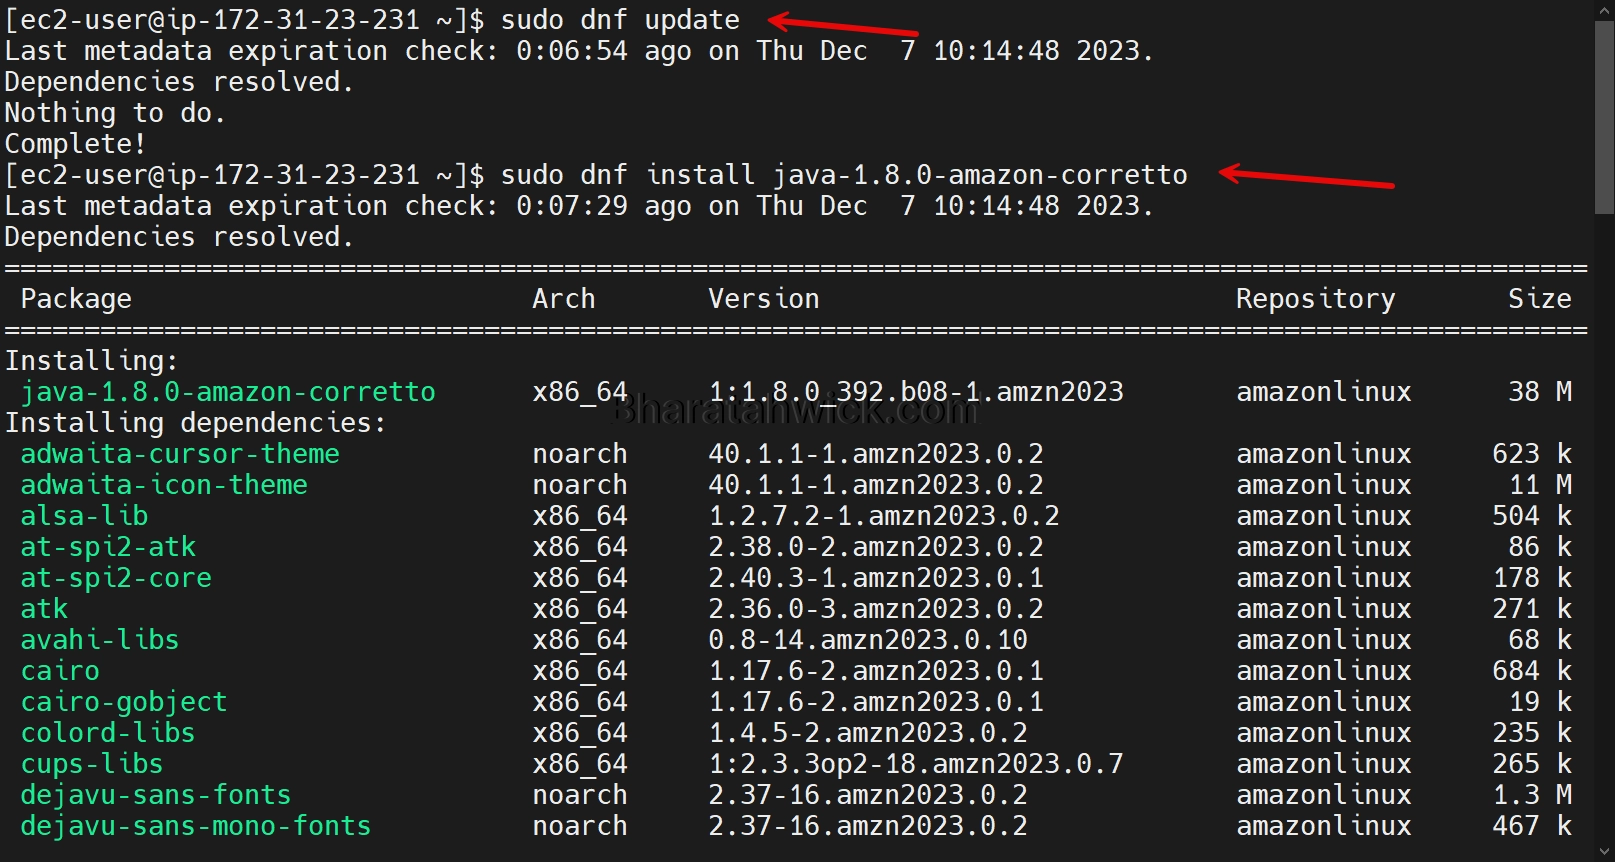
To install the Java Development Kit (JDK):
sudo dnf install java-1.8.0-amazon-corretto-develFor Java 11
For JRE 11:
sudo dnf install java-11-amazon-corretto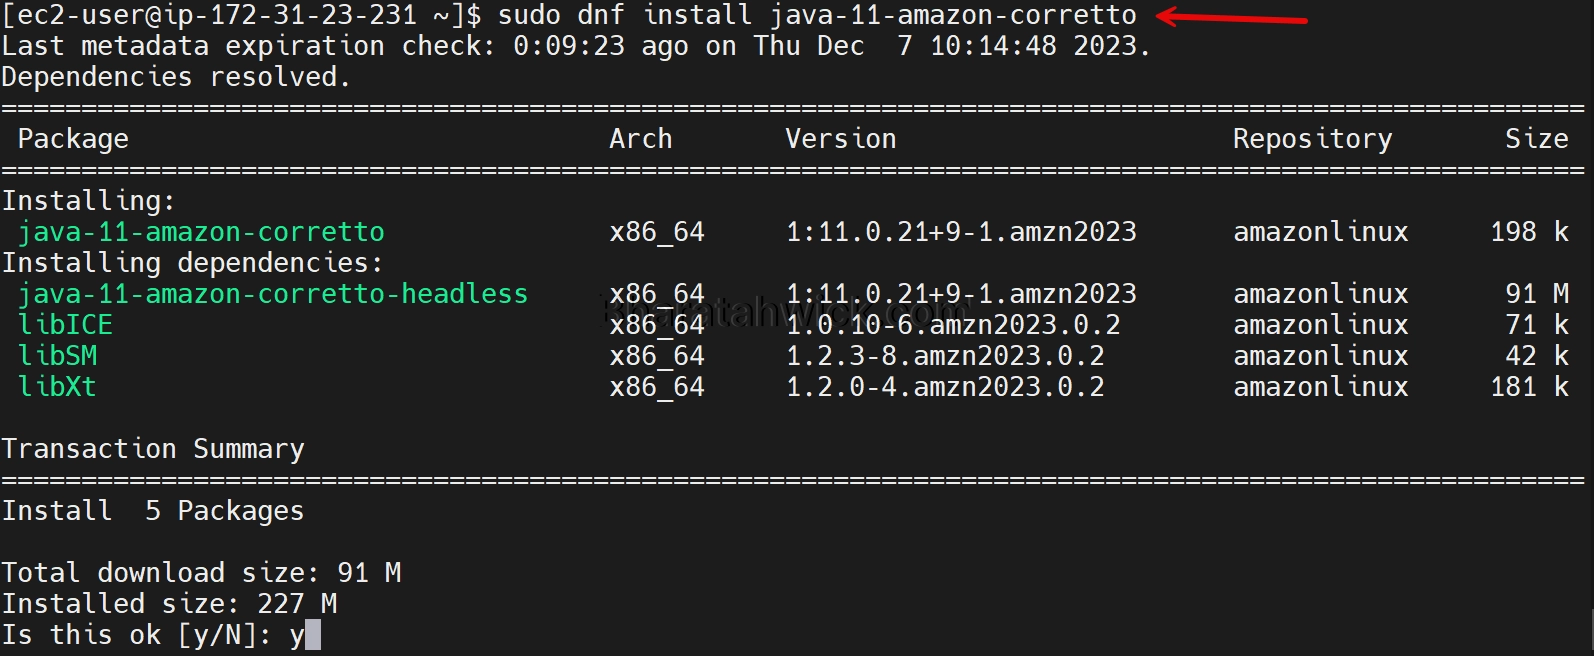
For JDK 11:
sudo dnf install java-11-amazon-corretto-develStep 3: Verify Java Installation
After installation, verify that Java has been installed correctly by checking the version:
java -version
This command will display the installed Java version, confirming a successful installation.
Step 4: Configure Java Alternatives
If you have multiple Java versions installed and need to switch between them, use the alternatives command to configure the default Java version:
sudo alternatives --config java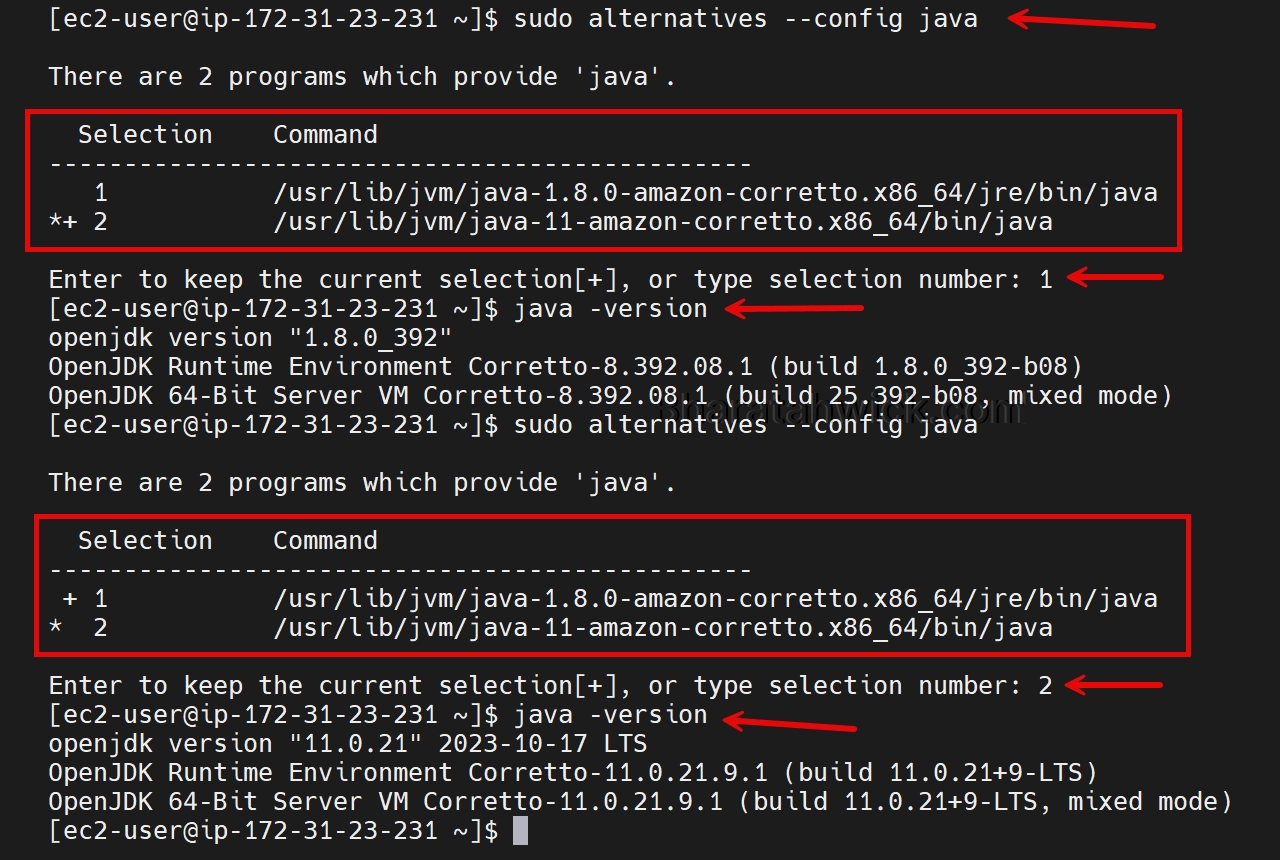
You’ll be presented with a list of installed Java versions. Type the selection number of the Java version you want to set as the default and hit the Enter key.
Important Java Configurations on AWS Linux
When working with Java on AWS Linux, you’ll encounter several important configuration files. Here are some of the key files and their typical locations:
| Configuration File | Details |
|---|---|
/usr/lib/jvm/ | Directory containing installed JVM and JDK versions. |
~/.aws/config and ~/.aws/credentials | AWS shared config and credentials files used by AWS SDKs and CLI tools, located in the .aws directory in the user’s home. |
/etc/alternatives/java | Symbolic link pointing to the default Java installation, managed by the alternatives system. |
/usr/java/latest | Symbolic link that points to the latest installed version of Java. |
JAVA_HOME Environment Variable | An environment variable pointing to the Java installation directory, often set in ~/.bash_profile or ~/.bashrc. |
/etc/profile.d/jdk.sh | Script that sets Java-related environment variables like JAVA_HOME and PATH upon user login. |
/etc/environment | File for setting system-wide environment variables, including JAVA_HOME. |
Final Thoughts
Installing Java on AWS Linux 2023 is straightforward, thanks to the inclusion of Amazon Corretto in the default repository. By following these steps, you can set up Java for your development or production needs.
Remember to choose the appropriate Java version for your applications and keep your system updated for security and performance.