Jenkins is an open-source automation server that supports building, deploying, and automating any project with hundreds of plugins. In this blog post, I will show you how to install Jenkins on Amazon AWS Linux 2023 AMI, which is a general-purpose rpm-based Linux distribution and a successor to Amazon Linux 22. Amazon Linux 2023 AMI integrates with AWS services and is designed to be deployed at scale in the cloud.
Prerequisites
Before you start, you will need the following:
- An AWS account and access to the AWS Management Console
- An EC2 instance running Amazon Linux 2023 AMI. You can launch one from the EC2 console by choosing the AL2023 AMI from the Quick Start list or by searching for “al2023-ami” in the public images filter. Make sure you select an instance type that meets the minimum hardware requirements for Jenkins, such as t3.medium or higher4. You will also need to configure the security group to allow inbound traffic on port 22 (SSH) and port 8080 (Jenkins web interface).
- A key pair to connect to the EC2 instance via SSH. You can create one from the EC2 console or use an existing one.
- A web browser to access the Jenkins web interface.
Step 1: Connect to the EC2 instance via SSH
Once you have launched the EC2 instance, you can connect to it via SSH using the key pair that you specified. You can find the public IP address of the instance from the EC2 console or by using the AWS CLI. For example, if your instance ID is i-077c80ef436f4cc79, you can run the following command to get the IP address:
aws ec2 describe-instances --instance-ids i-077c80ef436f4cc79 --query 'Reservations[*].Instances[*].{Instance:InstanceId,IP:PublicIpAddress}' --output json- aws ec2 describe-instances: This part of the command calls the AWS CLI and specifies that you want to describe EC2 instances.
- –instance-ids i-077c80ef436f4cc79: This flag is used to specify the EC2 instance for which you want to retrieve information. Replace i-077c80ef436f4cc79 with the actual instance ID you’re interested in.
- –query ‘Reservations[*].Instances[*].{Instance:InstanceId,IP:PublicIpAddress}’: This flag uses JMESPath query language to filter and format the output. In this case, it’s requesting information about instances and specifically selecting the Instance ID (Instance:InstanceId) and Public IP Address (IP:PublicIpAddress) for each instance.
- –output json: This flag specifies the output format for the command. In this case, it’s set to JSON, making it easier to parse and work with programmatically.
So, when you run this command, it retrieves and displays information about the specified EC2 instance, including its Instance ID and Public IP Address, in JSON format.

Then, you can use the IP address and the key pair to connect to the instance via SSH. For example, if your key pair is named “aws-key.pem” and the IP address is 54.123.456.78, you can run the following command:
ssh -i aws-key.pem ec2-user@54.123.456.78You should see a welcome message from Amazon Linux 2023 and a prompt to enter commands.
To keep your instance’s software packages up to date, run this command for a quick software update:
sudo yum updateStep 2: Install Java
Jenkins requires Java to run, so you will need to install it on the EC2 instance. you can install OpenJDK 11 by running the following command:
sudo dnf install java-17-amazon-corretto -yNow, you can verify the Java version by running the following command:
java -versionStep 3: Install Jenkins
Now that you have Java installed, you can proceed to install Jenkins. You will need to add the Jenkins repository to your ‘yum’ sources list, import the GPG key, and install the Jenkins package. You can do this by running the following commands:
sudo wget -O /etc/yum.repos.d/jenkins.repo \
    https://pkg.jenkins.io/redhat-stable/jenkins.repo
To install the package, you need to import a key file from Jenkins-CI. Use this command to do that:
sudo rpm --import https://pkg.jenkins.io/redhat-stable/jenkins.io-2023.keyTo check if there are any updates available for the packages, run this command:
sudo yum upgradeNow, Install Jenkins by using the following command:
sudo yum install jenkins -yMake the Jenkins service start by default when the system turns on:
sudo systemctl enable jenkinsInitiate Jenkins as a service that operates in the background:
sudo systemctl start jenkinsUse the following command to check if the Jenkins service is working properly:
sudo systemctl status jenkins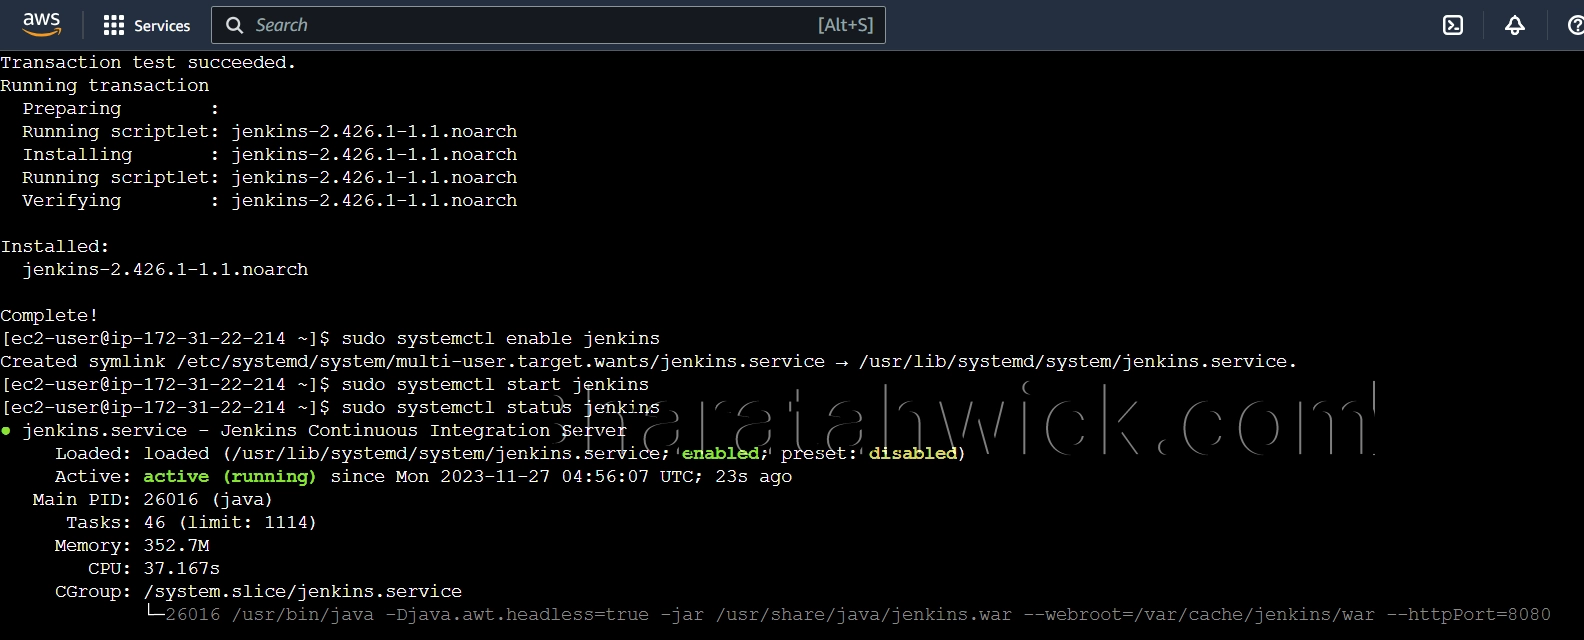
Step 4: Access the Jenkins web interface
Now that you have Jenkins running on the EC2 instance, you can access the Jenkins web interface from your web browser. You will need to use the public IP address of the instance and port 8080. For example, if your IP address is 54.123.456.78, you can enter the following URL in your browser: “http://54.123.456.78:8080”
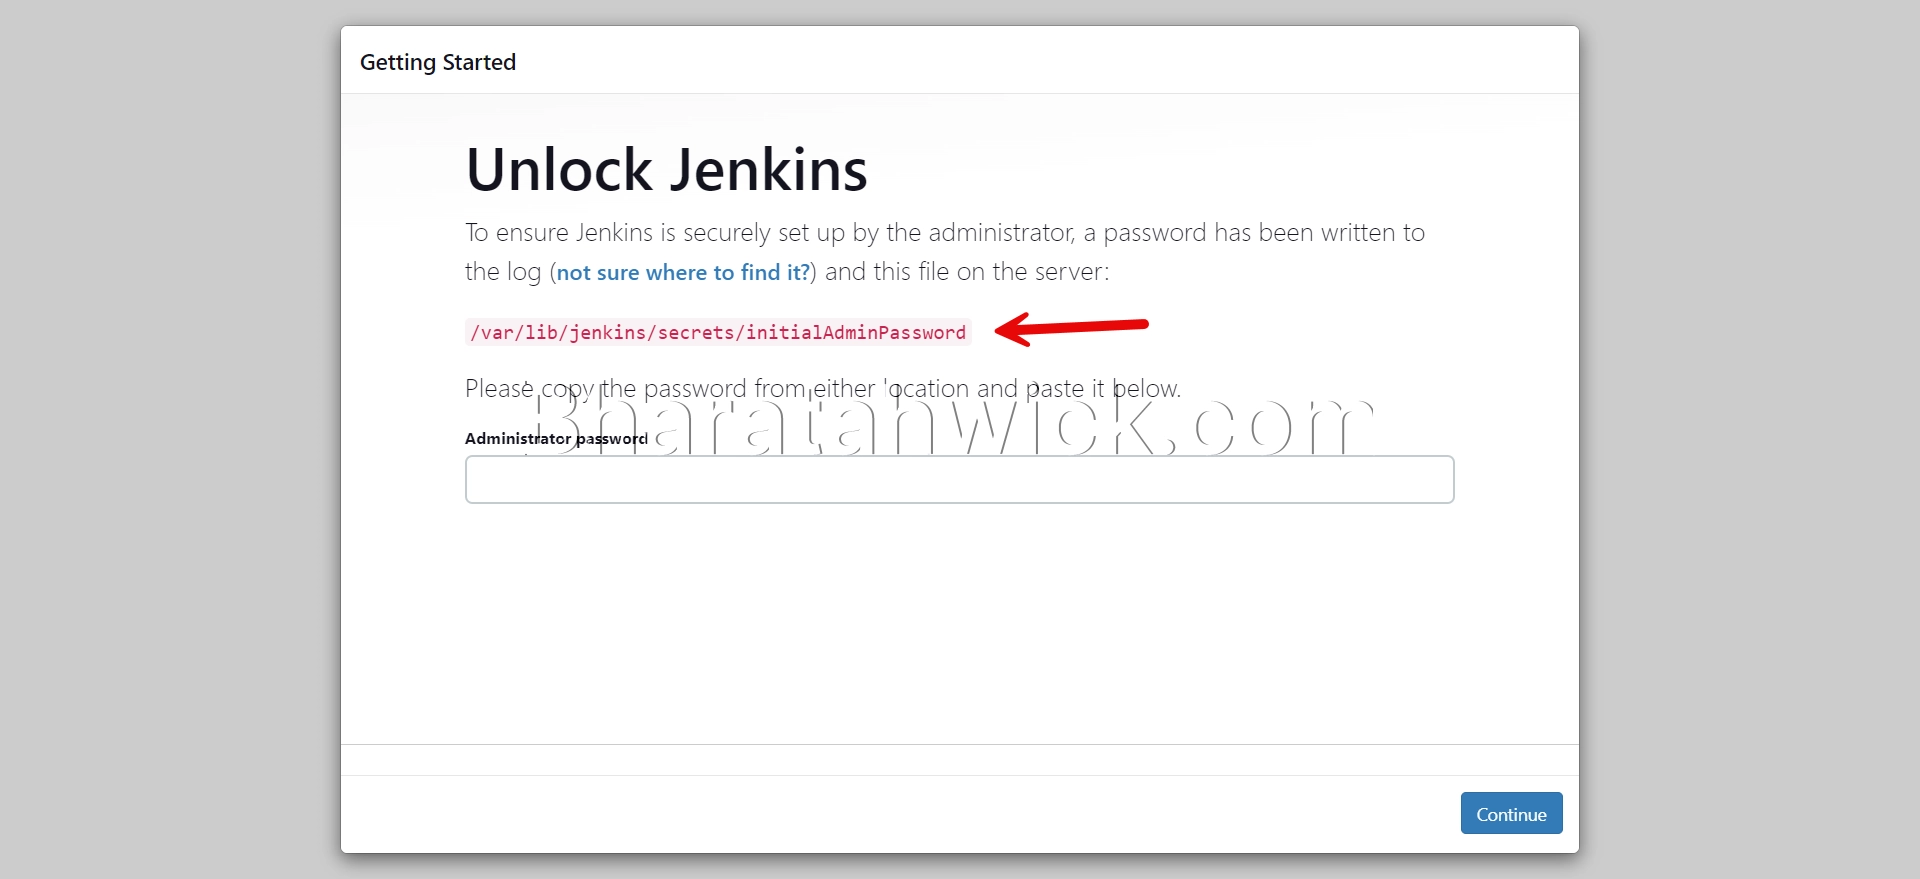
This screen asks you to enter the initial administrator password, which is stored in a file on the EC2 instance. You can retrieve the password by running the following command on the SSH terminal:
sudo cat /var/lib/jenkins/secrets/initialAdminPassword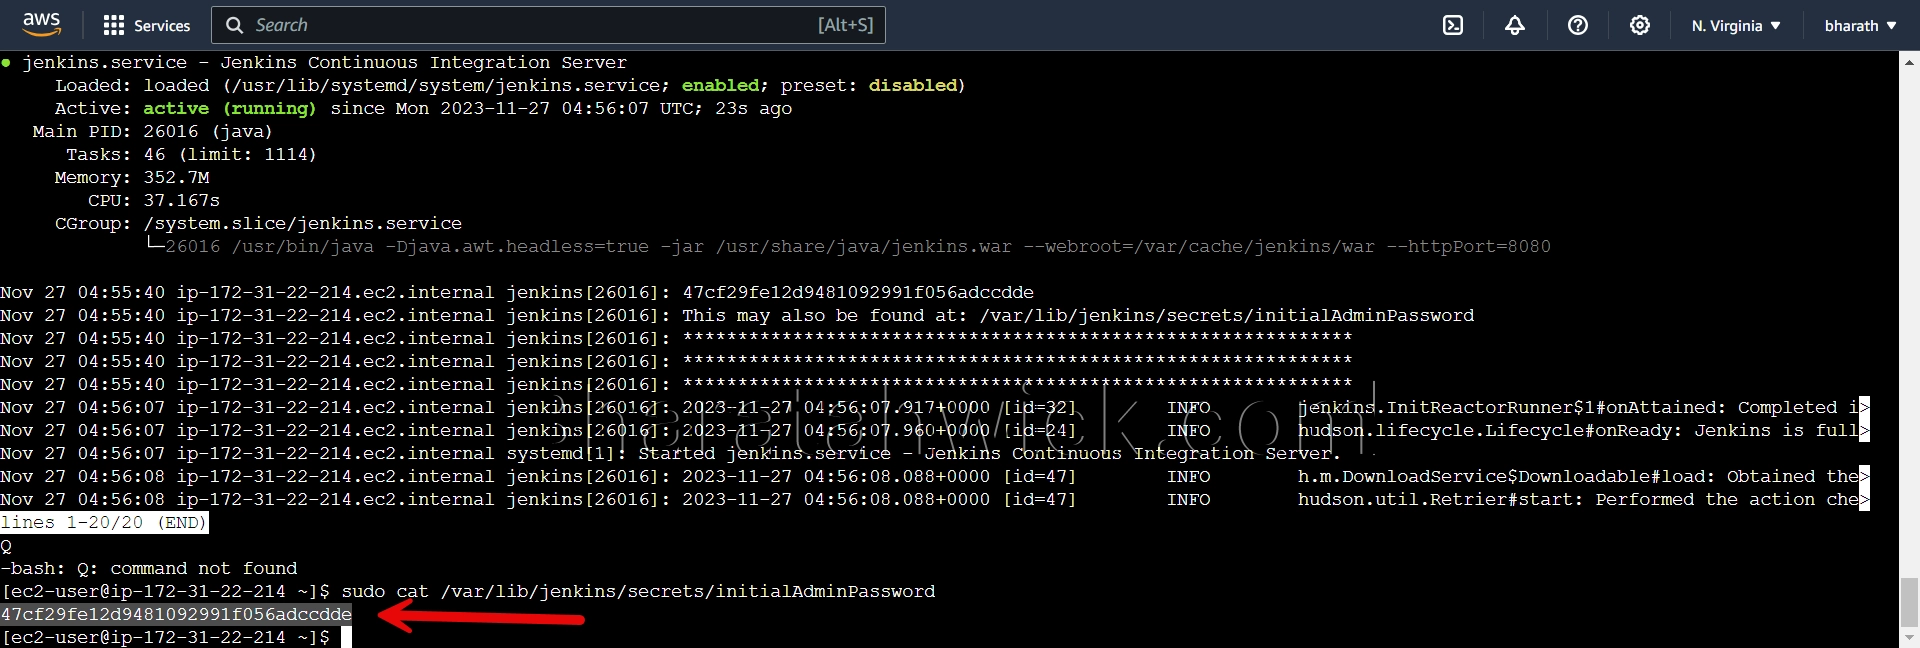
Copy and paste the password into the text box and click Continue.
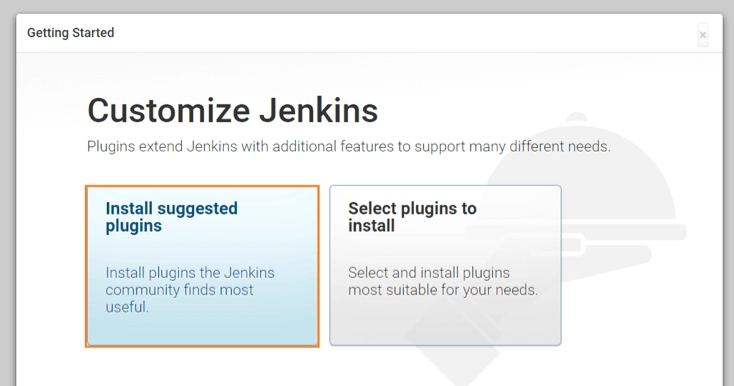
This screen allows you to customize your Jenkins installation by choosing which plugins to install. You can either select Install Suggested Plugins, which will install the most common and useful plugins, or select Specific Plugins to install, which will let you choose from a list of available plugins. For this tutorial, I will choose the first option (Suggested Plugins) and click Install.
Now, It shows the progress of the plugin installation. It may take a few minutes to complete.
Next, you need to create an admin user for Jenkins. You can enter your desired username, password, full name, and email address. For example, I will enter the following:
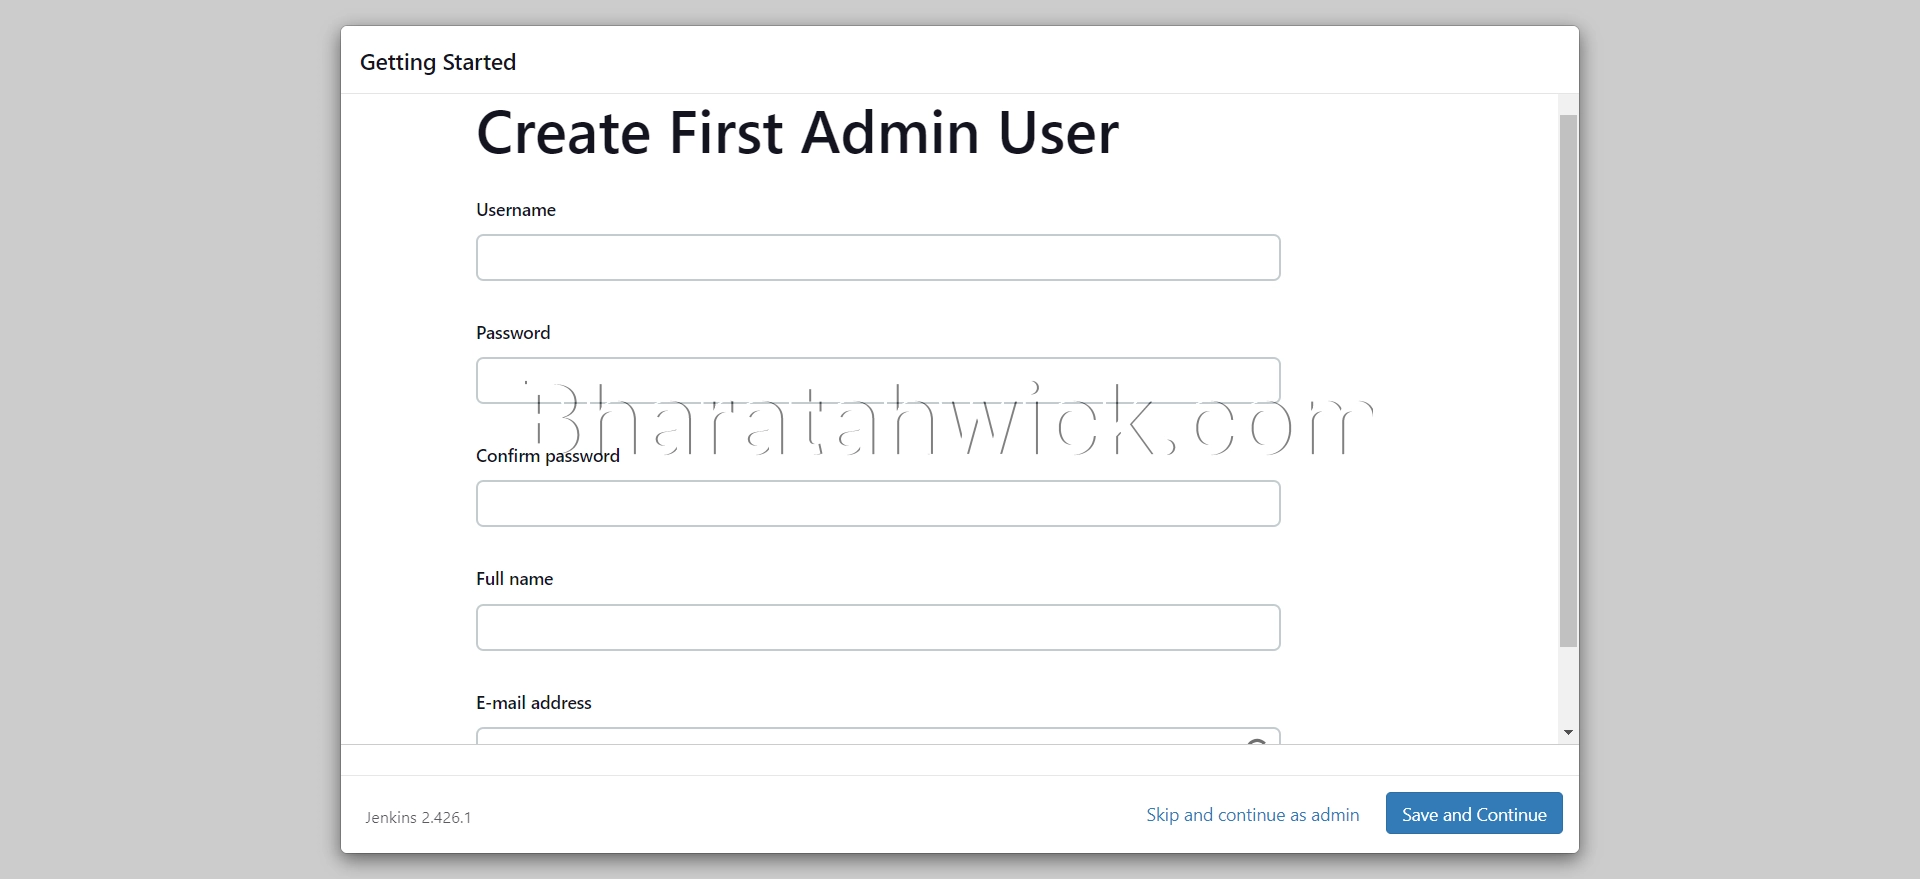
- Username: admin
- Password: admin123
- Confirm password: admin123
- Full name: Admin
- E-mail address: admin@example.com
Then, I will click Save and continue.
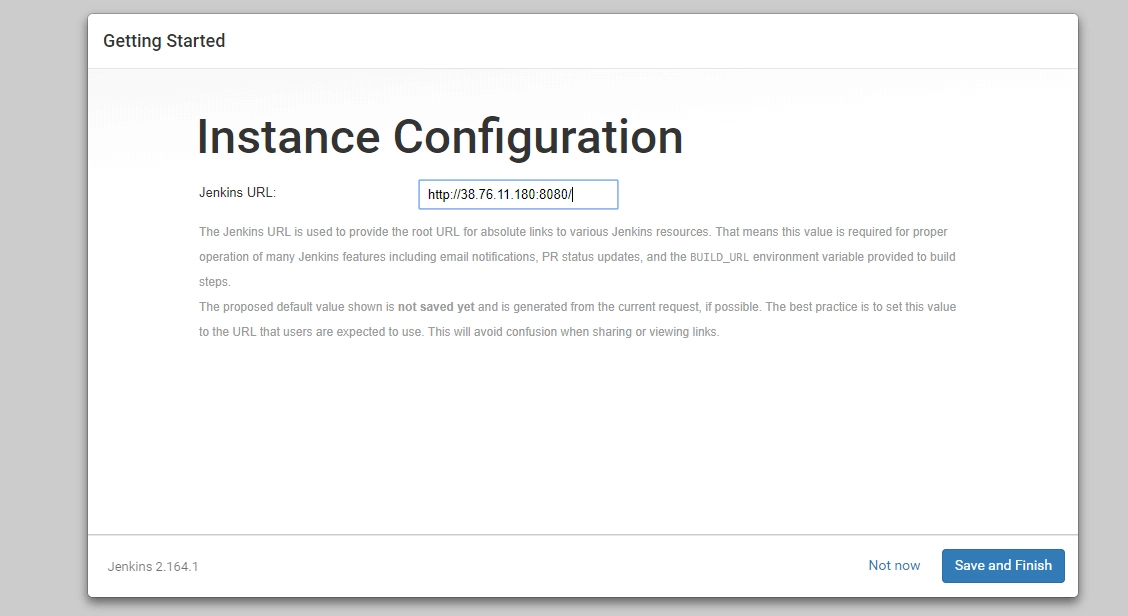
Now, you need to configure the Jenkins URL, which is the base URL for your Jenkins installation. By default, it is set to the IP address and port of the EC2 instance (http://54.123.456.78:8080), but you can change it if you have a domain name or a load balancer. For this tutorial, I will leave it as it is and click Save and finish.
This screen confirms that your Jenkins installation is complete and ready to use. You can click Start using Jenkins to go to the Jenkins dashboard. You should see a screen like this:
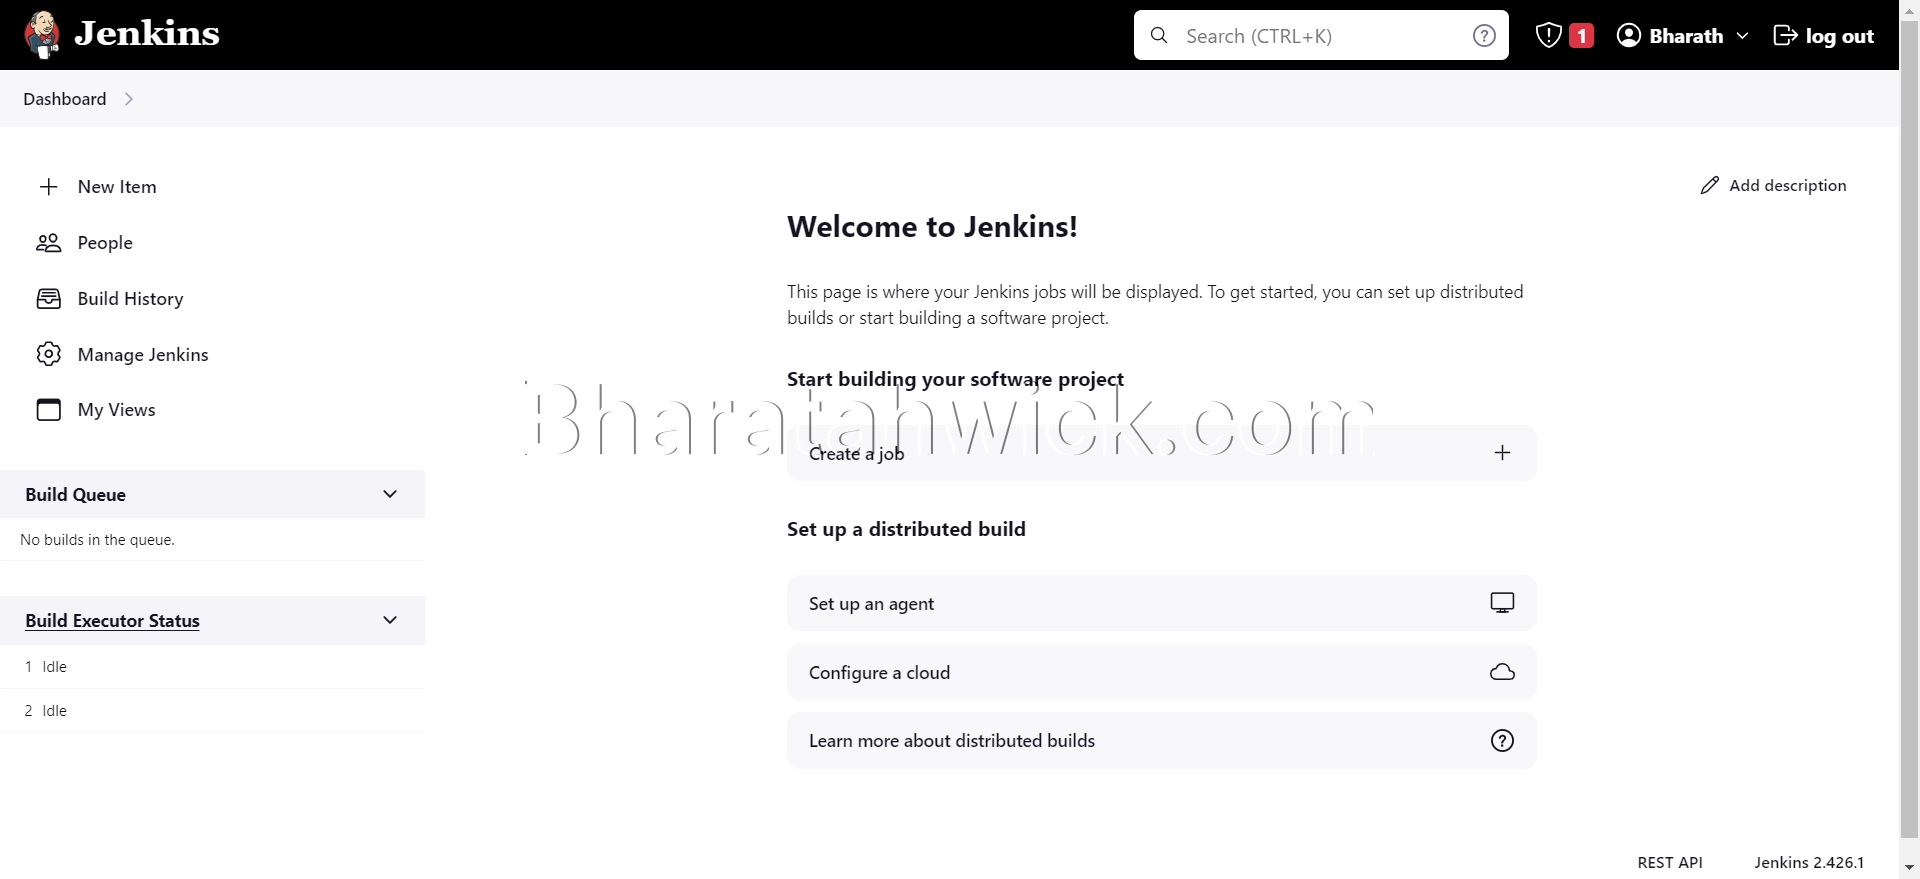
This screen shows the Jenkins dashboard, where you can create and manage your projects, view the build history, configure the system settings, and access the plugins and documentation. You have successfully installed Jenkins on Amazon Linux 2023.
Conclusion
In this guide, we’ve covered the essential steps to install Jenkins on Amazon AWS Linux 2023 AMI. Jenkins provides a powerful platform for continuous integration and delivery, and with this installation, you are well on your way to enhancing your development workflow. Happy automating!
