
Tomcat is a popular open-source web server and servlet container that supports Java web applications. In this blog post, I will show you how to install Tomcat on AWS Linux 2023, a Linux distribution based on Amazon Web Services (AWS Linux).
I will also show you how to configure Tomcat to run as a service, create a user for Tomcat, and enable a web management interface.
Prerequisites
Before you begin, you will need the following:
- An AWS account and an EC2 instance running AWS Linux 2023. You can follow this [guide] to create and launch an EC2 instance.
- SSH access to your EC2 instance. You can use PuTTY, WinSCP, or any other SSH client to connect to your instance. You can follow this [guide] to set up SSH access.
- A web browser to access the Tomcat web applications. You can use Chrome, Firefox, Safari, or any other web browser of your choice.
Step 1: Update your system
The first step is to update your system by running the following command in your terminal:
sudo yum update
sudo yum upgrade
This will install the latest available updates and rebuild the yum package index cache. This may take some time depending on your internet speed and the number of updates.
Step 2: Install Java
The next step is to install Java, which is a distribution of the Open Java Development Kit (OpenJDK) developed and maintained by AWS (Corretto).
You can choose between Java 8, 11, or 17 depending on your needs. To install Java, run one of the following commands in your terminal:
For Java 8 JRE
sudo dnf install java-1.8.0-amazon-correttoFor Java 8 JDK
sudo dnf install java-1.8.0-amazon-corretto-develFor Java 11 JRE
sudo dnf install java-11-amazon-correttoFor Java 11 JDK
sudo dnf install java-11-amazon-corretto-develFor Java 17 JRE
sudo dnf install java-17-amazon-correttoFor Java 17 JDK
sudo dnf install java-17-amazon-corretto-develYou can check the installed Java version by running the following command in your terminal:
java -versionYou should see the output similar to this:

Step 3: Install wget
The next step is to install wget, which is a tool for downloading files from the web. You can use the following command in your terminal to install it:
sudo yum install wgetStep 4: Download Tomcat
The next step is to download the latest version of Tomcat from the official website. As of this writing, the latest version is 10.0.23. You can use the following command in your terminal to download it:
sudo wget https://archive.apache.org/dist/tomcat/tomcat-10/v10.0.23/bin/apache-tomcat-10.0.23.tar.gzThis will download a compressed file named apache-tomcat-10.0.23.tar.gz to your current directory.

Step 5: Extract and move Tomcat
The next step is to extract the downloaded file and move it to the /opt/tomcat folder. You can use the following commands in your terminal to do this:
sudo tar -xvf apache-tomcat-10.0.23.tar.gz
sudo mv apache-tomcat-10.0.23 /opt/tomcat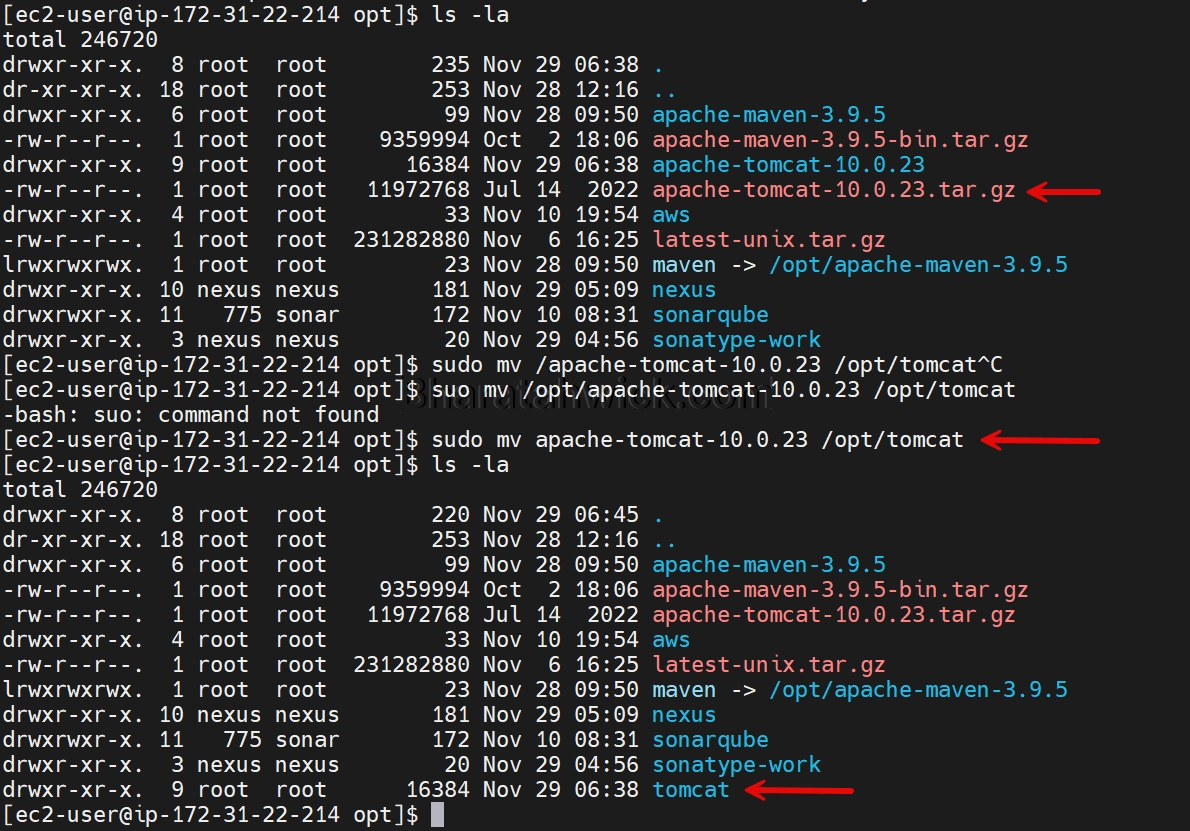
This will create a directory named /opt/tomcat that contains the Tomcat files and directories.
Step 6: Add execute permissions to Tomcat scripts
The next step is to add execute permissions to the startup and shutdown scripts of Tomcat. You can use the following commands in your terminal to do this:
sudo chmod +x /opt/tomcat/bin/startup.sh
sudo chmod +x /opt/tomcat/bin/shutdown.sh
This will allow you to run the scripts to start and stop Tomcat.
Step 7: Start Tomcat
The next step is to start Tomcat by running the following command in your terminal:
sudo /opt/tomcat/bin/startup.shThis will run the startup script and start Tomcat. You should see the output similar to this:
Using CATALINA_BASE: /opt/tomcat
Using CATALINA_HOME: /opt/tomcat
Using CATALINA_TMPDIR: /opt/tomcat/temp
Using JRE_HOME: /usr/lib/jvm/java-17-amazon-corretto
Using CLASSPATH: /opt/tomcat/bin/bootstrap.jar:/opt/tomcat/bin/tomcat-juli.jar
Tomcat started.
Step 8: Check the status of Tomcat
The next step is to check the status of Tomcat by visiting the URL http://IP:8080 in your browser. You should see the Tomcat welcome page like this:
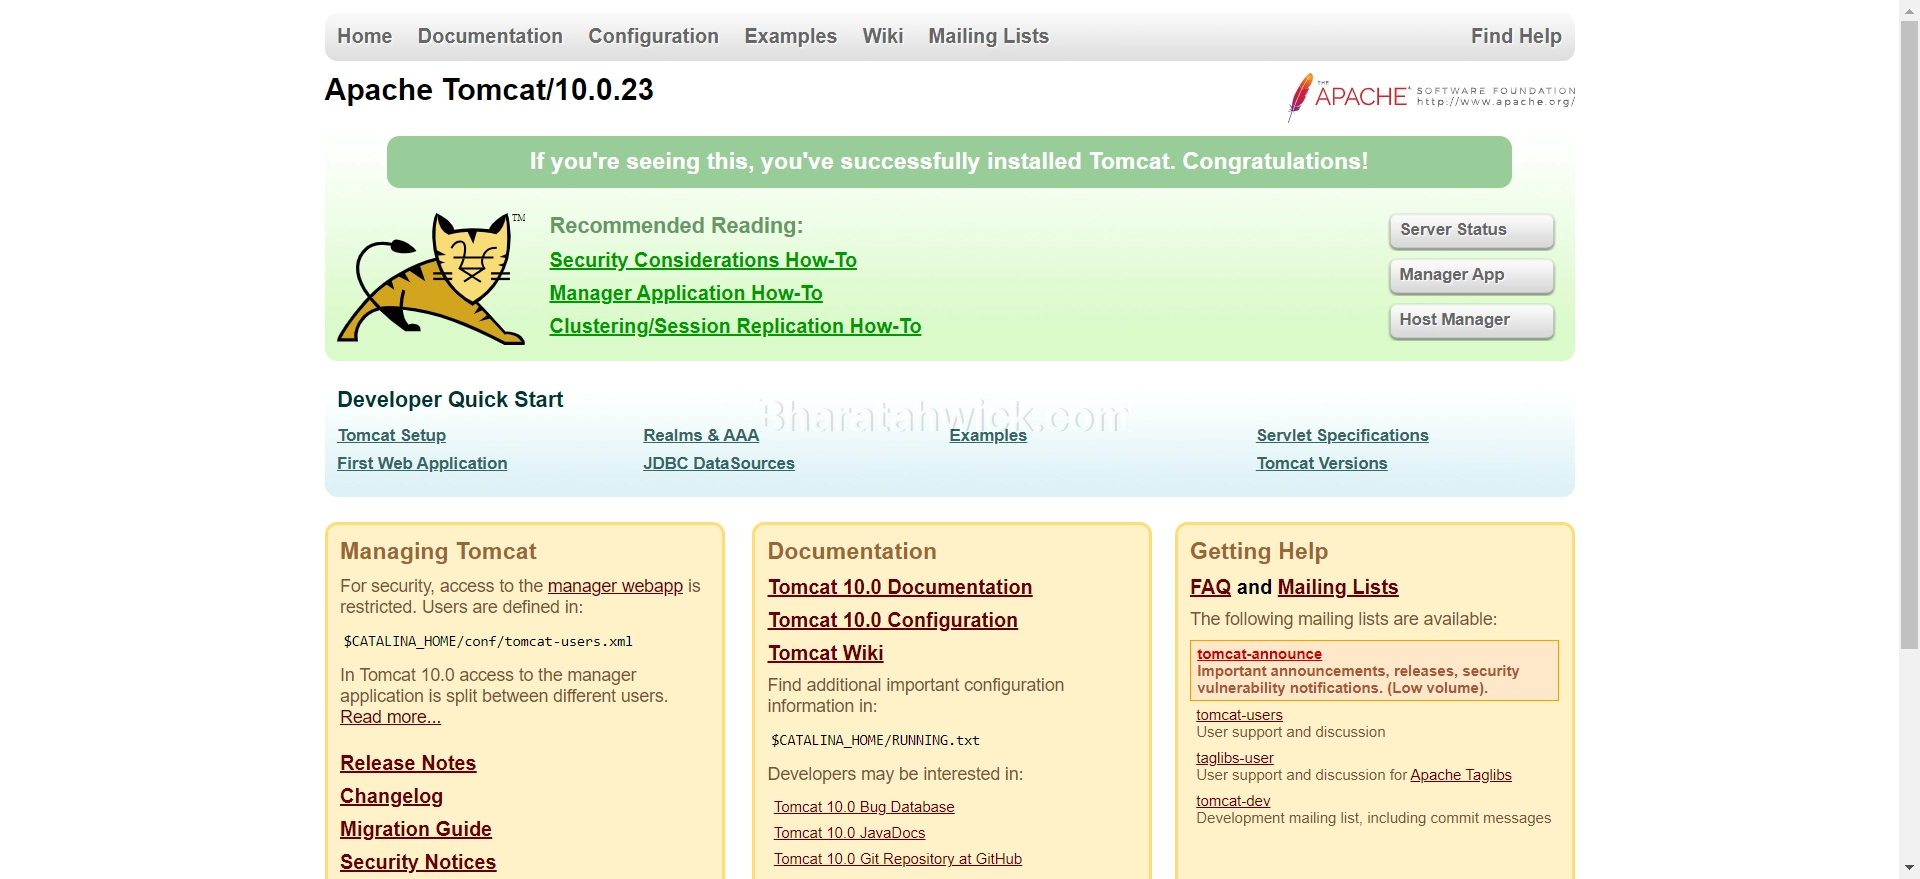
If you see this page, congratulations! You have successfully installed Tomcat on AWS Linux.
Step 9: Configure Tomcat to run as a service (optional)
The next step is optional, but recommended. You can configure Tomcat to run as a service, so that it will start automatically on system boot and stop gracefully on system shutdown.
You can also control the service using the systemctl command. To do this, you need to create a systemd service file for Tomcat.
A systemd service file is a configuration file that defines how a service is started, stopped, and managed by the systemd system and service manager.
You can follow these steps to configure a systemd service file for Tomcat:
1. Create a file named tomcat.service in the /etc/systemd/system directory by using the command in your terminal. This will open a text editor where you can write your service file.
sudo nano /etc/systemd/system/tomcat.service2. Copy and paste the following content into the text editor. You can modify the values of the parameters according to your needs.
For example, you can change the Description, User, and ExecStart parameters to suit your Tomcat installation.
[Unit]
Description=Apache Tomcat Web Application Container
After=network.target

[Service]
Type=forking
ExecStart=/opt/tomcat/bin/startup.sh
ExecStop=/opt/tomcat/bin/shutdown.sh
User=tomcat
Restart=on-failure

[Install]
WantedBy=multi-user.target
The service file has three sections: Unit, Service, and Install. The Unit section provides the basic information about the service, such as the description and the dependencies.

The Service section provides the details of how the service is started, stopped, and managed, such as the type, the commands, the user, and the restart policy. The Install section provides information on how the service is enabled or disabled, such as the target.
3. Save and exit the text editor by pressing Ctrl+O and then Ctrl+X.
4. Reload the systemd daemon by using the command in your terminal. This will make systemd aware of the new service file.
sudo systemctl daemon-reload5. Start the Tomcat service by using the command in your terminal. This will run the ExecStart command in the service file and start Tomcat.
sudo systemctl start tomcat6. Check the status of the Tomcat service by using the command in your terminal. You should see the output similar to this:
sudo systemctl status tomcat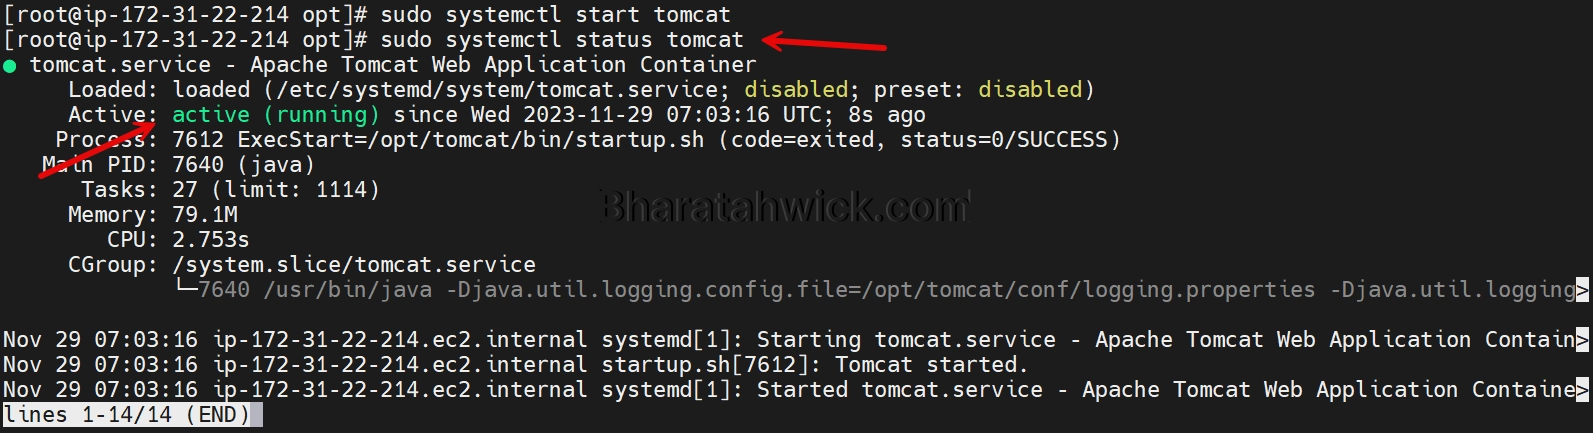
7. Enable the Tomcat service to start on system boot by using the command in your terminal.
sudo systemctl enable tomcatThis will create a symbolic link from the service file to the multi-user.target file, which is a target that is reached when the system is in normal operation mode.
Step 10: Create a user for Tomcat
The next step is optional, but recommended. You can create a user for Tomcat, so that it will run under a non-root account that has limited privileges and access.
This can improve the security and performance of Tomcat by isolating it from other processes and preventing unauthorized access.
To create a user for Tomcat, you can follow these steps:
1. Create a user named tomcat by using the command in your terminal. This will create a system user with the following options:
sudo useradd -r -m -U -d /opt/tomcat -s /bin/false tomcat-r: Create a system user that does not have a password or a home directory.-m: Create a home directory for the user if it does not exist.-U: Create a group with the same name as the user and add the user to the group.-d /opt/tomcat: Set the home directory of the user to /opt/tomcat.-s /bin/false: Set the shell of the user to /bin/false, which prevents the user from logging in.
2. Change the ownership and group of the /opt/tomcat directory and its subdirectories to the tomcat user and group by using the command in your terminal. This will give the tomcat user and group full control over the Tomcat files and directories.
sudo chown -R tomcat:tomcat /opt/tomcat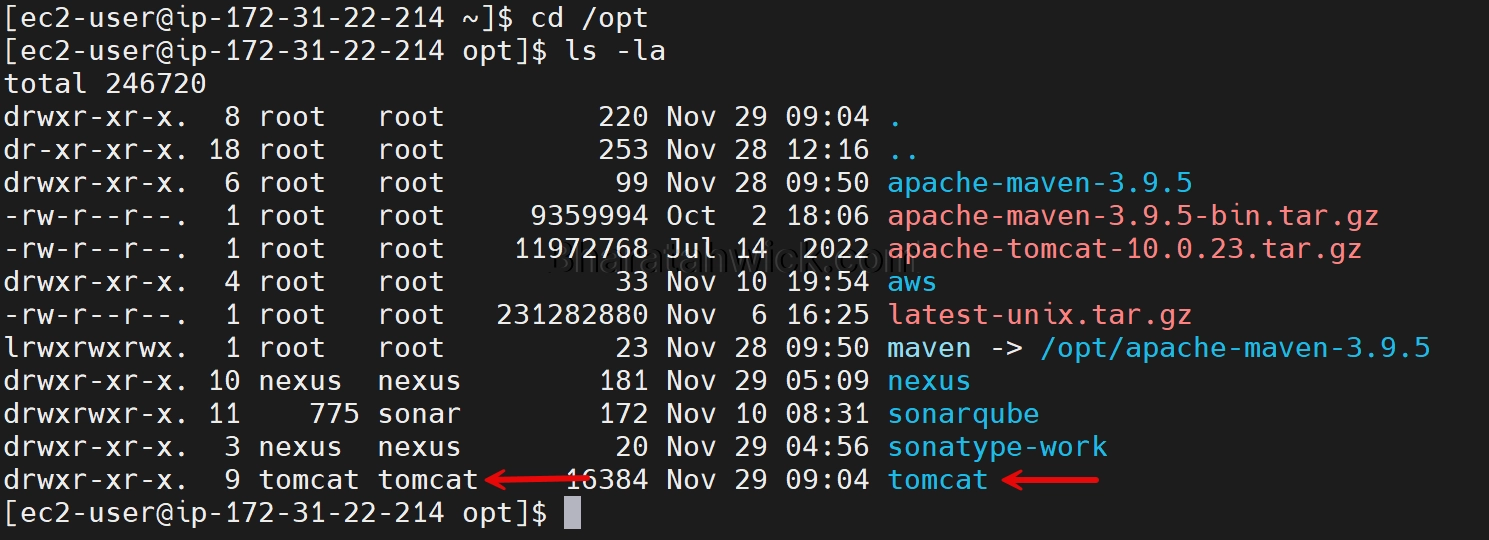
Step 11: Enable web management interface
The next step is optional, but recommended. You can enable the web management interface for Tomcat, which allows you to monitor and manage the Tomcat server and its web applications from a web browser.
To enable the web management interface, you need to edit the tomcat-users.xml and context.xml files for the manager and host-manager applications. You can follow these steps to edit these files:
1. Edit the tomcat-users.xml file to add the roles and credentials for the manager and host-manager applications.
The tomcat-users.xml file is located in the /opt/tomcat/conf directory. You can open it by using the command in your terminal. You will see a file like this:
sudo nano /opt/tomcat/conf/tomcat-users.xmlYou need to add a <role> element and a <user> element for each of the manager and host-manager applications.
For example, to add the manager-gui, manager-script, manager-jmx, manager-status, host-manager-gui, and host-manager-script roles to a user named tomcat with a password of s3cret, you can add the following lines to the file:
<role rolename="manager-gui"/>
<role rolename="manager-script"/>
<role rolename="manager-jmx"/>
<role rolename="manager-status"/>
<role rolename="host-manager-gui"/>
<role rolename="host-manager-script"/>
<user username="tomcat" password="s3cret" roles="manager-gui,manager-script,manager-jmx,manager-status,host-manager-gui,host-manager-script"/>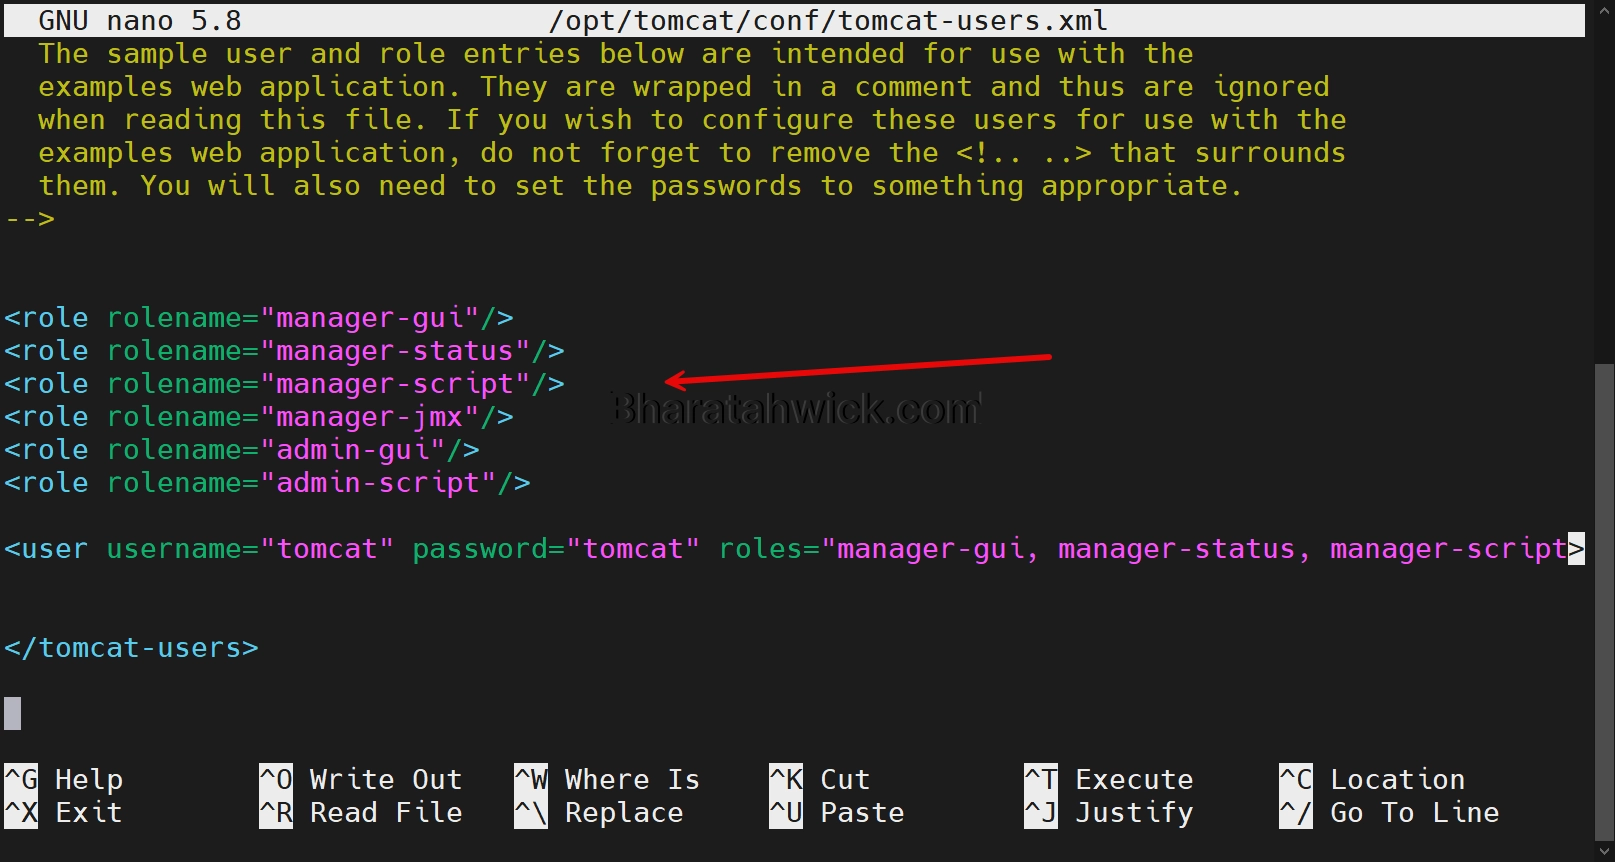
Save and exit the text editor by pressing Ctrl+O and then Ctrl+X. Restart the tomcat service by using the command in your terminal.
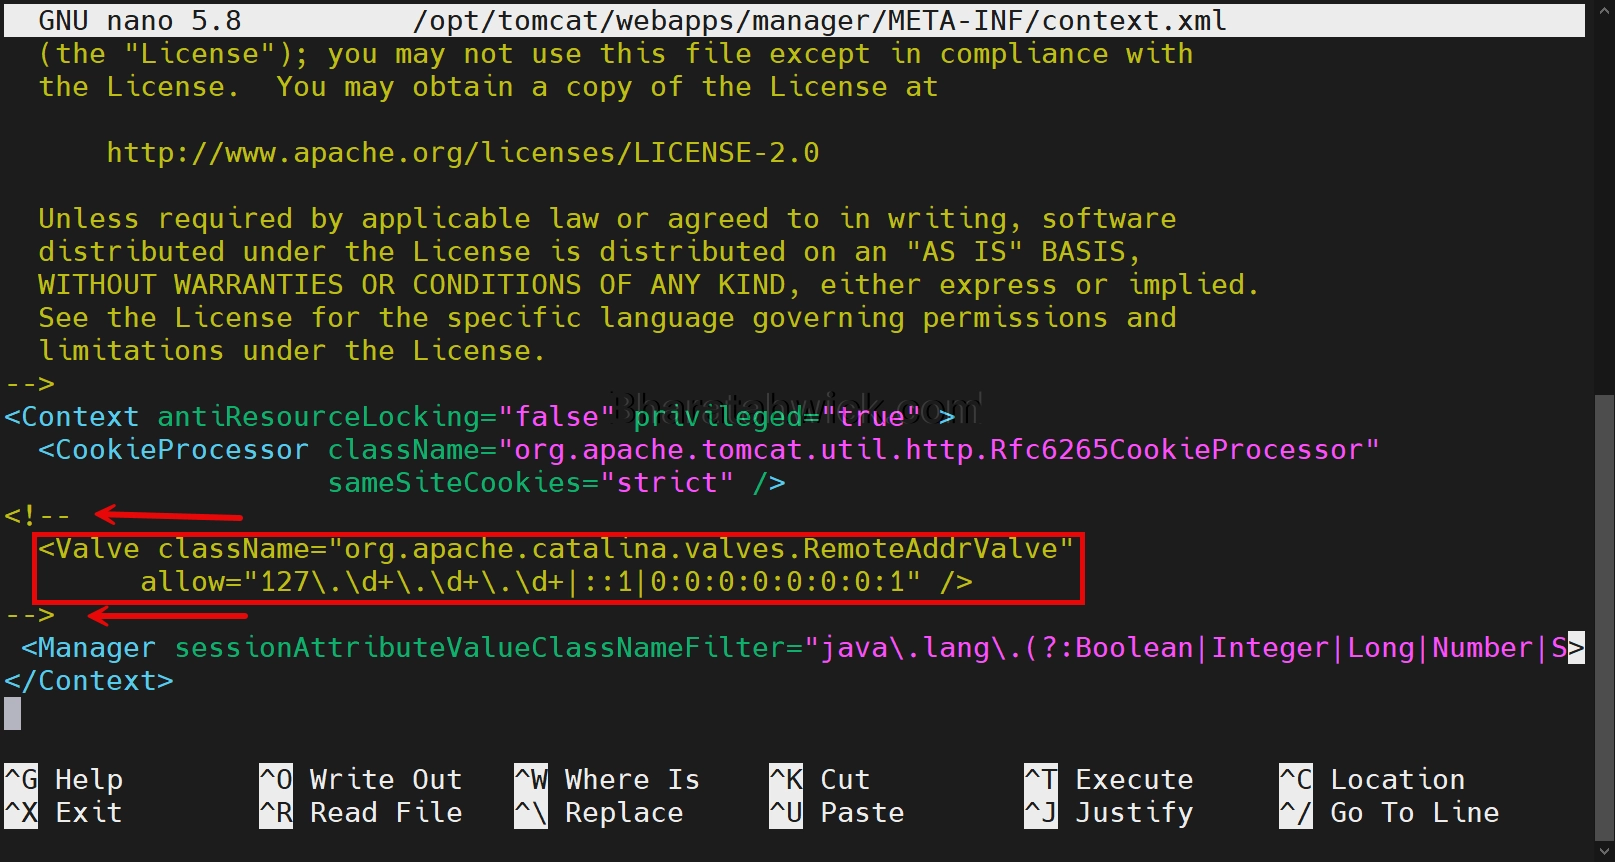
sudo systemctl restart tomcat2. Edit the context.xml file to allow access from your IP address for each of the manager and host-manager applications.
The context.xml file is located in the /opt/tomcat/webapps/manager/META-INF and /opt/tomcat/webapps/host-manager/META-INF directories.
To Edit the Manager context.xml
sudo nano /opt/tomcat/webapps/manager/META-INF/context.xmlTo Edit the Host-manager content.xml
sudo nano /opt/tomcat/webapps/host-manager/META-INF/context.xmlYou will see a line like this in each file: (Before Edit)
<Valve className="org.apache.catalina.valves.RemoteAddrValve"
         allow="127\.\d+\.\d+\.\d+|::1|0:0:0:0:0:0:0:1" />
You need to comment on the <value> element.To do this add comment tag <!-- --> (After Edit)
<!--
<Valve className="org.apache.catalina.valves.RemoteAddrValve"
         allow="127\.\d+\.\d+\.\d+|::1|0:0:0:0:0:0:0:1" />
-->
Save and exit the text editor by pressing Ctrl+O and then Ctrl+X. Restart the tomcat service by using the command in your terminal.
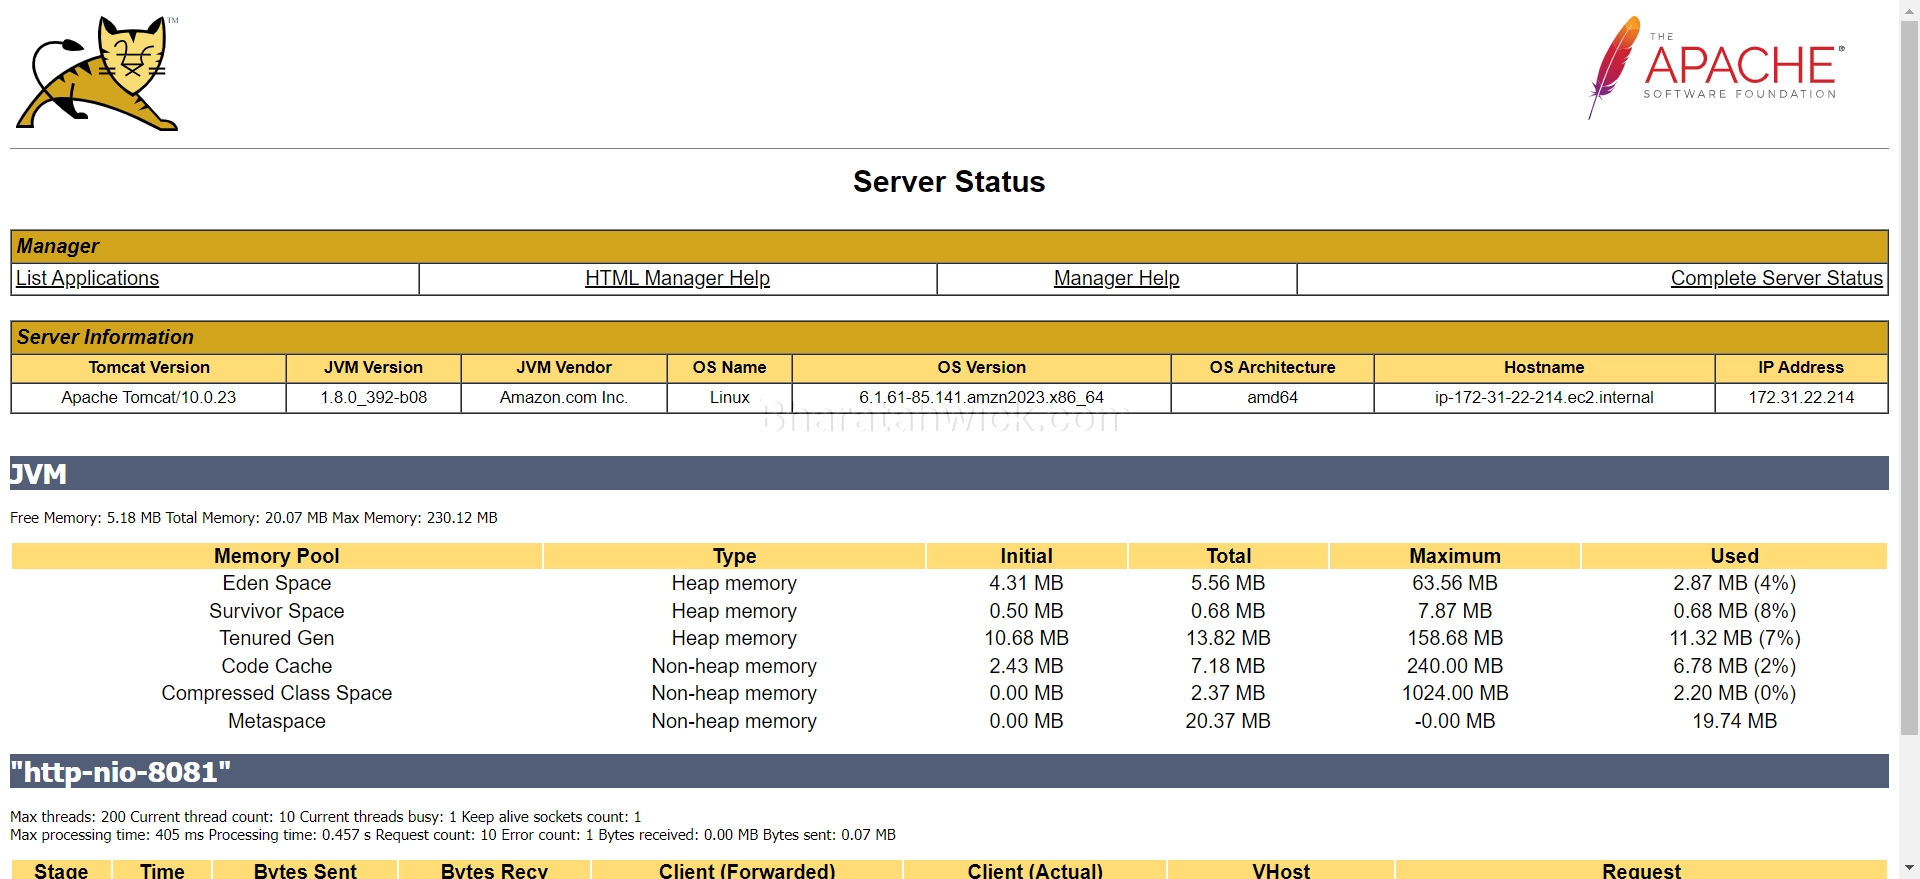
sudo systemctl restart tomcatAfter you have done these steps, you should be able to access the web management interface for Tomcat by visiting the following URLs in your browser and providing the username and password you have configured:
- For the manager application: http://:8080/manager
- For the host-manager application: http://:8080/host-manager
Server Status
Manager APP
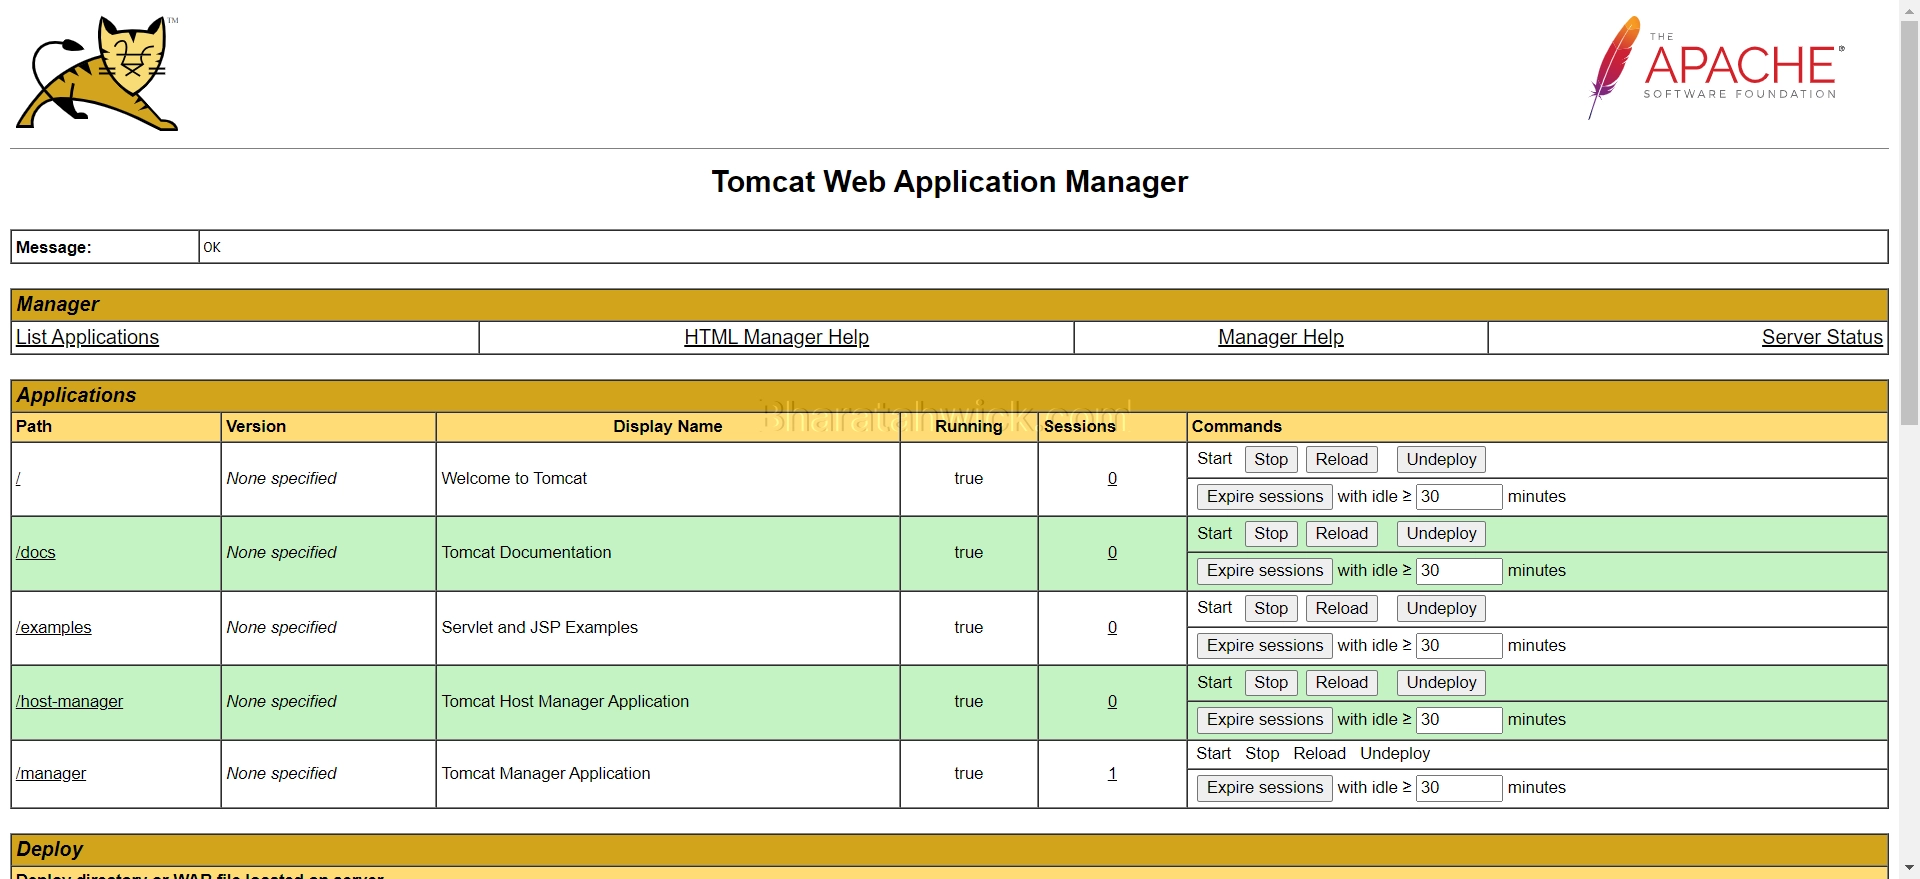
You can use these pages to monitor and manage the Tomcat server and its web applications.
Conclusion
Now, you know how to install Tomcat on AWS Linux 2023, how to configure Tomcat to run as a service, how to create a user for Tomcat, and how to enable a web management interface.
I hope you have found this post useful and informative. If you have any questions or feedback, please feel free to leave a comment below. Thank you for reading.