Are you looking for a reliable way to access and manage your Azure Virtual Machines (VMs)? SSH is the perfect solution, and we’ve got you covered with this easy step-by-step guide. We’ll show you how to use MobaXterm, a powerful SSH client that makes the process a breeze. Plus, if you prefer, you can also use PuTTY or OpenSSH. Get ready to streamline your workload in the cloud with these tips!
Prerequisites
To get started, let’s make sure you have everything you need in place:
- An Azure VM is deployed and running.
- The public IP address or DNS name of your Azure VM.
- When accessing your Azure VM, it’s important to remember your login username. For Linux VMs, the username is typically “azureuser”. Keep this in mind to ensure a smooth and seamless experience.
Step 1: Install MobaXterm
If MobaXterm isn’t already on your local computer, no worries! You can easily download it straight from the official website. Just follow the installation instructions, and you’ll be up and running in no time.
Step 2: Gather Azure VM Information
Before connecting to your Azure VM, ensure you have the necessary information at hand:
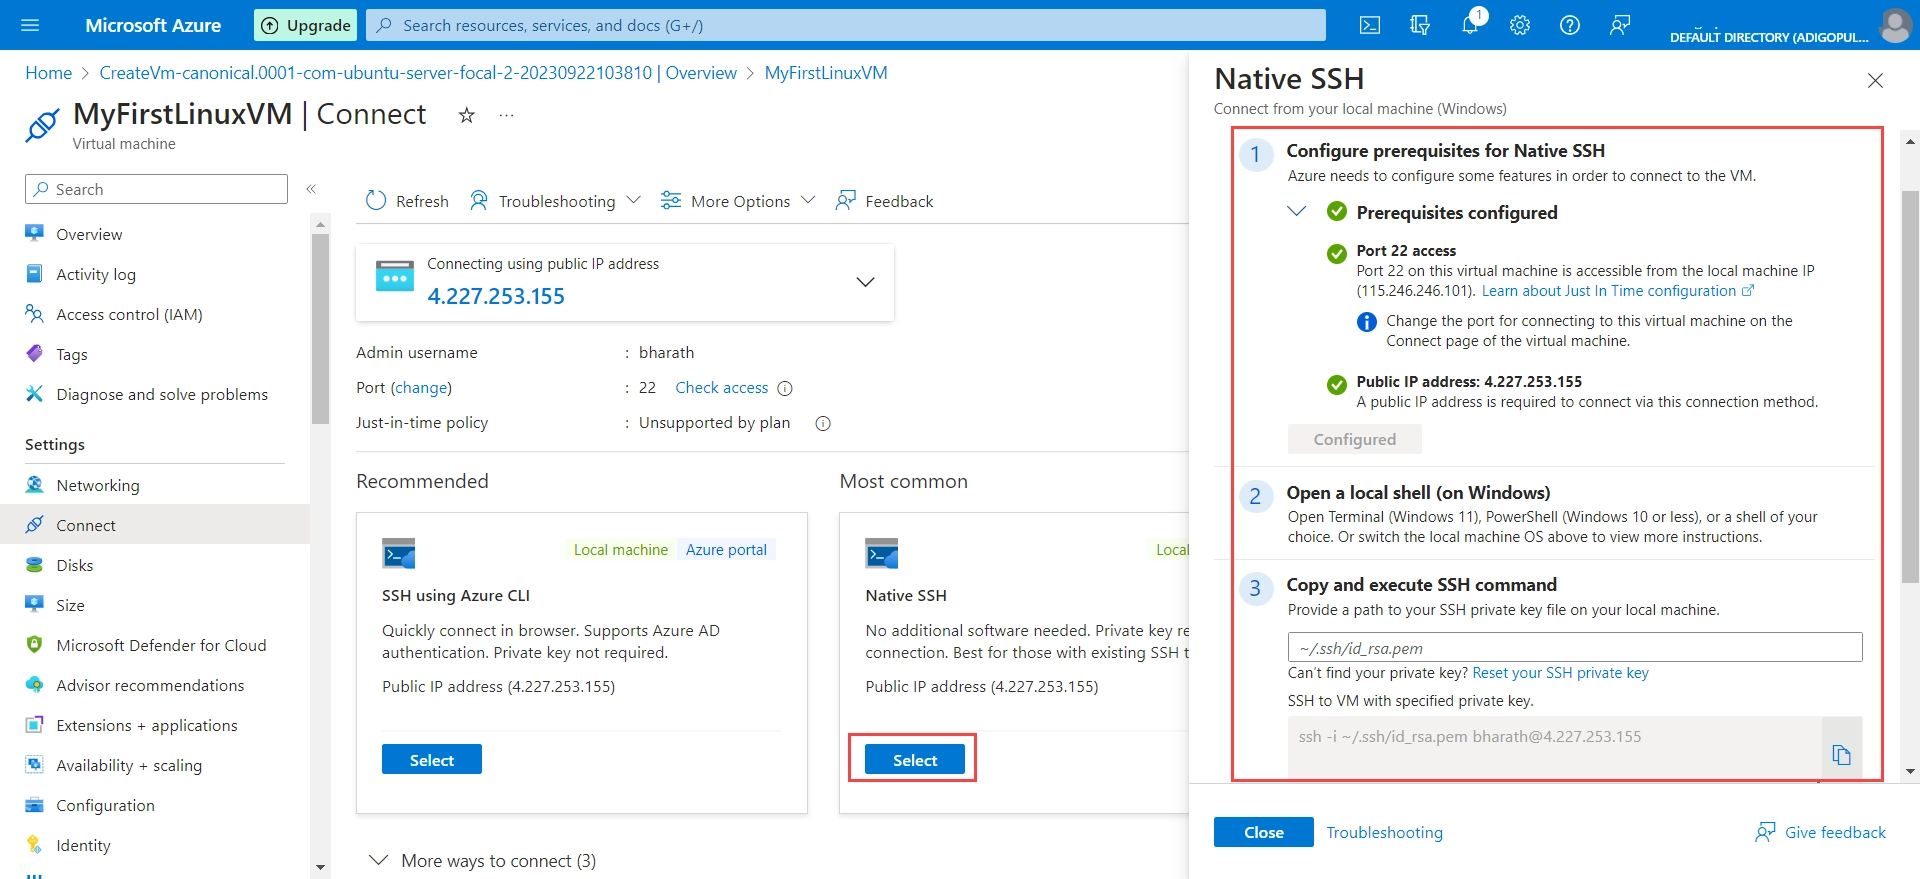
- Public IP Address or DNS Name: Make sure you keep this handy to find and access your VM easily.
- SSH Username: This is the username you use to access your Azure VM.
- SSH PEM Key: Be sure to have the private PEM key handy to connect to your VM.
- SSH Password: The password you need to access your Azure VM is totally up to you. If you decide to go with the PEM key, you can skip the password.
Step 3: Launch MobaXterm
Ready to kickstart your work? Let’s fire up MobaXterm on your local computer.
Step 4: Open a New SSH Session
To get started with MobaXterm, head over to the “Session” button in the top left corner and give it a click. This will bring up a session settings window that will help you customize your experience.
Step 5: Configure SSH Session
Let’s fill up the session settings window! Here’s what you need to do:
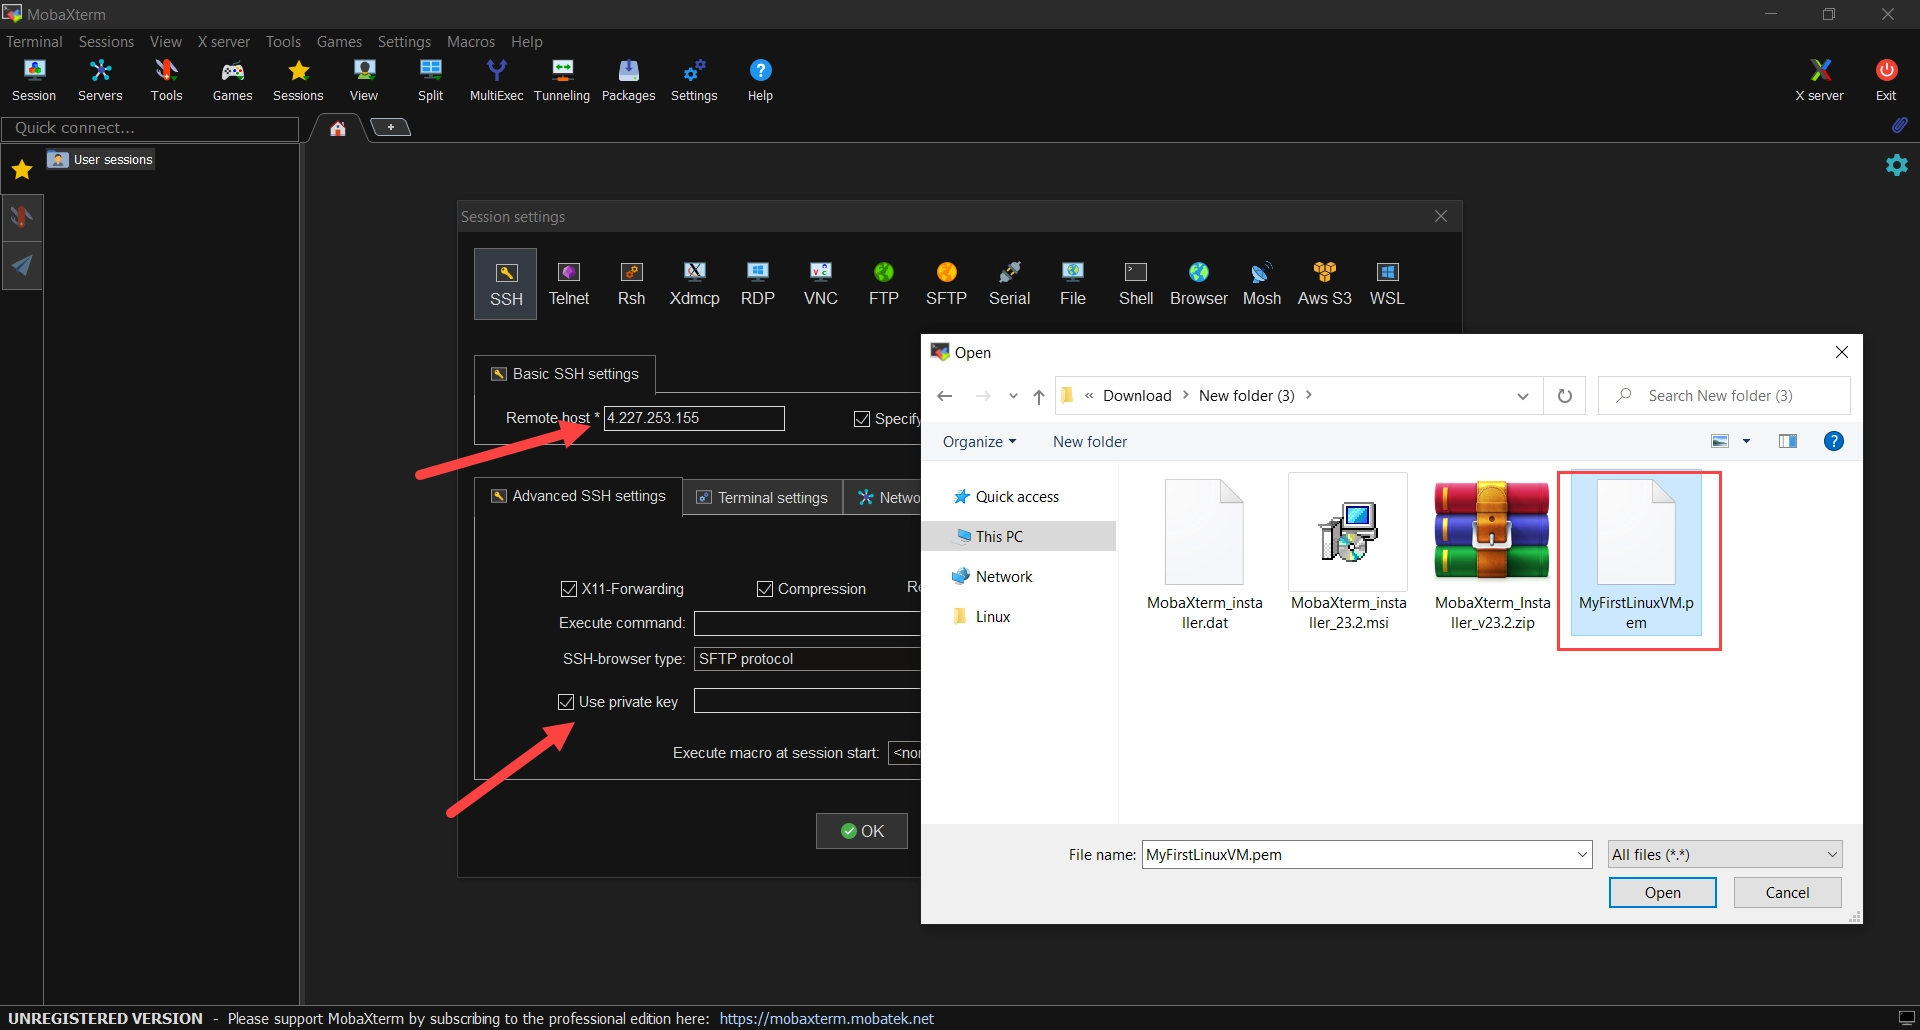
- Select the “SSH” protocol from the Session settings.
- Input the public IP address or DNS name of your Azure VM in the “Remote host” field. This will allow us to establish a connection and get you up and running in no time!
- Fill in the “Specify username” field with the username you’d like to use for SSH access. For example, you could use “azureuser”.
- To establish a connection with the VM using a password, all you need to do is hit the “OK” button, and you’ll be prompted to enter your password. Simple as that!
- Now, it’s time to choose a private PEM key file and put it in the “Use private key” field.
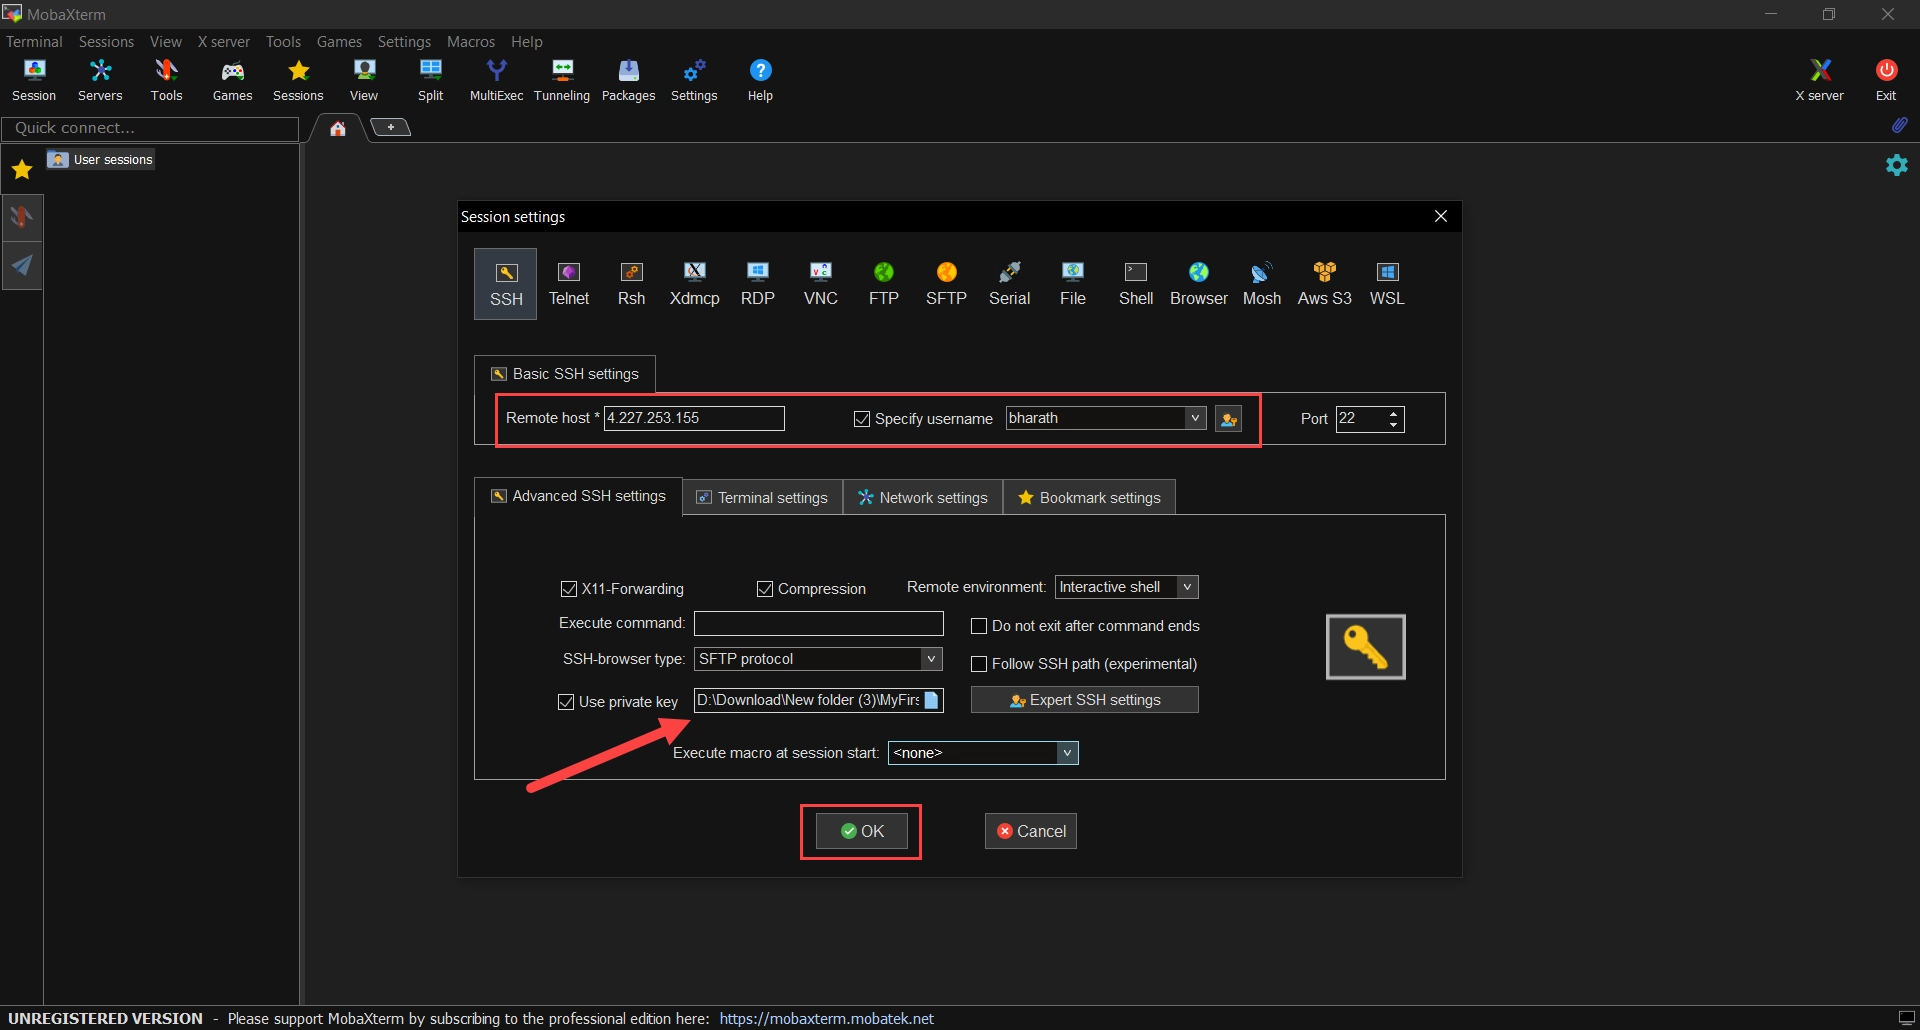
- Click “OK” to save the session settings.
Step 6: Access Your Azure VM
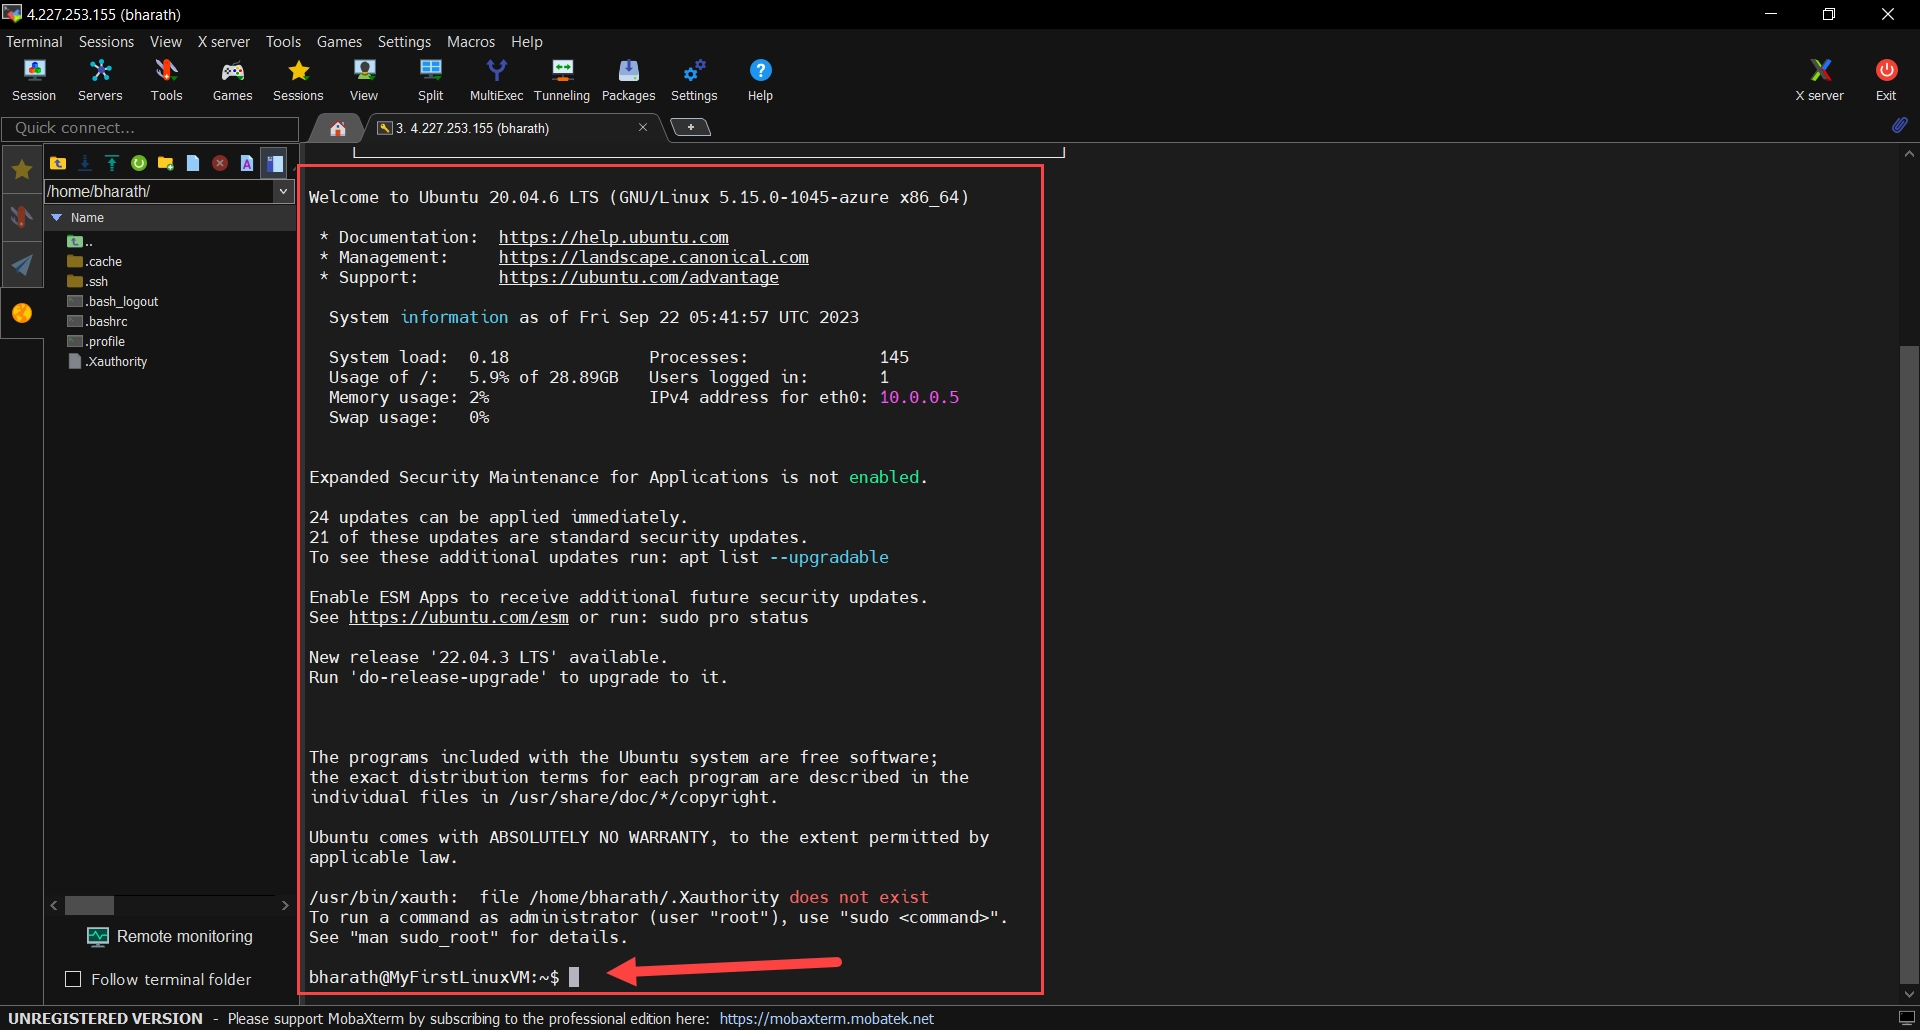
Once you’ve entered your credentials into MobaXterm, you’ll be ready to establish an SSH connection to your Azure VM. From there, a terminal window will open up, putting you in full control of your VM.
Final Thoughts
Congratulations! You’re now connected to your Azure VM using MobaXterm through SSH. This means you have the power to execute commands, manage files, and perform various administrative tasks on your VM with ease.
To take things up a notch, it’s recommended that you use SSH key-based authentication instead of passwords for enhanced security.
