
If you want to delete a Resource group in Azure, you will need to remove all the resources stored within that group, such as virtual machines, databases, and storage accounts. This process must be done with great care because once you’ve deleted the resource group, there is no way to undo it.
This means that all the resources associated with that group will be erased permanently. Here are the steps you need to follow in order to delete a resource group in Azure:
Step 1: Sign in to the Azure Portal
- To get started, go to a web browser and visit the Azure Portal.
- Log in to your Azure account using your login details. If you don’t have an account, you can create one by following the instructions provided in this guide.
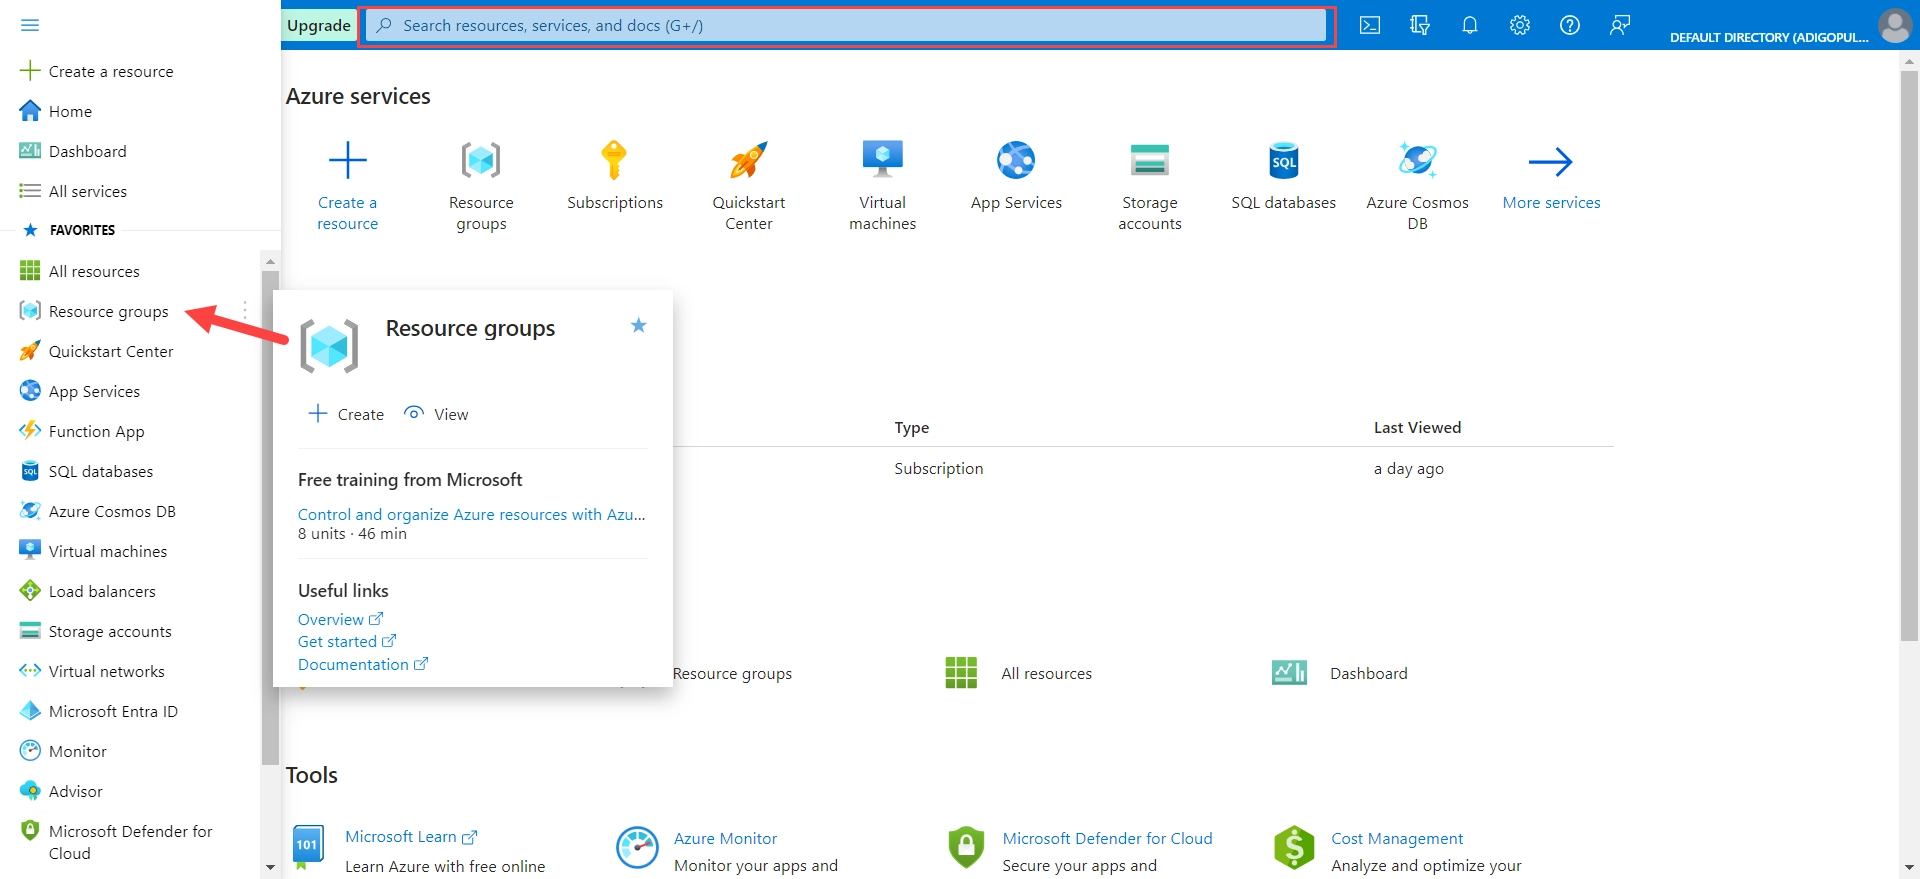
Step 2: Locate the Resource Group
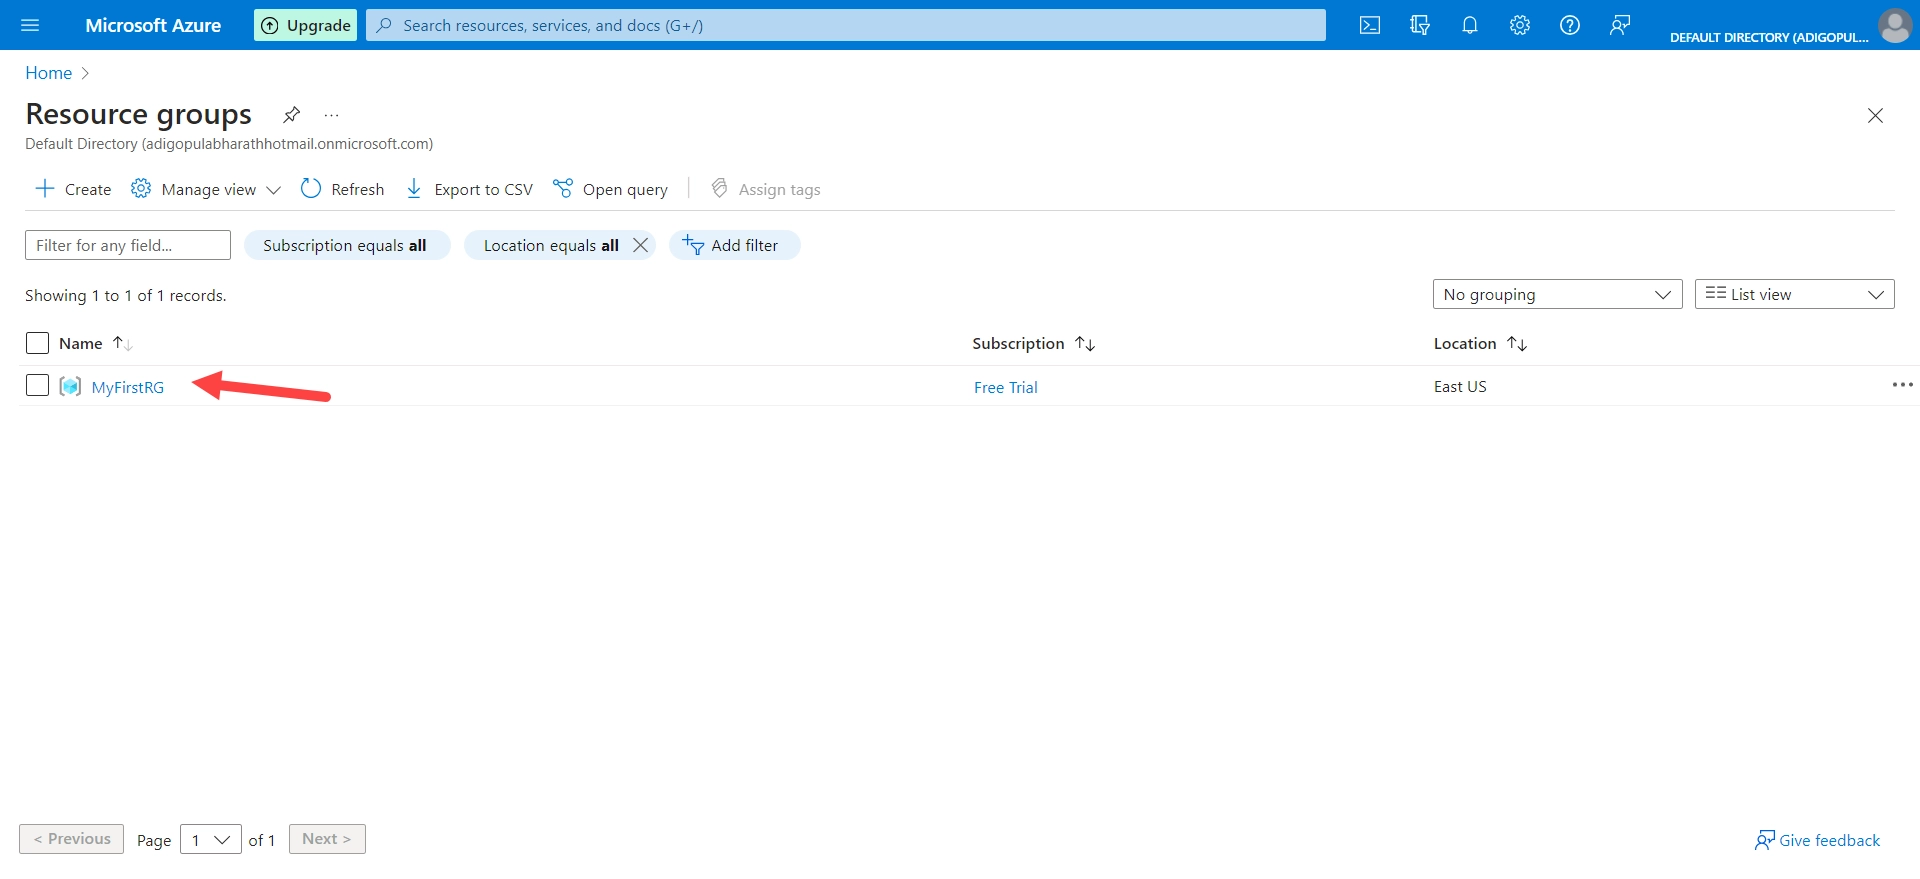
Once there, you’ll see a dashboard with a bunch of options. Look for “Resource groups” on the left-hand side and give it a click. Alternatively, you can use the search bar to find the resource groups.
When you go into the resource group panel, you’ll find a list of everything that’s inside it. Before you do anything, make sure to take a backup of everything and save any important information you might need later. If you don’t save it, it’ll be gone forever once you delete the resources.
To find and remove a specific resource group, Locate the one you want to delete, and click on it to select it.
Step 5: Delete the Resource Group
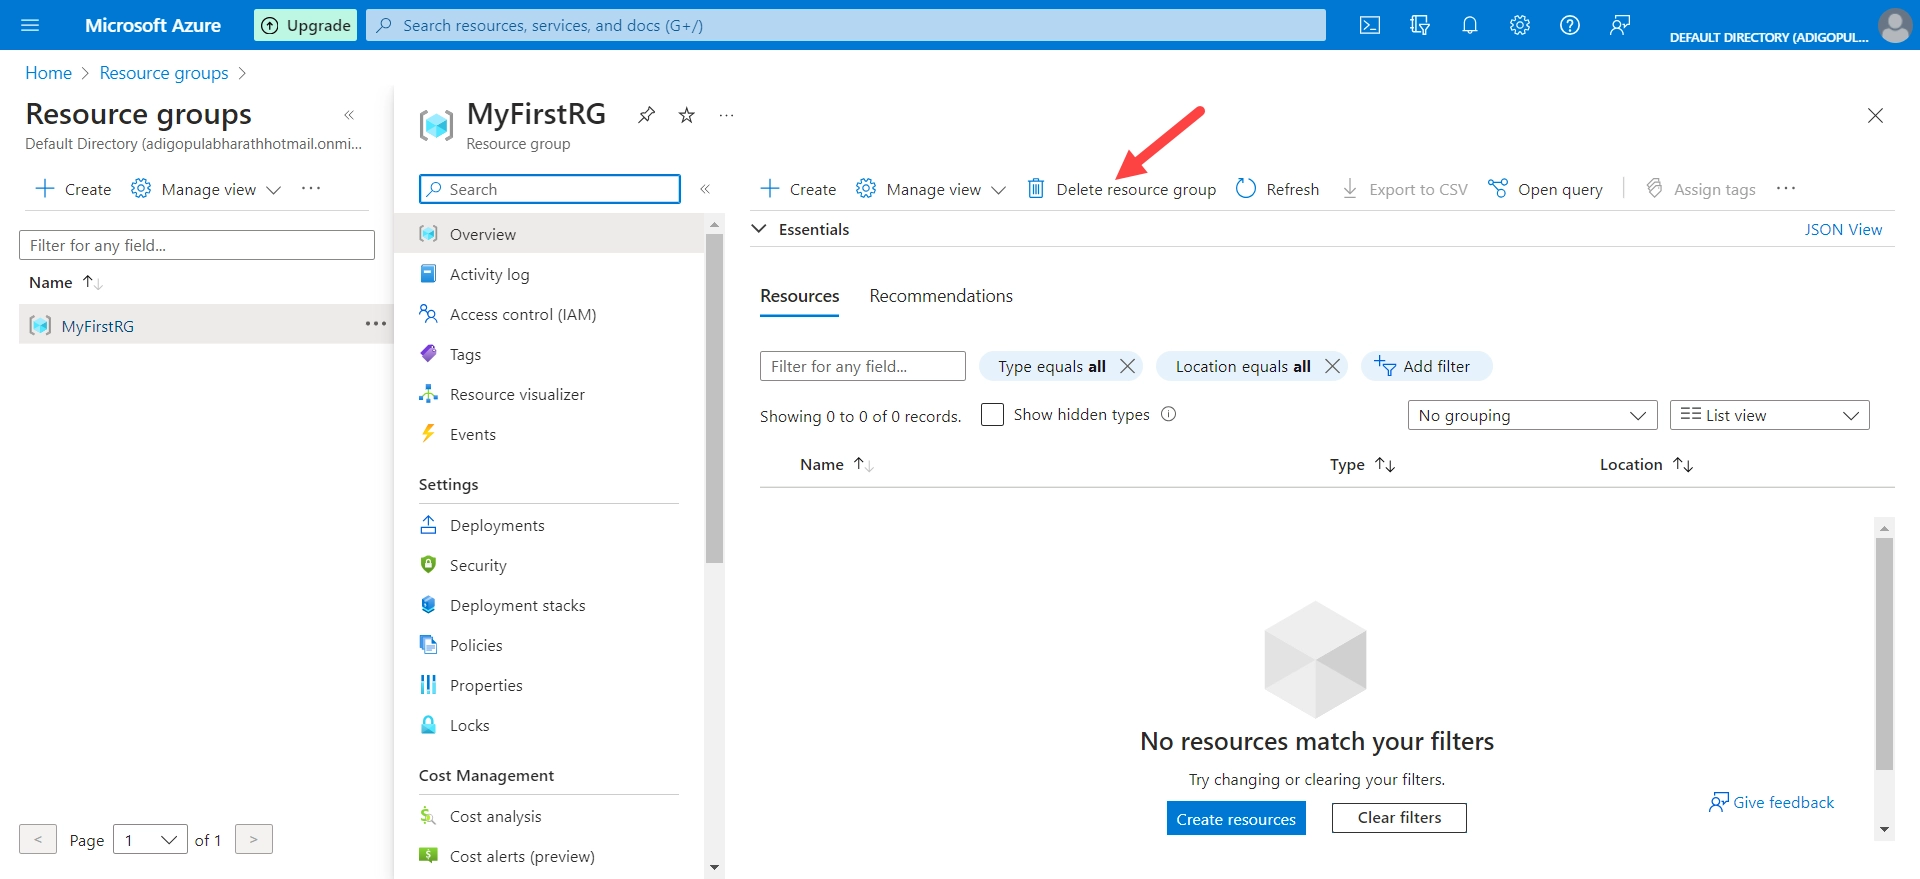
To delete a resource group, simply click on the “Delete resource group” button at the top of the page.
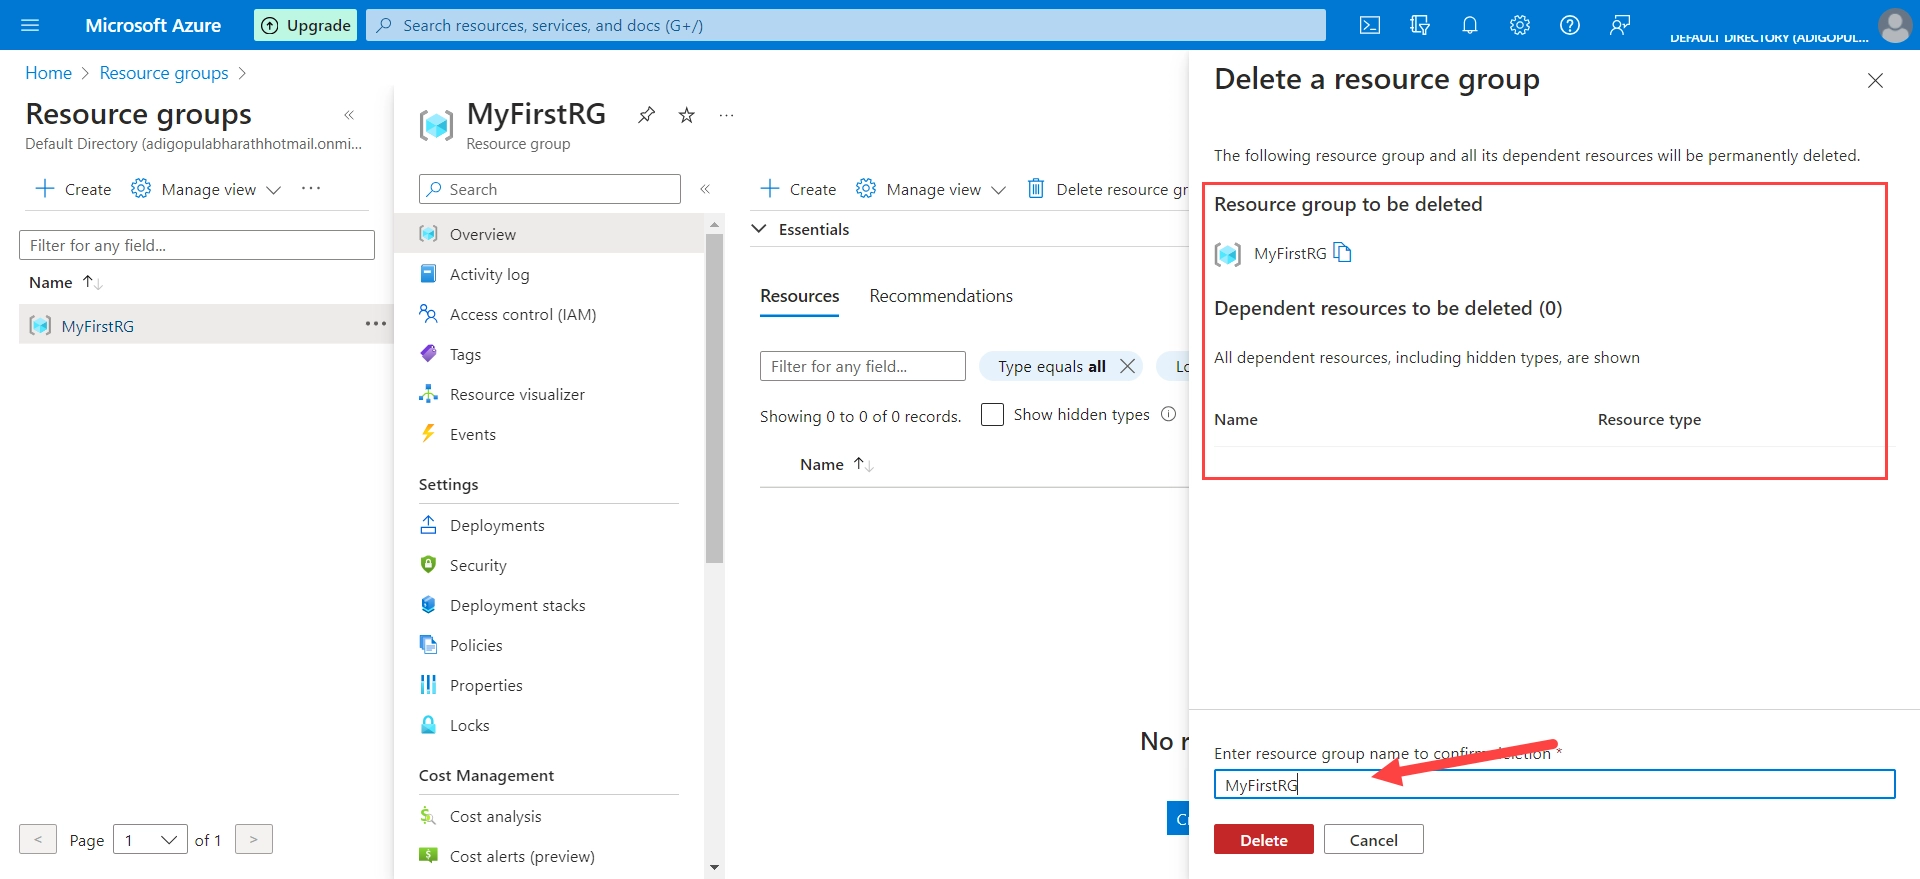
Before deleting a resource group, you will see a window asking you to confirm. Take a moment to review the list of items that will be deleted along with the resource group.
Finally, you need to specify which group it belongs to. In the “TYPE THE RESOURCE GROUP NAME” box, type the name of the group you want to delete. Then, click the “Delete” button to confirm that you want to go ahead with deleting it.
Step 7: Monitor Deletion Progress
The process of deleting resource group on Azure may take a while, depending on how many resources there are and how big they are. But Azure will get started on it as soon as possible.
To keep track of the progress of deleting, just head over to the Notifications section in the Azure Portal.
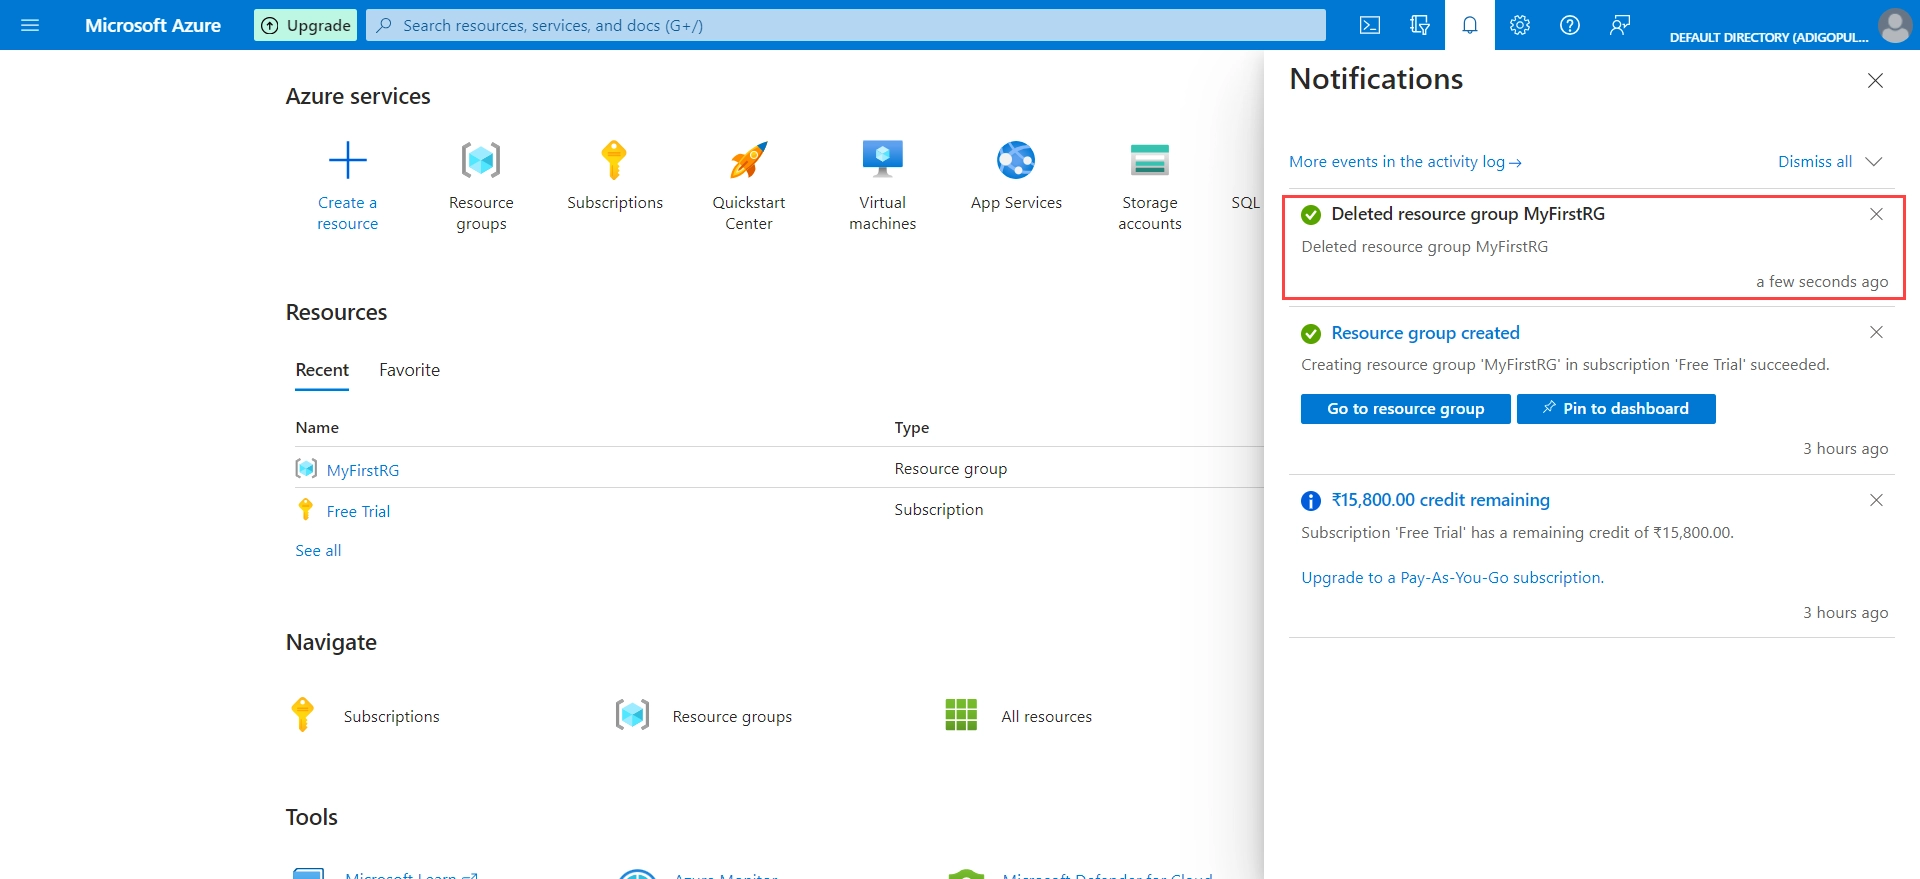
Once the deletion process is finished, you will get a notification telling you it’s done.
Final Thoughts
It’s important to keep in mind that once you start this process, you won’t be able to undo it. Everything associated with the resource group, including any information stored there, will be gone for good. Be sure to have backups of anything important before you go ahead with the deletion. It’s also a good idea to double-check everything and make sure you’re okay with losing the resources before you begin.