
In this blog post, we will learn how to automate the deployment of a Java web application packaged as a WAR file to a Tomcat server using Jenkins. Jenkins is a popular open-source automation server that can help us build, test, and deploy software in multiple environments.
Tomcat is a widely used Java web server that can run Java applications, servlets, and JSP pages.
Prerequisites
We will use the following tools and technologies for this tutorial:
- A Java web application that Jenkins can deploy to Tomcat. We will use a sample application called “login-project, which you can clone from GitHub.
- A Git source code management tool installation.
- A Java 8 or newer installation of the JDK. [Click here to know how to install Java on AWS Linux]
- A Maven build tool installation. Maven can package our Java application into a WAR file that can be deployed to Tomcat.
- A Jenkins CI tool installation. Jenkins will run our build and deployment pipeline. [Click here to know How to Install Jenkins]
- A Tomcat web server installation. Tomcat will host our deployed web application. [Click here to know How to Install Tomcat]
- A Deploy to container Jenkins plugin. This plugin will enable Jenkins to deploy our WAR file to Tomcat.
- A Publish Over SSH Jenkins plugin. This plugin will enable Jenkins to transfer our WAR file to a remote Tomcat server using SSH. [Click here to know How to Add SSH Server in Jenkins]
Step 1: Add a user with deployment rights to Tomcat
Before we can deploy our WAR file to Tomcat, we need to add a user to Tomcat with manager-script rights. This user will allow Jenkins to access the Tomcat Manager web application, which can perform various operations on the deployed web applications, such as start, stop, reload, and undeploy.
To add a user with manager-script rights to Tomcat, we need to edit the tomcat-users.xml file, which can be found in Tomcat’s conf directory.
[Click here to know how to add users in Tomcat]
Step 2: Install the Deploy to container and Publish Over SSH Jenkins plugins
As mentioned earlier, we will use two Jenkins plugins to deploy our WAR file to Tomcat: Deploy to container and Publish Over SSH. Also, Install the Maven Integration Plugin for Automatic installations.
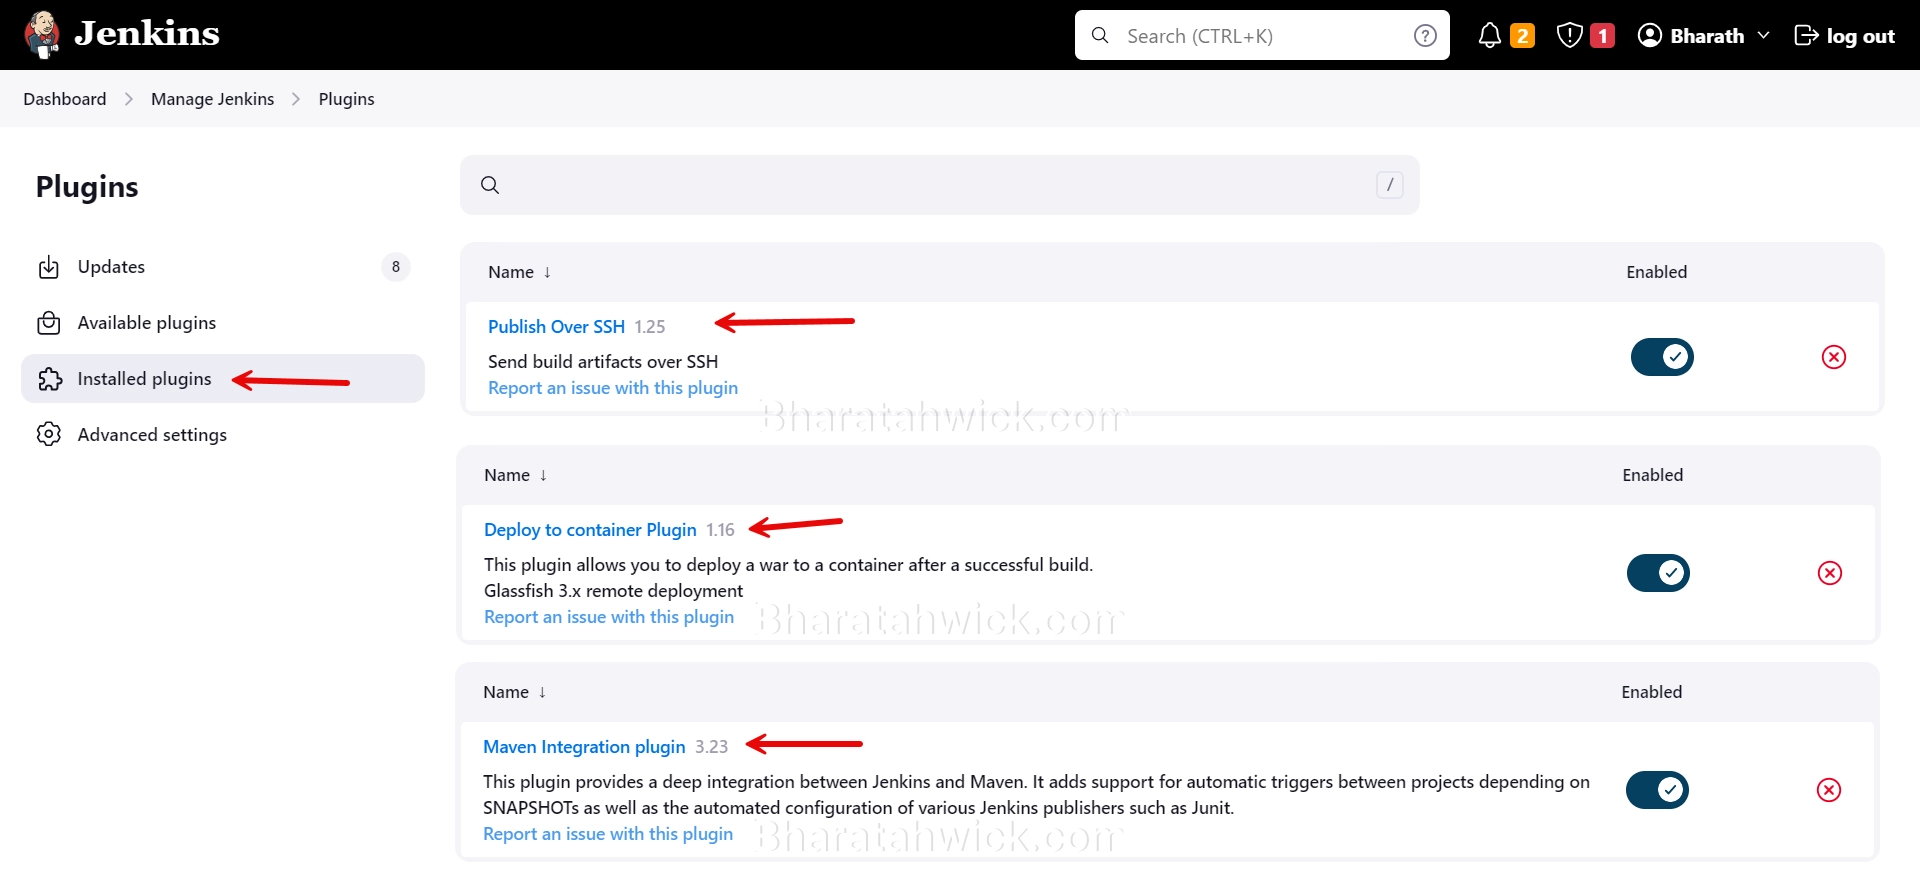
These plugins can be installed through the Plugin Manager tab under the “Manage Jenkins” section of the Jenkins dashboard. We can search for the plugins by their names and install them.
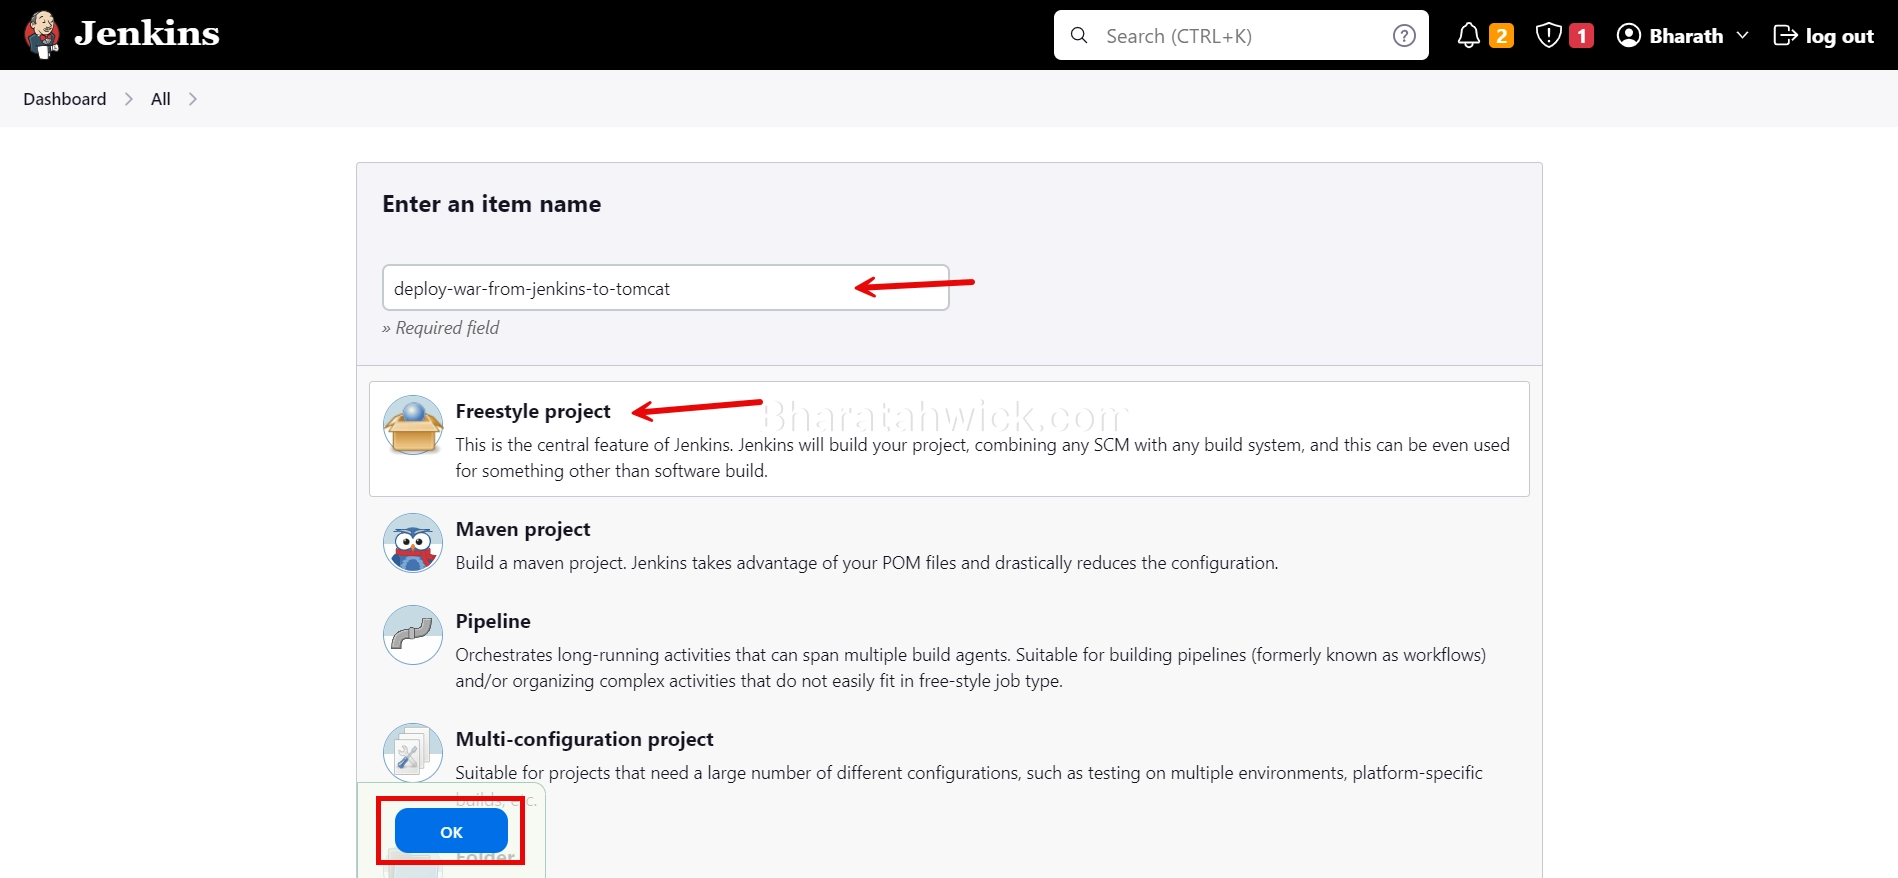
Step 3: Create a Jenkins freestyle project
Now that we have installed the required plugins, we can create a new Jenkins freestyle project that will build and deploy our web application. We can name our project “deploy-war-from-jenkins-to-tomcat” and configure it as follows:
- Under the “Source Code Management” section, we can select “Git” and enter the URL of our GitHub repository, which is https://github.com/adigopulabharath/Maven-Login-Project-Tomcat.git. We also need to specify the branch to build, which is “main” in our case. This branch contains the code that creates a WAR file instead of a JAR file.

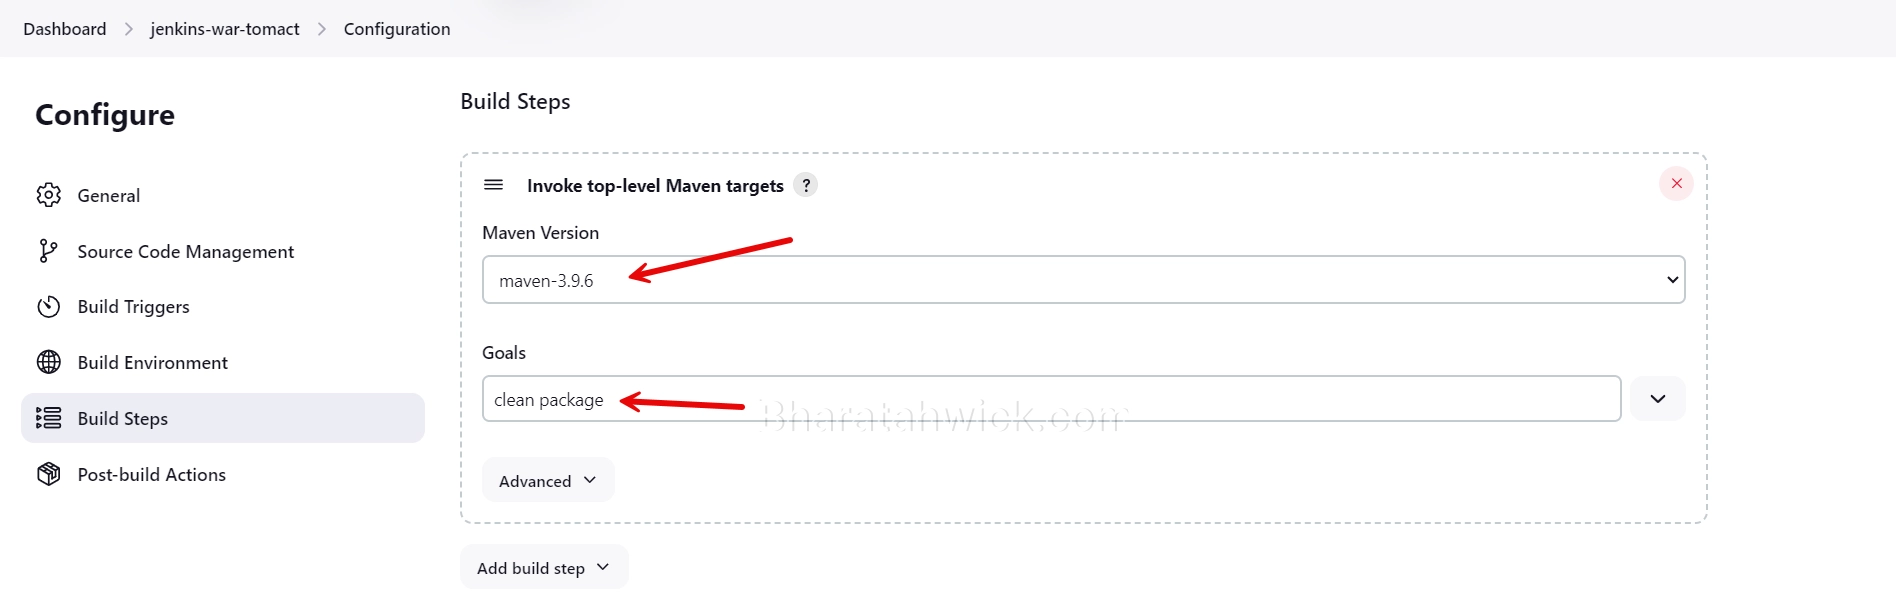
- Under the “Build” section, we can add a “Invoke top-level Maven targets” build step and enter “clean package” as the goals. This will clean and package our web application into a WAR file using Maven.
- Under the “Post-build Actions” section, we can add two actions: “Deploy war/ear to a container” and “Send build artifacts over SSH”. The first action will deploy our WAR file to a local Tomcat server, while the second action will transfer our WAR file to a remote Tomcat server using SSH.
Deploy war/ear to a container
To configure the “Deploy war/ear to a container” action, we need to provide the following information:
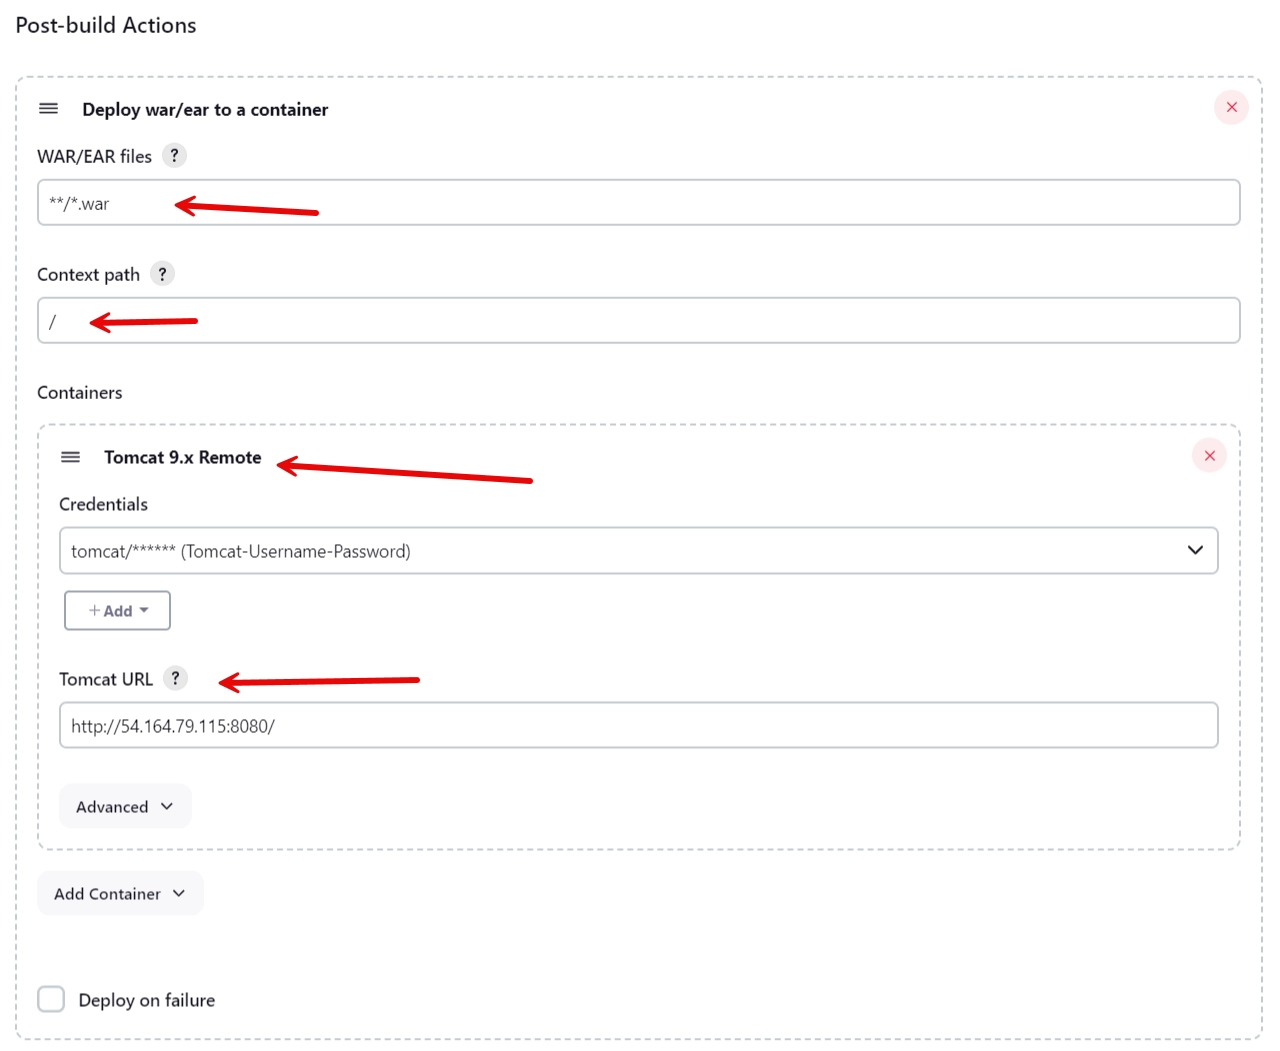
- The WAR/EAR files to deploy. We can use the
**/*.warpattern to match any WAR file in the workspace. - The context path of the web application. We can use
/it to deploy our web application as the root context. (Optional) - The credentials of the Tomcat user with manager-script rights. We can use the username and password that we defined in the
tomcat-users.xml file, which are “tomcat” and “jenkins-tomcat-deploy” respectively. [Click here to know How to Add Tomcat Credentials in Jenkins] - The Tomcat URL of the local server. We can use “
http://localhost:8080/” orPublic IP: 18.205.233.77:8080as the URL, assuming that our Tomcat server is running on the default port8080on the same machine as Jenkins.
Send build artifacts over SSH
To configure the “Send build artifacts over SSH” action, we need to provide the following information:
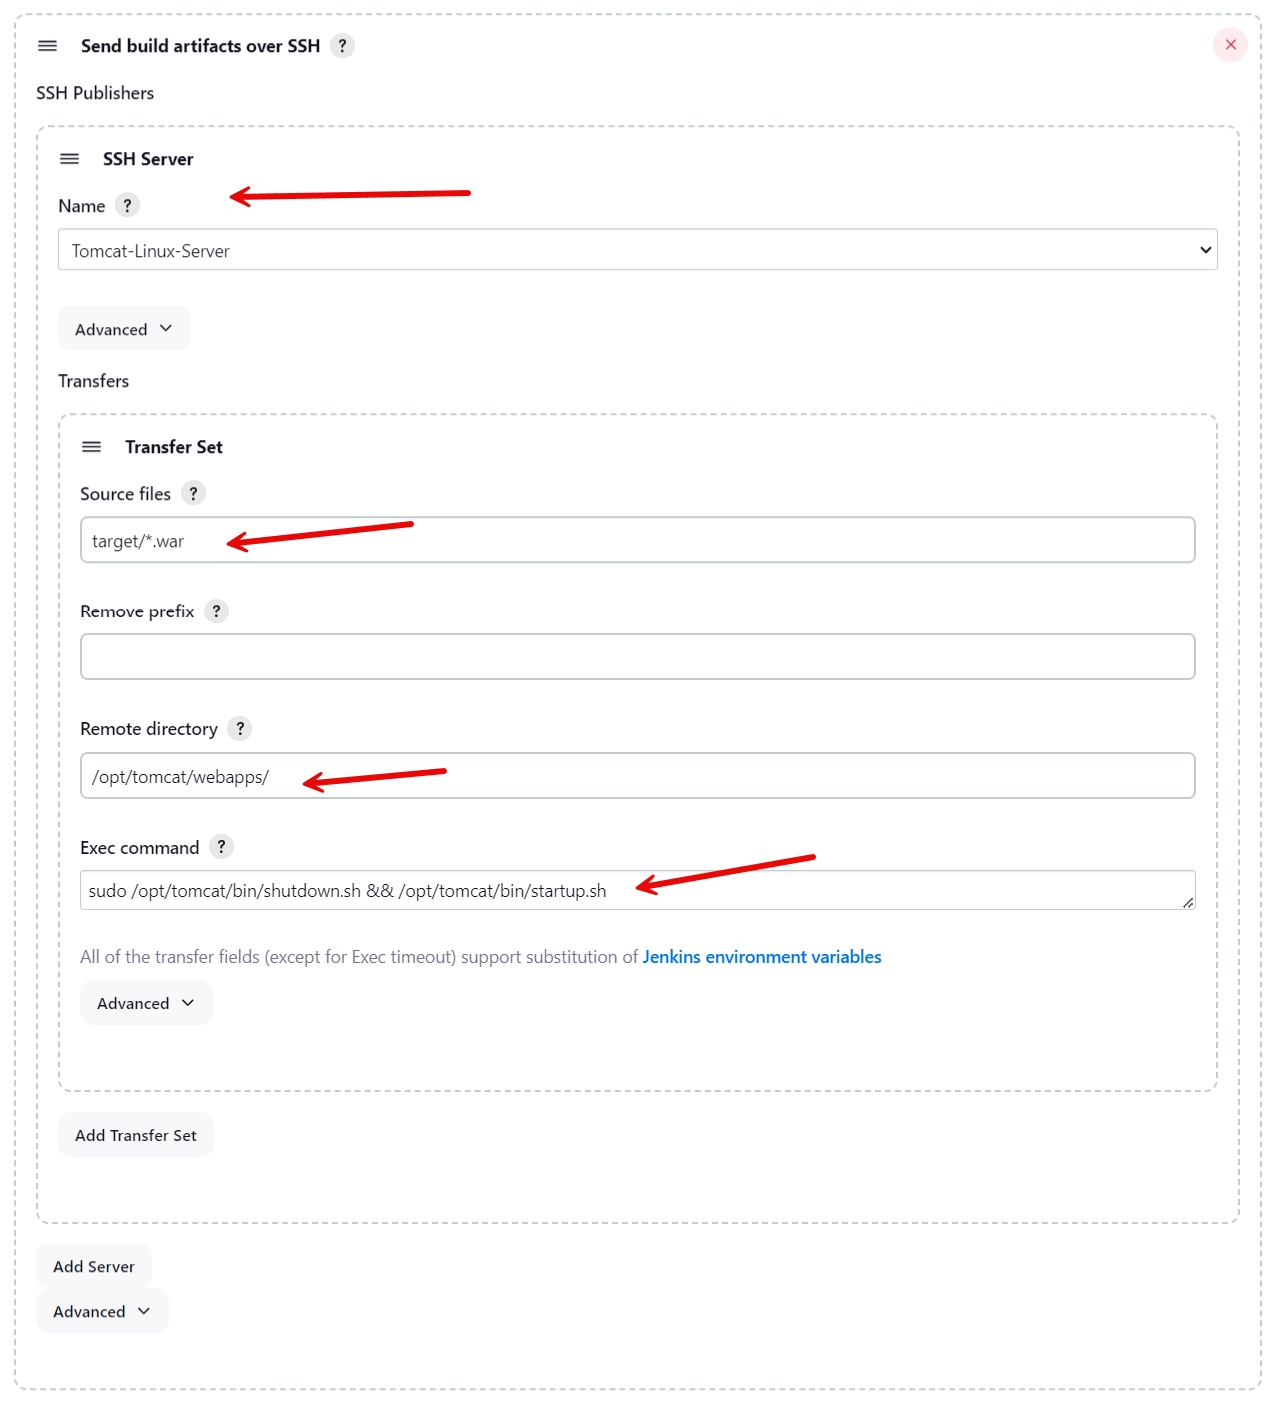
- The SSH server to connect to. We need to specify the hostname, username, password, and port of the remote Tomcat server to which we want to deploy our web application. [Click here to know How to Add an SSH Server in Jenkins Using the Publish Over SSH Plugin]
- We also need to enable the “
Exec command” option and enter the command to restart the Tomcat server on the remote machine, such as “sudo /opt/tomcat/bin/shutdown.sh && /opt/tomcat/bin/startup.sh”. - The source files to transfer. We can use the “
**/*.war” pattern to match any WAR file in the workspace. - The remote directory to transfer the files to. We need to specify the
webappsdirectory of the remote Tomcat server, such as “/opt/tomcat/webapps/”.
Step 4: Run the Jenkins project
After configuring our Jenkins project, we can run it by clicking on the “Build Now” button. This will trigger the following steps:
- Jenkins will clone our GitHub repository and check out the main branch.
- Jenkins will run Maven to clean and package our web application into a WAR file named “Cloud-War-1.0.war”.
- Jenkins will deploy our WAR file to the local Tomcat server using the Deploy to container plugin.
- Jenkins will transfer our WAR file to the remote Tomcat server using the Publish Over SSH plugin.
- Jenkins will restart the remote Tomcat server using the SSH command.
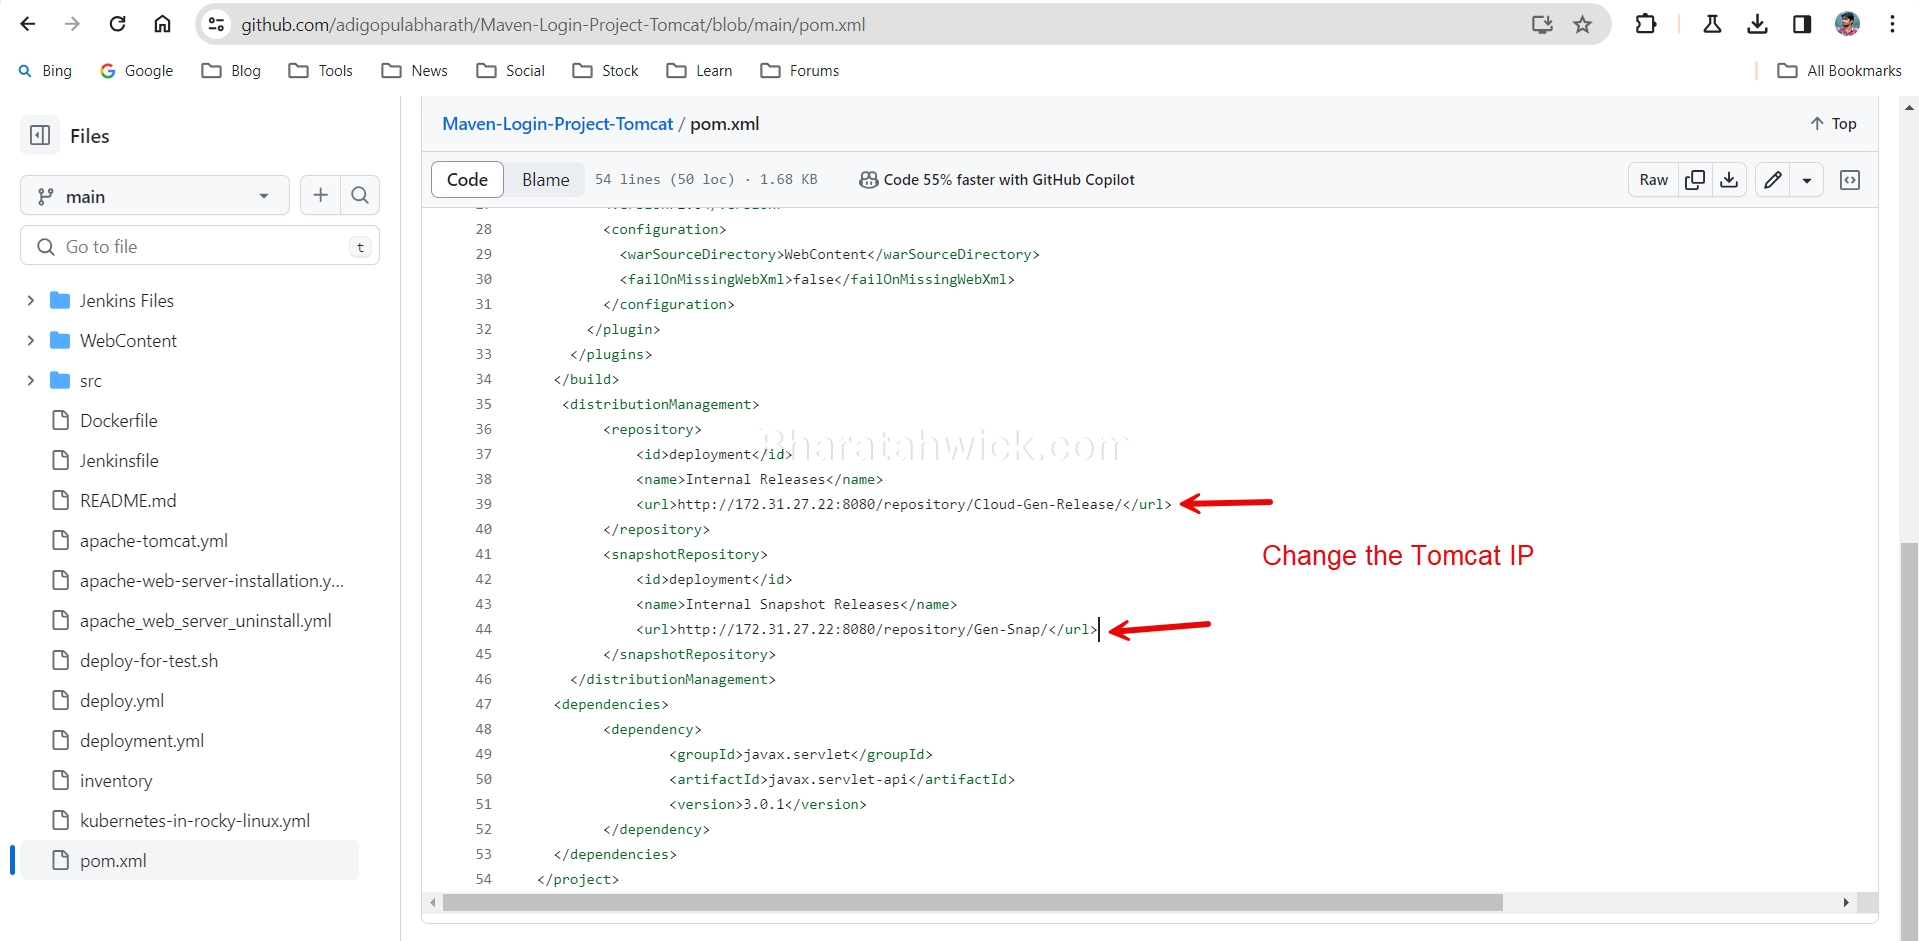
If the Build is Failure Change IP at POM.XML
Sometimes, you may encounter a build failure due to a network issue or a server outage that prevents Maven from accessing the remote repository specified in your pom.xml file.
In such cases, you may want to change the IP address of the repository to point to a different server that is available and has the required artifacts. This can be done by editing the pom.xml file and modifying the tomcat url element under the distributionManagement section.
Step 5: Verify the deployment
To verify that our web application has been deployed successfully, we can access it from a web browser using the following URLs:
- For the remote Tomcat server: [http://remote-hostname:8080/] or [http://3.89.97.234:8080]

We should see the Student Registration Form web application.
Conclusion
In this blog post, we have learned how to deploy a WAR file to Tomcat using Jenkins. We have used the Deploy to container and Publish Over SSH plugins to automate the deployment process to both local and remote Tomcat servers.
I have also used Maven to package our Java web application into a WAR file that can be deployed to Tomcat. We have verified that our web application works as expected on both servers.
I hope that this tutorial has been helpful and informative. If you have any questions or feedback, please feel free to leave a comment below. Thank you for reading!